Exploring The New Super Mario Game & Watch

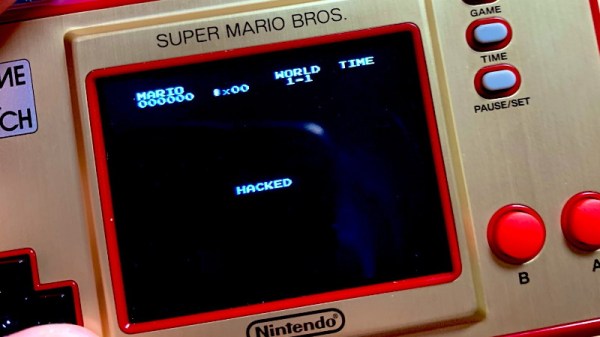
Nintendo has revived the classic Game & Watch, this time in glorious full-color and running the same Super Mario Bros that first graced the Nintendo Entertainment System (NES) back in 1985. Even though it’s only been on the market for a few days, [stacksmashing] has already made some impressive progress towards unlocking the full potential of this $50 retro handheld.

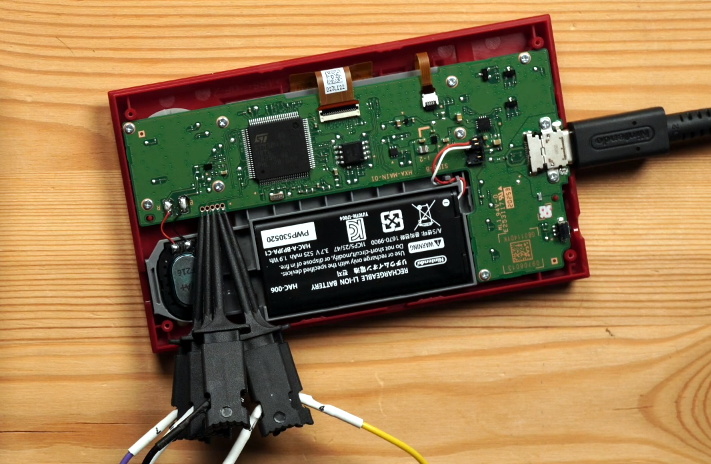
It will come as no surprise to the average Hackaday reader that what we’re looking at here is a pocket-sized NES emulator, but until [stacksmashing] cracked his open, nobody was quite sure what kind of hardware is was running on. Thankfully there wasn’t an epoxy blob in sight, and all of the chips were easily identifiable. Armed with the knowledge that the Game & Watch is running on a STM32H7B0 microcontroller with a nearby SPI flash chip holding the firmware, it was just a matter of figuring out how the software worked.

Connecting to the SWD header.

It didn’t take long to find that an unpopulated header on the board would give him access to the Serial Wire Debug (SWD) interface of the STM32, though unfortunately he found that the chip’s security mode was enabled and he couldn’t dump the firmware.

But he was able to dump the RAM through SWD, which allowed him to identify where the Super Mario Bros NES ROM lived. By connecting the SPI flash chip to a reader and comparing its contents with what the system had in RAM, [stacksmashing] was able to figure out the XOR encryption scheme and come up with a tool that will allow you to insert a modified ROM into an image that can be successfully flashed to the chip.

So does that mean you can put whatever NES ROM you want on the new Game & Watch? Unfortunately, we’re not quite there yet. The emulator running on the device has a few odd quirks, and it will take some additional coaxing before its ready to run Contra. But we’ve seen enough of these devices get hacked to know that it’s just a matter of time.

Continue reading “Exploring The New Super Mario Game & Watch”

Orbital Tracking On The NES

It’s easy to dismiss the original Nintendo Entertainment System as just, well, an entertainment system. But in reality the 6502 based console wasn’t so far removed from early home computers like the Apple II and Commodore 64, and Nintendo even briefly flirted with creating software and accessories geared towards general purpose computing. Though in the end, Mario and friends obviously won out.

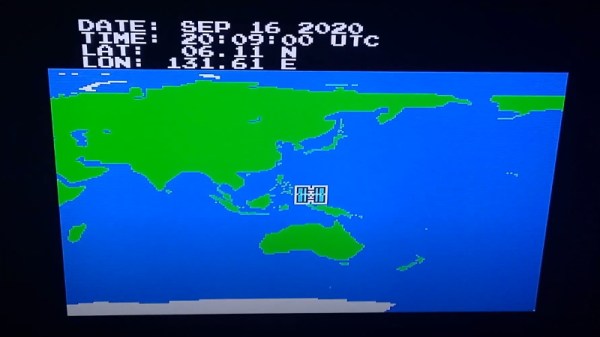
Still, we’re willing to bet that nobody at Nintendo ever imagined their plucky little game system would one day be used to track the course of a space station in low Earth orbit. But that’s precisely what [Vi Grey] has done with his latest project, which is part of his overall effort to demonstrate the unexpected capabilities of the iconic NES. While you’ll need a bit of extra hardware to run the program on a real console, there’s no fundamental trickery that would have kept some developer from doing this in 1985 if they’d wanted to.

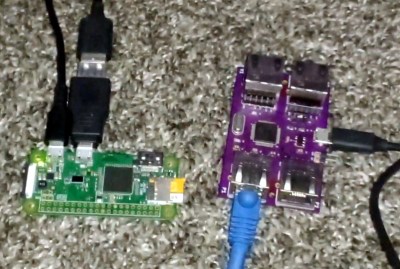
Raspberry Pi Zero and TAStm32

If you want to see your own 8-bit view of the International Space Station, the easiest way is with an emulator. In that case, [Vi] explains how you can load up his Lua script in Mesen or FCEUX to provide the ROM with the necessary tracking data from the Internet.

To run it on a real NES you’ll not only need some type of flash cart to get the ROM loaded, but also a TAStm32 board that’s used for tool-assisted speedruns. This allows the computer to essentially “type” the orbital data into the NES by emulating rapid controller button presses. That might seem like a tall order, but it’s important to note that neither device requires you to modify the original console; the code itself runs on a 100% stock NES.

If tracking spacecraft isn’t your thing, perhaps you’d be more interested in the some of the work [Vi] has previously done on the NES. We’re particularly fond of his polyglot ROM that is a ZIP file of its own source code.

Continue reading “Orbital Tracking On The NES”

A Real Working Lego NES

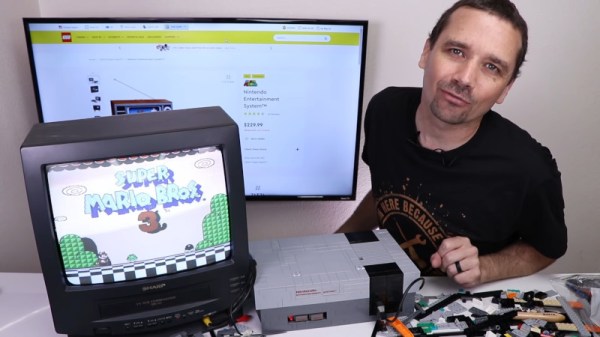
Lego is an entry into the world of engineering for many a youngster, and an enjoyable pursuit for many more. These days, high quality kits are available to make everything from the Tower of Pisa to Nintendo’s venerated NES console. [TronicsFix] picked up the latter set, and decided it needed to be fully functional.

Consisting of 2646 pieces, the official Lego NES is a faithful recreation of the original, albeit at approximately 80% of the size. After building the kit to spec, [TronicsFix] noted that there was no way a cartridge would fit in the slot.

Given this failing, a ground-up rebuild was in order. Starting with the internals from an original NES, [TronicsFix] set about building an appropriately sized base and working from there. Supports were built to mount the various components, with the controller ports being particularly well done, and the video output and power switches being a little more tricky. The many cosmetic pieces from the official kit came in handy here, giving the final product the aesthetic touches it needed to fit the bill.

The final result is an authentic, functional NES in a LEGO case. [TronicsFix] demonstrates as such, showing the console playing Super Mario 3. Nintendo consoles remain a favorite amongst modders; some going so far as to build fire-breathing creations. Video after the break.

Continue reading “A Real Working Lego NES”

Retro Game Bow Tie

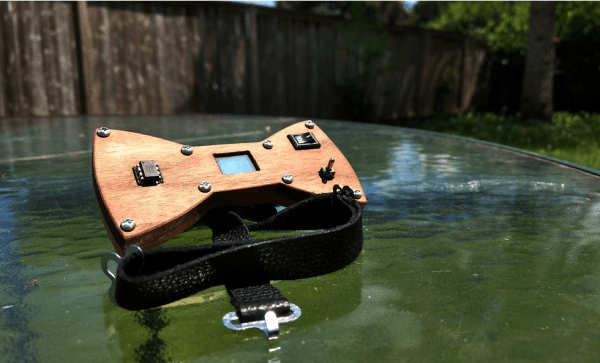
[Greg] loves hacking his bow ties. Back in high school, he added some bright RGB LEDs to the bow tie he wore to prom and even won the male best-dressed award. Recently he decided to try another bow tie hack, this time giving his tie some retro arcade game feels.

He decided to use an ATtiny85 and to experiment doing some more lower-level programming to refresh his skills. He wrote all his libraries from scratch which really helped him learn a lot about the ATtiny in the process. This also helped him make sure his code was as efficient as possible since he had quite a bit of memory constraints using the ATtiny85 (only 512 bytes of RAM).

He designed the body of the bow tie with wood. He fit all the electronics inside the body while allowing the ATtiny to protrude out of the body giving his bow tie some wanted hacker aesthetic. Of course, he needed to access the toggle switch to play the game, so he made a slot for that as well.

Nice addition to the electronics bow tie collection on Hackaday. Really aesthetic design if you ask us. And you know how much we love retro games.

Continue reading “Retro Game Bow Tie”

Arduino Plays NES Games

Watching the advancement of technology is interesting enough by looking at improved specifications for various components as the years go by. But clock speeds, memory size, and power consumption are all fairly intangible compared to actual implementation of modern technology when compared to days of yore. For example, this $40 microcontroller can do what a video game console was able to do in the 80s for a tenth of the (inflation adjusted) price.

The NESDUE is an emulator for NES games which runs completely on an Arduino Due. The Arduino does have some limitations that have to be worked around to get the Nintendo to work, though. For one, it needs to be overclocked to be playable and it also needs a workaround to get past the memory limit of 96 kB of RAM. From there, a small screen is wired up along with a controller (from a Super Nintendo) and the gaming can begin.

This is an impressive feat for an Arduino platform to accomplish, especially with the amount of memory tweaking that has to happen. This might be the most advanced gaming system available that runs everything on an Arduino, right up there with the Arduinocade which can provide an arcade-like experience straight from the Arduino as well.

Continue reading “Arduino Plays NES Games”

Nintendo Switch Gets A Stylish Dock In A Broken NES

The Switch is Nintendo’s latest home console, which has forever blurred the line between handhelds and consoles you plug in to your TV. It does both! Typically, hooking up to a screen is done through the dock, but that wasn’t quite cool enough for [sturm]. He took a NES and turned it into a tidy Switch dock instead!

The build starts with an original NES shell, which is gutted of its original hardware. The PCB from the original dock is installed, and a slot cut in the top of the NES to allow the Switch to be inserted. Naturally, there’s a spring flap reminiscent of the Super NES to keep the dock looking clean when not in use. When it is installed, a series of cables and bezels break out the USB ports to the original controller ports on the NES.

It’s a tidy build that brings a touch of nostalgia to the modern console. We’re sure an official version would sell like hotcakes, too. There’s plenty of similarly inspired builds for the Switch, with the Gamecube Joycons a particular highlight!

Continue reading “Nintendo Switch Gets A Stylish Dock In A Broken NES”

Teardown: Generation NEX

Today if you wanted a little gadget to sit on your shelf and let you play classic games from the early console era, you’d likely reach for the Raspberry Pi. With slick emulator front-ends like RetroPie and DIY kits available on Amazon, you don’t even need to be a technical wizard or veteran penguin wrangler to set it up. If you can follow an online tutorial, you can easily cram the last few decades of gaming into a cheap and convenient package.

But things were a bit different back in 2005. There weren’t a lot of options for playing old games on the big screen, and what was out there tended to be less than ideal. You could hack an original Xbox or gut an old laptop to make an emulation box that could comfortably blend in with your DVD player, but that wasn’t exactly in everyone’s wheelhouse. Besides, what if you had the original cartridges and just wanted to play them on a slightly more modern system?

I’m willing to bet whoever wrote this owns a katana.

Enter Messiah, and their Generation NEX console. As you might have gathered from their ever-so-humble name, Messiah claimed their re-imagined version of the Nintendo Entertainment System would “Bring Gaming Back to Life” by playing the original cartridges with enhanced audio and visual clarity. It also featured integrated support for wireless controllers, which at the time was only just becoming the standard on contemporary consoles. According to the manufacturer, the Generation NEX used custom hardware based on the “NES algorithm” that offered nearly 100% game compatibility.

Unfortunately, the system was a complete bomb. Despite Messiah’s claims, the Generation NEX ended up being yet another “NES-on-a-chip” (NOAC) clone, and a pretty poor one at that. Reviewers at the time reported compatibility issues with many popular titles, despite the fact that they were listed as working on Messiah’s website. The touted audio and video improvements were nowhere to be found, and in fact many users claimed the original NES looked and sounded better in side-by-side comparisons.

It didn’t matter how slick the console looked or how convenient the wireless controllers were; if the games themselves didn’t play well, the system was doomed. Predictably the company folded not long after, leaving owners stuck with the over-priced and under-performing consoles. Realistically, most of them ended up in landfills. Today we’ll take a look inside a relatively rare survivor and see just what nostalgic gamers got for their money in 2005.

Continue reading “Teardown: Generation NEX”