Two types of polymer clay hand warmers with a digital temperature controller.

Adjustable Electric Hand Warmers

It may be the last gasp of summer here in the Northern Hemisphere, but it’s always cold somewhere, whether it’s outdoors or inside. If you suffer from cold, stiff hands, you know how difficult it can be to work comfortably on a computer all day. Somehow, all that typing and mousing does little to warm things up. What you need are hand warmers, obviously, and they might as well be smart and made to fit your hands.
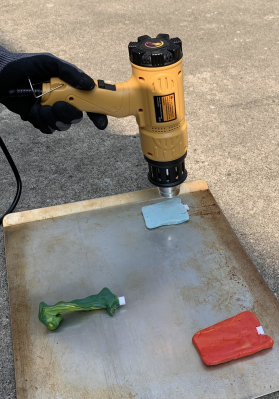
Using a heat gun to cure polymer clay. Fifteen-year-old [Printerforge] created these bad boys in an effort to learn how to code LCDs and control heat like Magneto controls ferrous metals. Thanks to digital control, they can heat up to specific temperatures, and they happen to run for a long time.

Power-wise, these warmers use a 18650 cell and a TP4056 charging module. Everything is controlled by an Arduino Nano, which reads from both a thermistor and a potentiometer to control the output.

[Printerforge] really thought this project through, as you’ll see in the Instructable. There’s everything from a table of design requirements to quick but thorough explanations of nichrome wire and basic electronic theory.

And then there’s the material consideration. [Printerforge] decided that polymer clay offers the best balance of heat conductivity and durability. They ended up with two styles — flat, and joystick grip. The best part is, everything can fit in a generous pocket.

Clay is good for a lot of things, like making the perfect custom mouse.

Start Your Semiconductor Fab With This DIY Tube Furnace

Most of us are content to get our semiconductors from the usual sources, happily abstracting away the complexity locked within those little epoxy blobs. But eventually, you might get the itch to roll your own semiconductors, in which case you’ll need to start gearing up. And one of the first tools you’ll need is likely to be something like this DIY tube furnace.

For the uninitiated, [ProjectsInFlight] helpfully explains in the video below just what a tube furnace is and why you’d need one to start working with semiconductors. Perhaps unsurprisingly, a tube furnace is just a tube that gets really, really hot — like 1,200° C. In addition to the extreme heat, commercial furnaces are often set up to seal off the ends of the tube to create specific conditions within, such as an inert gas atmosphere or even a vacuum. The combination of heat and atmospheric control allows the budding fabricator to transform silicon wafers using chemical and physical processes.

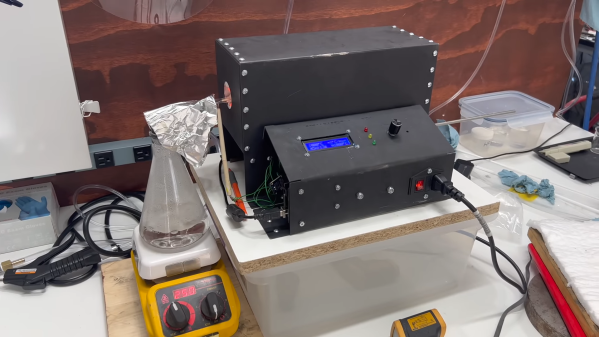
[ProjectsInFlight]’s tube furnace started with a length of heat-resistant quartz glass tubing and a small tub of sodium silicate refractory cement, from the plumbing section of any home store. The tube was given a thin coat of cement and dried in a low oven before wrapping it with nichrome wire. The wrapped tube got another, thicker layer of silicate cement and an insulating wrap of alumina ceramic wool before applying power to cure everything at 1,000° C. The cured tube then went into a custom-built sheet steel enclosure with plenty of extra insulation, along with an Arduino and a solid-state relay to control the furnace. The video below concludes with testing the furnace by growing a silicon dioxide coating on a scrap of silicon wafer. This was helped along by the injection of a few whisps of water vapor while ramping the furnace temperature up, and the results are easily visible.

[ProjectsInFlight] still needs to add seals to the tube to control the atmosphere in there, an upgrade we’ll be on the lookout for. It’s already a great start, although it might take a while to catch up to our friend [Sam Zeloof].

Continue reading “Start Your Semiconductor Fab With This DIY Tube Furnace”

Infinite Flying Glider

If you’ve exhausted your list of electronics projects over the past several weeks of trying to stay at home, it might be time to take a break from all of that and do something off the wall. [PeterSripol] shows us one option by building a few walkalong gliders and trying to get them to fly forever.

Walkalong gliders work by following a small glider, resembling a paper airplane but made from foam, with a large piece of cardboard. The cardboard generates an updraft which allows the glider to remain flying for as long as there’s space for it. [PeterSripol] and his friends try many other techniques to get these tiny gliders, weighing in at around half a gram, to stay aloft for as long as possible, including lighting several dozen tea candles to generate updrafts, using box fans, and other methods.

If you really need some electricity in your projects, the construction of the foam gliders shows a brief build of a hot wire cutting tool using some nichrome wire attached to a piece of wood, and how to assemble the gliders so they are as lightweight as possible. It’s a fun project that’s sure to be at least several hours worth of distraction, or even more if you have a slightly larger foam glider and some spare RC parts.

Continue reading “Infinite Flying Glider”

CNC Hot-Wire Cutter Gives Form To Foam

Rapid prototyping tools are sometimes the difference between a project getting off the ground and one that stays strictly on paper. A lightweight, easy-to-form material is often all that’s needed to visualize a design and make a quick judgment on how to proceed. Polymeric foams excel in such applications, and a CNC hot-wire foam cutter is a tool that makes dealing with them quick and easy.

We’re used to seeing CNC machines where a lot of time and expense are put into making the frame as strong and rigid as possible. But [HowToMechatronics] knew that the polystyrene foam blocks he’d be using would easily yield to a hot nichrome wire, minimizing the cutting forces and the need for a stout frame. But the aluminum extrusions, 3D-printed connectors. and linear bearings he used still make for a frame stiff enough to give clean, accurate cuts. The addition of a turntable to the bed is a nice touch, turning the tool into a 2.5D machine. The video below details the construction and goes into depth on the toolchain [HowToMechatronics] used to go from design to G-code, including the tricks he used for making a continuous path, as well as integrating the turntable to make three-dimensional designs.

Plenty of hot-wire foam cutters have graced our pages before, everything from tiny hand-held cutters to a hot-wire “table saw” for foam. We like the effort put into this one, though, and the possibilities it opens up.

Continue reading “CNC Hot-Wire Cutter Gives Form To Foam”

Robotic Muscles From Fishing Line And Nichrome

Did you know that under the right conditions, nylon can be used as a type of artificial muscle? We certainly didn’t until we came across [Brandon T. Wood]’s Material Linear-Actuator for Robotics entry for the 2018 Hackaday Prize.

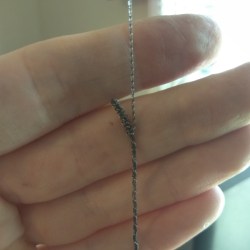
When [Brandon] first learned about Nylon Linear Material Actuators (NLMAs), he became determined to find a repeatable and practical method of making and experimenting with them. This is how it works: hyper-wound coils of nylon, when heated, will contract along their length while expanding in width. Upon cooling, they return to their original shape.

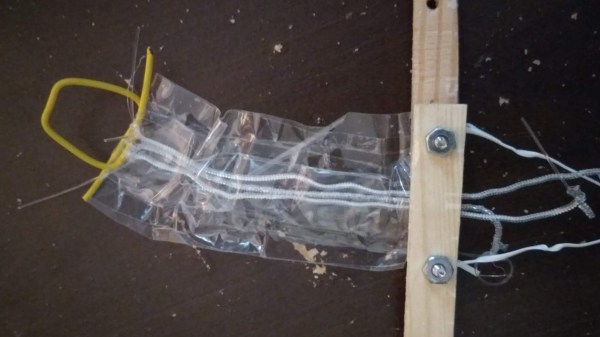
[Brandon] has been busy mainly with the kind of work that is important but not very flashy: finding accessible methods to reliably create strands of artificial nylon muscles cheaply and reliably. His current method uses a jig to wind nylon fishing line until it coils upon itself tightly, then twist a length of nichrome wire around the outside to act as a heater. Using this method, the coils can be electrically controlled. [Brandon] is currently experimenting with creating bundles of individual nylon coils to act all together as one big muscle, because while one wire isn’t particularly strong, a bundle could be quite another story. It’s definitely unusual and is doing a lot of work to turn a known phenomenon into something hackable, which makes it lovely to see in this year’s Hackaday Prize.

Simple Jig Gives Plastic Homes To Orphaned Projects

Look around your bench and chances are pretty good that there’s a PCB or scrap of perfboard or even a breadboard sitting there, wires and LEDs sprouting off it, doing something useful and interesting. Taking it to the next level with a snazzy enclosure just seems too hard sometimes, especially if you don’t have access to a 3D printer or laser cutter. But whipping up plastic enclosures can be quick and easy with this simple acrylic bending outfit.

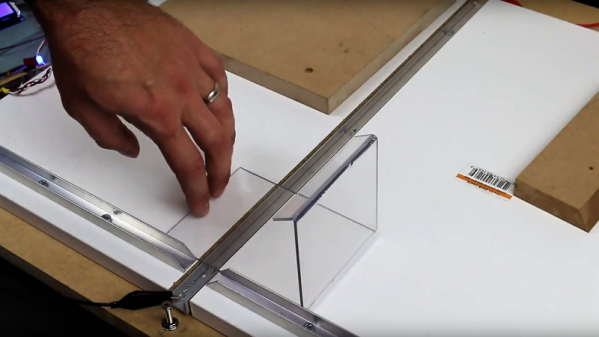
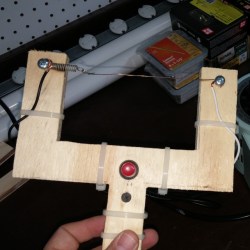
At its heart [Derek]’s bending rig is not much different from any of the many hot-wire foam cutters we’ve featured. A nichrome wire with a tensioning spring is stretched across a slot in a flat work surface. The slot contains an aluminum channel to reflect the heat from the wire upward and to protect the MDF bed; we wonder if perhaps an angle section set in a V-groove might not be more effective, and whether more vertical adjustment range would provide the wider heating area needed for wider radius bends. It works great as is, though, and [Derek] took the time to build a simple timer to control the heating element, for which of course he promptly built a nice looking enclosure.

We can imagine the possibilities here are endless, especially if you use colored acrylic or Lexan and add in some solvent welding. We’ve covered acrylic enclosure techniques before; here’s a post that covers the basics.

Continue reading “Simple Jig Gives Plastic Homes To Orphaned Projects”

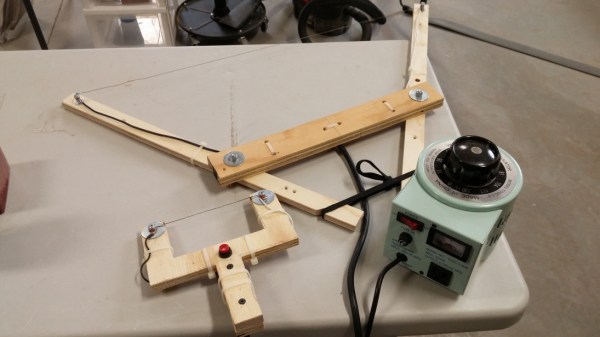
Things Learned From Hot Wire Cutting A Droid’s Body

One of [Bithead]’s passions is making Star Wars droids, and in the process of building the outer shell for one of them he decided to use hot wire foam cutting and make his own tools. Having the necessary parts on hand and having seen some YouTube videos demonstrating the technique, [Bithead] dove right in. Things didn’t go exactly to plan but happily he decided to share what did and didn’t work, and in the end the results were serviceable.

[Bithead] built two hot wire cutters with nichrome wire. The first was small, but the second was larger and incorporated some design refinements. He also got an important safety reminder when he first powered on with his power supply turned up too high; the wire instantly turned red and snapped with an audible bang. He belatedly realized he was foolishly wearing neither gloves nor eye protection.

When it came to use his self-made tools, one of the biggest discoveries was that not all foam is equal in the eyes of a hot wire cutter. This is one of those things that’s common knowledge to experienced people, but isn’t necessarily obvious to a newcomer. A hot wire cutter that made clean and effortless cuts in styrofoam did no such thing with the foam he was using to cast his droid’s outer shell. Still, he powered through it and got serviceable results. [Bithead]’s blog post may not have anything new to people who have worked with foam and hot wire cutters before, but if you’re new to such things you can use it to learn from his experiences. And speaking of improving experiences, [Bithead] most recently snazzed up the presentation of his R2-D2 build by getting tricky with how he hides his remote control.