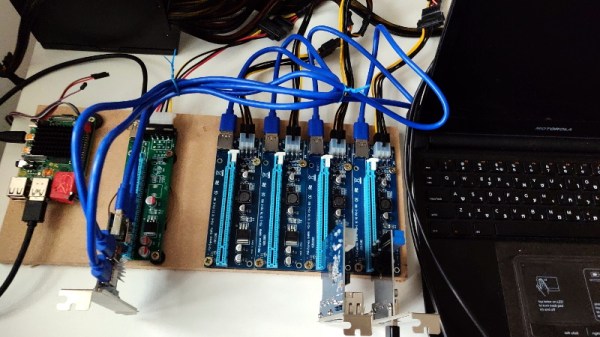
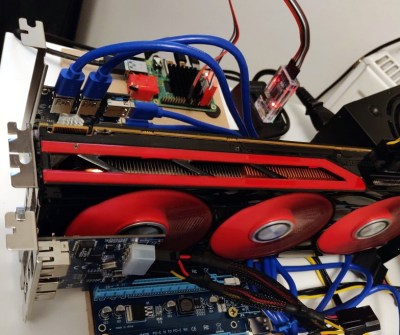
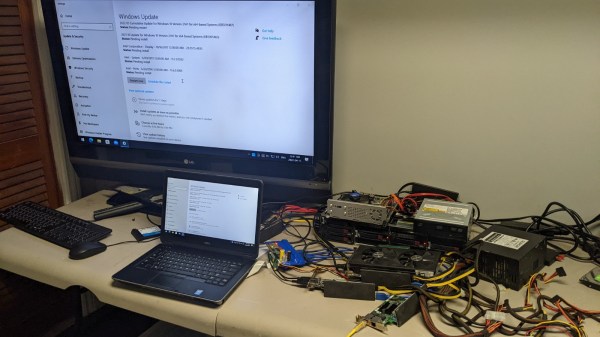
Picture of the setup described in the article, with PCI-E cards strewn around the desk, all interconnected, and a powered-up laptop, a large TV screen behind the laptop

This Laptop Gets All The PCIe Devices

Did you ever feel like your laptop’s GPU was sub-optimal, or perhaps that your laptop could use a SAS controller? [Rob Rogers] felt like that too, so now he has the only Dell Latitude business-class laptop that’s paired with an AMD RX580 GPU – and more. Made possible because of a PCIe link he hijacked from the WiFi card, he managed to get a SAS controller, a USB 3.0 expansion card, the aforementioned GPU and a dual-port server network adapter, all in a single, desk-top setup, as the video demonstrates.

First off, we see a PCIe packet switch board based on a PLX-made chip, wrapped in blue tape, splitting a single PCIe x1 link into eight. The traditional USB 3.0 cables carry the downstream x1 links to the four PCIe cards connected, all laid out on [Rob]’s desk. [Rob] demonstrates that all of the cards indeed function correctly – the SAS controller connected to a server backplane with whole 22 TB of storage in it, a few devices plugged into a USB 3.0 card, an Ethernet cable with an active link in the network card, and wrapping up the video showing 3DMark results of the RX580 clearly paired with the laptop’s mobile CPU. There’s four more spots on the PCIe switch card, so if you wanted to connect a few NVMe SSDs without the costly USB enclosures that usually entails, you absolutely could!
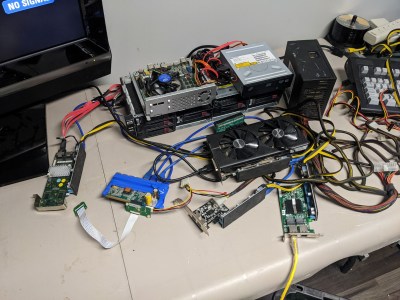
The setup on the desk, laptop-less, still interconnected and with the mini pci-e adapter visibleNow, there’s a reason why we don’t see more of such hacks. This seems to be a Latitude E5440 and the card is plugged into a mini-PCIe slot, which means the entire contraption is bound by a single PCI-E Gen2 x1 link, heavily offsetting the gains you’d get from an external GPU when, say, gaming. However, when it comes to the types and amount of peripherals, this is unbeatable – if you want to add an external GPU, high-speed networking and a SAS controller to the same computer that you usually lug around, there isn’t really a dock station you can buy for that!

Our collection of cool PCIe hacks has been growing, with hackers adding external GPUs through ExpressCard and mini PCIe alike, fitting PCIe slots where the factory refused to provide one, and extending the onboard M.2 slots for full-size PCIe cards. Nowadays, with these packet switches, it’s easy as ever to outfit any PCIe capable device with a whole slew of features – as this Raspberry Pi Computer Module motherboard with eleven PCIe slots demonstrates. Wonder how PCIe works, and why all of that is possible? We’ve written an entire article on that!

Continue reading “This Laptop Gets All The PCIe Devices”

The Bus That’s Not A Bus: The Joys Of Hacking PCI Express

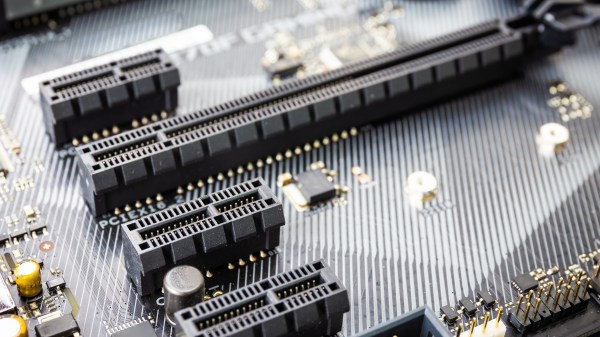
PCI Express (PCIe) has been around since 2003, and in that time it has managed to become the primary data interconnect for not only expansion cards, but also high-speed external devices. What also makes PCIe interesting is that it replaces the widespread use of parallel buses with serial links. Instead of having a bus with a common medium (traces) to which multiple devices connect, PCIe uses a root complex that directly connects to PCIe end points.

This is similar to how Ethernet originally used a bus configuration, with a common backbone (coax cable), but modern Ethernet (starting in the 90s) moved to a point-to-point configuration, assisted by switches to allow for dynamic switching between which points (devices) are connected. PCIe also offers the ability to add switches which allows more than one PCIe end point (a device or part of a device) to share a PCIe link (called a ‘lane’).

This change from a parallel bus to serial links simplifies the topology a lot compared to ISA or PCI where communication time had to be shared with other PCI devices on the bus and only half-duplex operation was possible. The ability to bundle multiple lanes to provide less or more bandwidth to specific ports or devices has meant that there was no need for a specialized graphics card slot, using e.g. an x16 PCIe slot with 16 lanes. It does however mean we’re using serial links that run at many GHz and must be implemented as differential pairs to protect signal integrity.

This all may seem a bit beyond the means of the average hobbyist, but there are still ways to have fun with PCIe hacking even if they do not involve breadboarding 7400-logic chips and debugging with a 100 MHz budget oscilloscope, like with ISA buses.

Continue reading “The Bus That’s Not A Bus: The Joys Of Hacking PCI Express”

Faster Desktop Ethernet With Server Network Adapters

As far as consumer network hardware goes, we’re all expected to be pretty happy with 802.11n WiFi and Gigabit Ethernet over Cat 6 cables. For most home users, that’s plenty of bandwidth for streaming movies and posting K-pop fancams to Twitter on a daily basis. If you want a fatter pipe, things can get expensive, fast. However, [TobleMiner] found a way to use surplus server-grade cards in a regular PC – providing huge bandwidth on a budget.

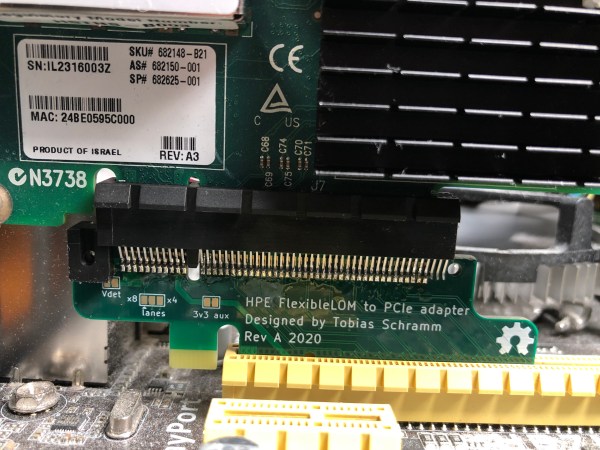
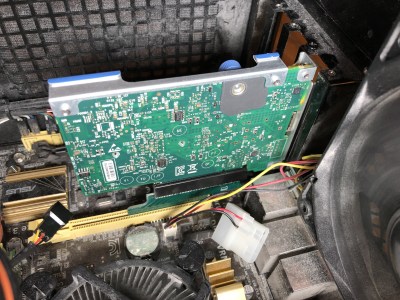
The adapter is designed to allow a FlexibleLOM card to fit into a regular ATX PCI-E card slot. A small additional bracket should be used to fix the card in place with the typical bracket retention screw.

HPE’s FlexibleLOM standard consists of a special edge connector on HPE servers that lets the end-user fit a variety of network adapters in a form factor designed specifically for blade and rack mount servers. At the electrical level, it’s simply PCI-Express 8x. FlexibleLOM network cards are built for high-speed data center use, often featuring SFP+ and QSFP+ interfaces capable of 10 gigabit and 40 gigabit speeds, respectively.

These cards can be had for under $20 on eBay, but won’t fit in a standard PCI-Express slot. Enter [ToberMiner]’s adapter, which hooks up the relevant PCI-Express lines to where they need to go, and mechanically adapts the FlexibleLOM hardware to fit in a regular ATX PC case.

It’s a great way to get server-grade network adapters in your home rig, without breaking the bank. We’ve featured other attempts at high-speed home networking before, too. If you’ve got the low down on a great way to get multi-gigabit speeds out of cheap surplus hardware, you know who to call.

[Thanks to Marco for the tip!]

PCIe Multiplier Expands Raspberry Pi 4 Possibilities

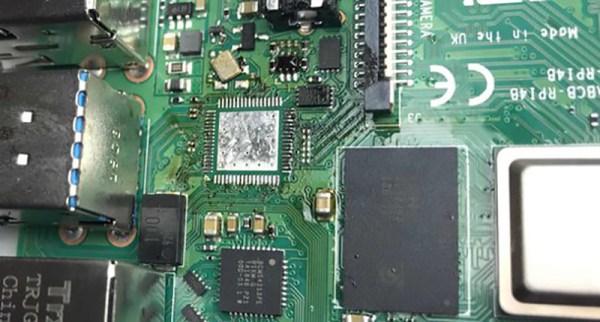
It probably goes without saying that hardware hackers were excited when the Raspberry Pi 4 was announced, but it wasn’t just because there was a new entry into everyone’s favorite line of Linux SBCs. The new Pi offered a number of compelling hardware upgrades, including an onboard PCI-Express interface. The only problem was that the PCIe interface was dedicated to the USB 3.0 controller; but that’s nothing a hot-air rework station couldn’t fix.

We’ve previously seen steady-handed hackers remove the USB 3.0 controller on the Pi 4 to connect various PCIe devices with somewhat mixed results, but [Colin Riley] has raised the bar by successfully getting a PCIe multiplier board working with the diminutive Linux computer. While there are still some software kinks to work out, the results are very promising and he already hasĀ  a few devices working.

Getting that first PCIe port added to the Pi 4 is already fairly well understood, so [Colin] just had to follow the example set by hackers such as [Tomasz Mloduchowski]. Sure enough, when he plugged the port multiplier board in (after a bit of what he refers to as “professional wiggling”), the appropriate entry showed up in lspci.

But there was a problem. While the port multiplier board was recognized by the kernel, nothing he plugged into it showed up. Checking the kernel logs, he found messages relating to bus conflicts, and one that seemed especially important: “devices behind bridge are unusable because [bus 02] cannot be assigned for them“. To make a long story short, it turns out that the Raspbian kernel is specifically configured to only allow a single PCI bus.

Fortunately, it’s an easy fix once you know what the problem is. Using the “Device Tree Compiler” tool, [Colin] was able to edit the Raspbian Device Tree file and change the PCI “bus-range” variable from <0x0 0x1> to <0x0 0xff>. From there, it was just a matter of plugging in different devices and seeing what works. Simple things such as USB controllers were no problem, but getting ARM Linux support for the NVIDIA GTX 1060 he tried will have to be a topic for another day.

[Thanks to Paulie for the tip.]

Giving The Pi 4 PCI Express

The release of the Raspberry Pi 4 brought us a new SoC, up to 4 Gigs of memory, and most importantly, got away from that janky USB to USB and Ethernet solution. The Raspberry Pi 4 has a PCI Express interface buried under some chips, and if you’re very good at soldering you can add a PCIe x1 device to the new best single board computer.

[Thomasz] took a look at the Raspberry Pi 4 and realized the new USB 3.0 chip is attached to the PCI Express interface on the SoC. That is, if you remove this chip and you have some very fine wires, you can patch in a real PCI Express slot. Removing the chip is easy enough with a hot air gun, although a few caps did get messed up. Throw that in an ultrasonic cleaner, and you have a blank canvas to work PCI magic.

This hack requires six wires, or three differential pairs, there’s a reference clock, a lane 0 transmit, and a lane zero receive. Working backwards from a PCI Express riser, [Thomasz] traced out these connections and soldered a few wires in. On the Pi side, a few capacitors were required to be compliant with the PCI Express spec, but the soldering isn’t too bad. You can do a lot with a small tip on an iron and a microscope.

The Pi was successfully wired up to a PCI Express riser card, along with the lines for ground, 5V, link reactivation, and a power good signal. The only thing left to do was to plug in a PCI card and test. This didn’t go as well as expected, because the PCI Express adapter didn’t like being enumerated by the Raspberry Pi kernel. In subsequent experiments, an Adaptec SAS controller worked. Does this mean external graphics cards for the Pi? No, not quite; this is only one lane of PCIe, where modern graphics cards require an x16 slot for the best performance. Still, if you’ve ever wanted a SCSI card for a Pi, this is the best option yet.

How Do You Get PCI-E On The Atomic Pi? Very Carefully.

At this point, you’ve almost certainly heard about the Atomic Pi. The diminutive board that once served as the guts of a failed robot now lives on as a powerful x86 SBC available at a fire sale price. How long you’ll be able to buy them and what happens when the initial stock runs out is another story entirely, but there’s no denying that folks are already out there doing interesting things with them.

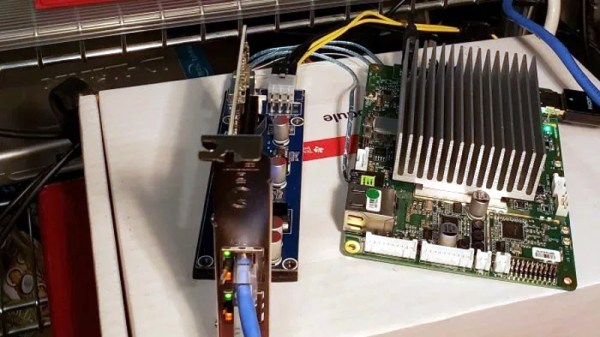
One of them is [Jason Gin], who recently completed an epic quest to add a PCI Express (PCI-E) slot to his Atomic Pi. Things didn’t exactly go according to plan and the story arguably has more lows than highs, but in the end he emerged victorious. He doesn’t necessarily recommend you try the same modification on your own Atomic Pi, but he does think this sets the stage for the development of a more refined upgrade down the line.

[Jason] explains that the board’s Ethernet controller was already communicating with the Intel Atom x5-Z8350 SoC over PCI-E, so there was never a question about whether or not the modification was possible. In theory, all you needed to do was disable the Ethernet controller and tack on an external PCI-E socket so you could plug in whatever you want. The trick is pulling off the extremely fine-pitch soldering such a modification required, especially considering how picky the PCI Express standard is.

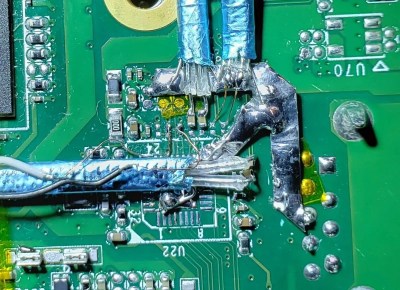
In practice, it took several attempts with different types of wire before [Jason] was able to get the Atomic Pi to actually recognize something plugged into it. Along the way, he managed to destroy the Ethernet controller somehow, but that wasn’t such a great loss as he planned on disabling it anyway. The final winning combination was 40 gauge magnet wire going between the PCB and a thin SATA cable that is mechanically secured to the board with a piece of metal to keep anything from flexing.

At this point, [Jason] has tested enough external devices connected to his hacked-on port to know the modification has promise. But the way he’s gone about it is obviously a bit temperamental, and far too difficult for most people to accomplish on their own anyway. He’s thinking the way forward might be with a custom PCB that could be aligned over the Ethernet controller and soldered into place, though admits such a project is currently above his comfort level. Any readers interested in a collaboration?

Like most of you, we had high hopes for the Atomic Pi when we first heard about it. But since it became clear the board is the product of another company’s liquidation, there’s been some understandable trepidation in the community. Nobody knows for sure what the future looks like for the Atomic Pi, but that’s clearly not stopping hackers from diving in.

Catching The (PCIe) Bus

If you are trying to learn about FPGAs, there is only so far you can go with the usual blinking lights and VGA outputs. Eventually, you want to do something more. Although not terribly cheap, you can get FPGA boards in a PCIe form-factor and use them directly with PC software. Is it easy? Well, it isn’t flashing an LED, but there are tools to help. [Angelos Kyriakos] did a Master’s thesis on the very subject and used a project known as RIFFA to help with the task.

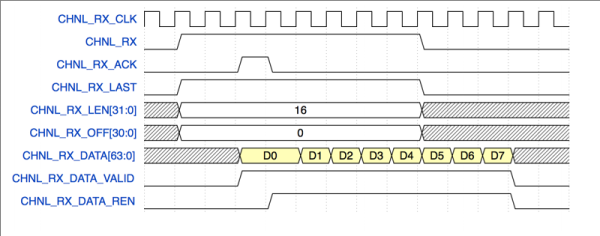
RIFFA (Reusable Integration Framework for FPGA Accelerators) is a simple framework for communicating data from a host CPU to an FPGA via a PCI Express bus. The framework requires a PCIe enabled workstation and an FPGA on a board with a PCIe connector. RIFFA supports Windows and Linux, Altera and Xilinx, with bindings for C/C++, Python, MATLAB, and Java. With proper design, RIFFA can transfer quite a bit of data in a short period of time between your computer and your FPGA.

Continue reading “Catching The (PCIe) Bus”