A Free Speed Boost For Your Pi 5

The world of the overclocker contains many arcane tweaks to squeeze the last drops of performance from a computer, many of which require expert knowledge to understand. Happily for Raspberry Pi 5 owners the Pi engineers have come up with a set of tweaks you don’t have to be an overclocker to benefit from, working on the DRAM timings to extract a healthy speed boost. Serial Pi hacker [Jeff Geerling] has tested them and thinks they should be good for as much as 20% boost on a stock board. When overclocked to 3.2 GHz, he found an unbelievable 32% increase in performance.

We’re not DRAM experts here at Hackaday, but as we understand it they have been using timings from the Micron data sheets designed to play it safe. In consultation with Micron engineers they were able to use settings designed to be much faster, we gather by monitoring RAM temperature to ensure the chips stay within their parameters. Best of all, there’s no need to get down and dirty with the settings, and they can be available to all with a firmware update. It’s claimed this will help Pi 4 owners to some extent as well as those with a Pi 5, so even slightly older boards get some love. So if you have a Pi 5, don’t wait for the Pi 6, upgrade today, for free!

Cost-Optimized Raspberry Pi 5 Released With 2 GB RAM And D0 Stepping

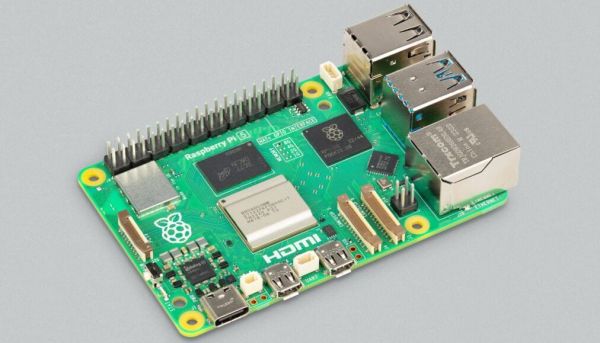
When the Raspberry Pi 5 SBC was released last year, it came in 4 and 8 GB RAM variants, which currently retail from around $80 USD and €90 for the 8 GB variant to $60 and €65 for the 4 GB variant. Now Raspberry Pi has announced the launch of a third Raspberry Pi 5 variant: a 2 GB version which also features a new stepping of the BCM2712 SoC. This would sell for about $50 USD and feature the D0 stepping that purportedly strips out a lot of the ‘dark silicon’ that is not used on the SBC.

These unused die features are likely due to the Broadcom SoCs used on Raspberry Pi SBCs being effectively recycled set-top box SoCs and similar. This means that some features that make sense in a set-top box or such do not make sense for a general-purpose SBC, but still take up die space and increase the manufacturing defect rate. The D0 stepping thus would seem to be based around an optimized die, with as only possible negative being a higher power density due to a (probably) smaller die, making active cooling even more important.

As for whether 2 GB is enough for your purposes depends on your use case, but knocking $10 off the price of an RPi 5 could be worth it for some. Perhaps more interesting is that this same D0 stepping of the SoC is likely to make it to the other RAM variants as well. We’re awaiting benchmarks to see what the practical difference is between the current C1 and new D0 steppings.

Thanks to [Mark Stevens] for the tip.

Kali Cyberdeck Looks The Business

Even though we somewhat uncharacteristically don’t have a cyberdeck contest currently underway, there’s never a bad time to get your [Gibson] on. That’s especially true when fate hands you an enclosure as perfect as the one that inspired this very compact Kali Linux cyberdeck.

Now, that’s not to say that we don’t love larger cyberdecks, of course. The ones built into Pelican-style shipping containers are particularly attractive, and it’s hard to argue against their practicality. But when [Hans Jørgen Grimstad], who somehow just sounds like a person who should be building cyberdecks, found a new-old-stock stash of US Army Signal Corps spare parts kits from the 1950s, designation CY-684/GR, he just had to spring into action. After carefully gutting the metal case of the dividers that once protected tubes and other parts, he had some PCB panels made up for the top and bottom. The bottom had enough room for a compact USB keypad, with room left over on the panel for a cooling fan and various connectors. A 7″ HDMI display was added to the panel on the top lid, while a Raspberry Pi 5 with a 500-GB NVMe SSD went below the lower panel. The insides are properly decorated with cyberpunk-esque regalia including a “Self Destruct” button. Sadly, this appears to be unimplemented in the current version, at least for the stated purpose; there’s always hope for version two.

While we love the look and feel of this build and the subtle nods to the cyberpunk aesthetic, it sure seems like you could get some serious work done with a deck like this. Hats off to [Hans] for the build, and here’s hoping he left some of those cool cases for the rest of us.

Continue reading “Kali Cyberdeck Looks The Business”

How Does The Raspberry Pi Rack Up Against A Mini PC?

When the first Raspberry Pi came out back in 2012 it was groundbreaking because it offered a usable little Linux machine with the proud boast of a $25 dollar price tag. Sure it wasn’t the fastest kid on the block, but there was almost nothing at that price which could do what it did. Three leap years later though it’s surrounded by a host of competitors with similar hardware, and its top-end model now costs several times that original list price.

Meanwhile the cost of a “real” x86 computer such as those based upon the Intel N100 has dropped to the point at which it almost matches a fully tricked-out Pi with storage and peripherals, so does the Pi still hold its own? [CNX Software] has taken a look.

From the examples they use, in both cases the Intel machine is a little more expensive than the Pi, but comes with the advantage of all the peripherals, cooling, and storage coming built-in rather than add-ons. They rate the Pi as having the advantage on expandability as we’d expect, but the Intel giving a better bang for the buck in performance terms. From where we’re sitting the advantage of the Pi over most of its ARM competition has always been its good OS support, something which is probably exceeded by that on an x86 platform.

So, would you buy the Intel over the high-end Pi? Let us know in the comments.

Pi 5 And SDR Team Up For A Digital Scanner You Can Actually Afford

Listening to police and fire calls used to be a pretty simple proposition: buy a scanner, punch in some frequencies — or if you’re old enough, buy the right crystals — and you’re off to the races. It was a pretty cheap and easy hobby, all things considered. But progress marches on, and with it came things like trunking radio and digital modulation, requiring ever more sophisticated scanners, often commanding eye-watering prices.

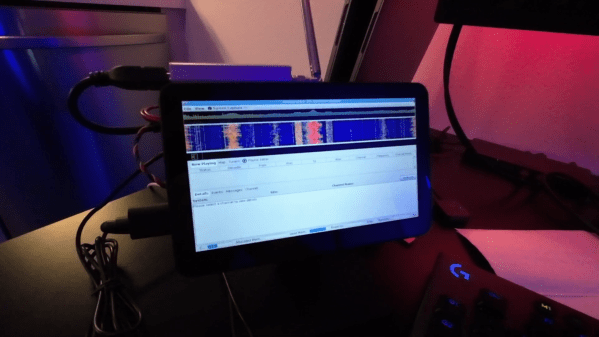
Having had enough of that, [Top DNG] decided to roll his own digital trunking scanner on the cheap. The first video below is a brief intro to the receiver based on the combination of an RTL-SDR dongle and a Raspberry Pi 5. The Pi is set up in headless mode and runs sdrtrunk, which monitors the control channels and frequency channels of trunking radio systems, as well as decoding the P25 digital modulation — as long as it’s not encrypted; don’t even get us started on that pet peeve. The receiver also sports a small HDMI touchscreen display, and everything can be powered over USB, so it should be pretty portable. The best part? Everything can be had for about $250, considerably cheaper than the $600 or so needed to get into a purpose-built digital trunking scanner — we’re looking at our Bearcat BCD996P2 right now and shedding a few tears.

The second video below has complete details and a walkthrough of a build, from start to finish. [Top DNG] notes that sdrtrunk runs the Pi pretty hard, so a heat sink and fan are a must. We’d probably go with an enclosure too, just to keep the SBC safe. A better antenna is a good idea, too, although it seems like [Top DNG] is in the thick of things in Los Angeles, where LAPD radio towers abound. The setup could probably support multiple SDR dongles, opening up a host of possibilities. It might even be nice to team this up with a Boondock Echo. We’ve had deep dives into trunking before if you want more details.

Continue reading “Pi 5 And SDR Team Up For A Digital Scanner You Can Actually Afford”

What It Takes To Make A Raspberry Pi Killer

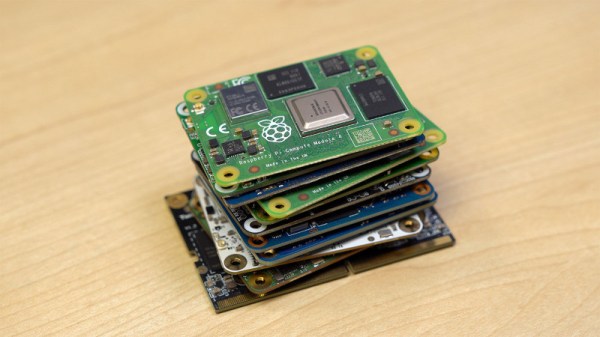
The folks at Raspberry Pi are riding on a bit of a wave at the moment, with the launch of the Pi 5 with its PCIe and RP1 peripheral chip, the huge success of the RP2040 microcontroller, and the supply chain issues that dogged the Pi 4 and Compute Module 4 during and after the pandemic finally working themselves out. But as always there are plenty of would-be competitors snapping at their heels, so [Jeff Geerling] has posed the question of what it takes to make a Raspberry Pi killer. He’s in a good position to do this, as he’s amassed an impressive collection of every competing Compute Module board.

It’s a well-observed analysis of the world of small Linux SBCs, on hardware, software, community, and price, and we find ourselves pretty much in agreement with it. The Pi hardware has quirks and is rarely the best on paper when compared to the competition, but they win hands-down on distribution support and community. In a sense what you really buy when you get a PI is this, because Raspberry Pi OS will run on it for the reasonable future. Rival makers would do well to read his piece, because we sense that if one of them tried to give the Pi a run for its money away from the hardware it would make for a much better SBC ecosystem. Take a look at his Compute Module comparison below the break.

We recently took a look at the strategic importance of the Pi 5 and in particular the RP1.

Continue reading “What It Takes To Make A Raspberry Pi Killer”

Getting PCIe Working On The New Pi 5

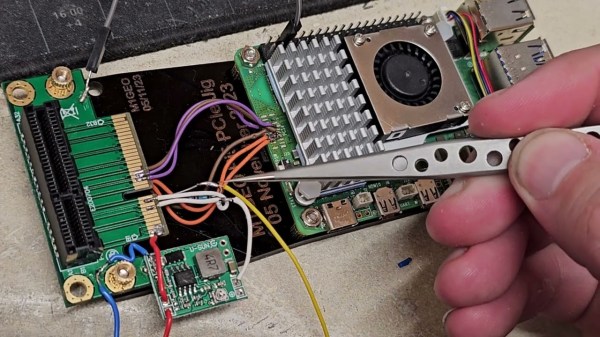
After the Pi 4 released, a discovery was quickly made that the internals of the popular single-board computer use PCIe to communicate with each other. This wasn’t an accessible PCIe bus normally available in things like desktop computers for expansion cards, though; this seemed to be done entirely internally. But a few attempts were made to break out the PCIe capabilities and connect peripherals to it anyway, with varying levels of success. The new Pi 5 seems to have taken that idea to its logical conclusion and included a PCIe connector, and [George] is showing us a way to interface with this bus.

The bus requires the port to be enabled, but once that’s done it’s ready to be used. First, though, some support circuitry needs to be worked out which is why [George] is reverse engineering the system to see what’s going on under the hood. There are a few handshakes that happen before it will work with any peripherals, but with that out of the way a PCIe card can be connected. [George] removed the connector to solder wires to the board directly in order to connect a proper PCIe port allowing a variety of cards to be connected, in this case a wireless networking card and an old Firewire card. This specific build only allows Gen 1 speeds, but the bus itself supports faster connections in theory with better wiring and support circuitry.

While it might not be the prettiest solution, as [George] admits, it does a great job of showing the inner workings of this communication protocol and its use in the new, more powerful Raspberry Pi 5. This makes a lot of things more accessible, such as high-speed PCIe HATs allowing for a wide range of expansion for these popular single-board computers, which wouldn’t have been possible before. If you’re still stuck with a Pi 4, though, don’t despair. You can still access the PCIe bus on these older models but it’ll take a little bit more work.

Thanks to [CJay] for the tip!

Continue reading “Getting PCIe Working On The New Pi 5”