Evaluating The Unusual And Innovative Perf+ Protoboard

Back in 2015 [Ben Wang] attempted to re-invent the protoboard with the Perf+. Not long afterward, some improvements (more convenient hole size and better solder mask among others) yielded an updated version which I purchased. It’s an interesting concept and after making my first board with it here are my thoughts on what it does well, what it’s like to use, and what place it might have in a workshop.

Perf+ Overview
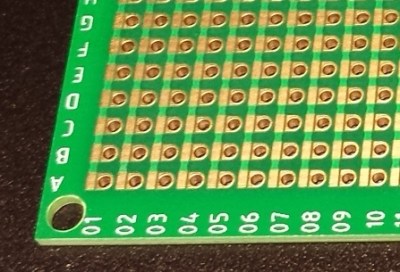
One side of a Perf+ 2 board. Each hole can selectively connect to bus next to it with a solder bridge. The bus strips are horizontal on the back side.
One side of a Perf+ board. Each hole can selectively connect to the bus next to it with a solder bridge. These bus strips are vertical. The ones on the back are horizontal.

The Perf+ is two-sided perfboard with a twist. In the image to the left, each column of individual holes has a bus running alongside. Each hole can selectively connect to its adjacent bus via a solder bridge. These bus traces are independent of each other and run vertically on the side shown, and horizontally on the back.

Each individual hole is therefore isolated by default but can be connected to one, both, or neither of the bus traces on either side of the board. Since these traces run vertically on one side and horizontally on the other, any hole on the board can be connected to any other hole on the board with as few as two solder bridges and without a single jumper wire.

It’s an innovative idea, but is it a reasonable replacement for perfboard or busboard? I found out by using it to assemble a simple prototype.

Continue reading “Evaluating The Unusual And Innovative Perf+ Protoboard”

Lighting The Great Indoors With A Solar Security Light

Look at any list of things to do to make your house less attractive to the criminal element and you’ll likely find “add motion sensing lights” among the pro tips. But what if you don’t want to light up the night? What if you want to use a motion sensor to provide a little light for navigating inside a dark garage? And what if the fixture you’ve chosen is a solar fixture that won’t quite cooperate? If you’re like [r1ckatkinson], you do a teardown and hack the fixture to do your bidding.

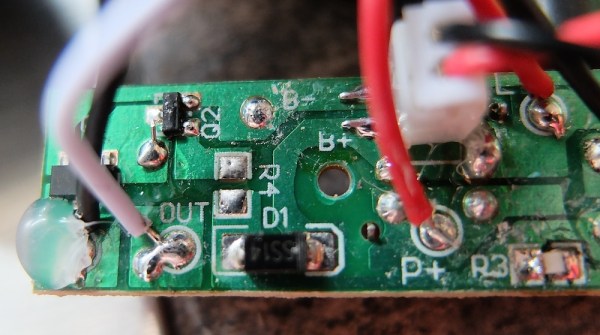
[r1ckatkinson]’s fixture was an inexpensive Maplin solar unit with PIR motion sensing, with the solar panel able to be mounted remotely. This was perfect for the application, since the panel could go outside to power the unit, with the lamp and PIR sensor inside. Unfortunately, the solar cell is also the photosensor that tells the unit not to turn on during the day. Armed with scratch pad and pencil, [r1ckatkinson] traced the circuit and located the offending part – a pull-down resistor. A simple resistor-ectomy later and he’s got a solar-powered light working just the way he likes it.

A simple hack, but effective. Seeing off-the-shelf gear modified is always a treat. Of course there’s something to be said for the more home-brew approach to security lighting, too.

A Motion Activated AC Switching Circuit Using Mostly Discrete Components

AC motion switch

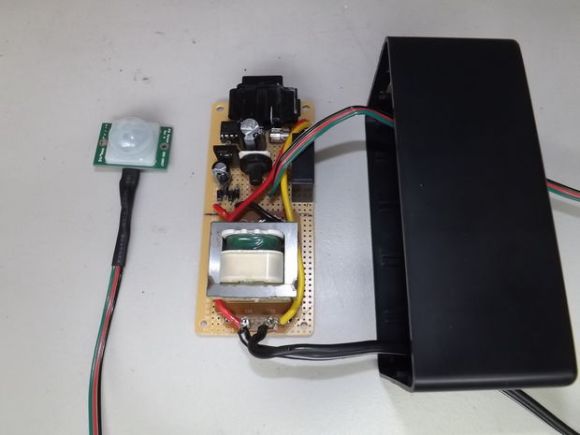
If you’ve ever dealt with a brightly lit Christmas tree, you might understand the frustration of having to crawl underneath the tree to turn the lights on and off. [brmarcum] feel’s your pain. He’s developed his own motion activated AC switching circuit to turn the lights on and off automatically. A motion sensor ensures that the lights are only on when there are people around to actually see the lights. The circuit also has an adjustable timer so [brmarcum] can change the length of time that the lights stay on.

The project is split into several different pieces. This makes the building and debugging of the circuit easier. The mains power is first run through a transformer to lower the voltage by a factor of 10. What remains is then filtered and regulated to 9VDC. [brmarcum] is using a Parallax PIR sensor which requires 4.5V. Therefore, the 9V signal is then lowered once more using a voltage divider circuit.

When the PIR sensor is triggered, it activates the timer circuit. The timer circuit is driven by a 555 timer. The circuit itself was originally borrowed from a classic Forrest Mims book, though it was slightly modified to accommodate the PIR sensor. The original push-button trigger was removed and replaced with the signal from the PIR sensor. The only problem is that the circuit was expecting a low signal as the trigger and the PIR sensor outputs a high signal. [brmarcum] resolved this problem with an NPN BJT to invert the signal. Once the timer is triggered, it flips on a relay that allows the mains electricity to flow through to the lights.

[brmarcum] soldered the entire circuit onto a piece of protoboard. The final product was then mounted securely inside of an insulated plastic case. This allows him to mount the circuit safely underneath the Christmas tree skirt. The PIR sensor is kept external to the enclosure and wired up into the tree itself. This allows the sensor to still detect motion in the room while the rest of the circuit is hidden away.

[via Reddit]

Making The Electronics For A Doppler Motion Sensor

There are many different sensors that can be used to detect motion in a given environment. Passive InfraRed (PIR) sensors are the most used today, as they work by detecting moving heat signatures. However, they are less reliable in the hotter days and obviously only work for animals and humans.

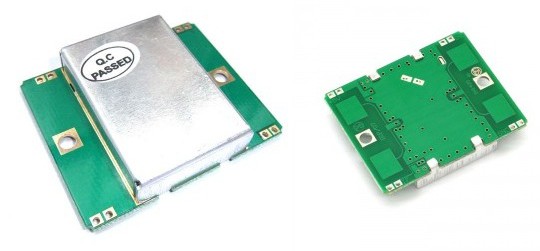
Sensors like the one shown in the above picture started to appear on the internet, they use the doppler effect to detect motion. I (limpkin) designed the electronics you need to add in order to get them to work.

Here is a simple explanation of the doppler effect: if you send an RF signal at a given frequency to a moving target, the reflected signal’s frequency will be shifted. It is commonly heard when a vehicle sounding a siren or horn approaches, passes, and recedes from an observer. The received frequency is higher (compared to the emitted frequency) during the approach, it is identical at the instant of passing by, and it is lower during the recession. Continue reading “Making The Electronics For A Doppler Motion Sensor”

SenseLamp Automates Rooms By Replacing Light Fixtures

senselamp

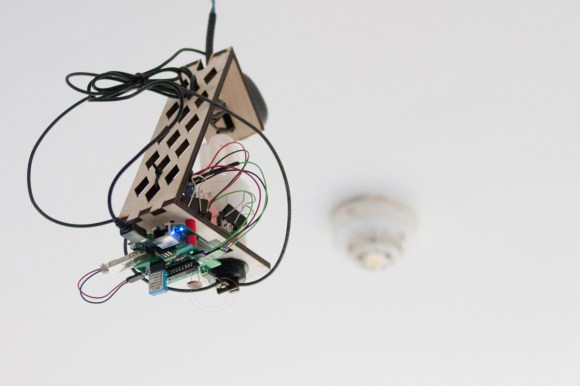
Would you believe that this beautiful light fixture is actually a hacked together home automation project? Okay, so this wire mess is the second of three versions that [Christian] built. It replaces a light fixture in the room, but if you look closely you’ll see that there is a compact fluorescent bulb included in the build. The laser-cut frame acts as a bit of a lamp shade, while providing a place to mount the rest of the hardware.

The final version cleans things up a bit, and adds a footprint for the PIR motion sensor that he forgot to design into this version. The idea is that each lamp monitors motion in the room, switching the light on and off again as necessary. A light-dependent resistor ensures that the bulb is only powered up if the room is dark so as not to waste electricity during the day.

The build includes a sensor package that reports back temperature and humidity data. Communications are provided by a WR703N router rolled into each of the four units installed in his house. With this kind of hardware at his disposal it should be a snap to control every IR remote control device in his house via the network by adding an IR LED and some code to the lamps.

nerf-sentry

Nerf Sentry Gun For The Apocalypse

nerf-sentry

If you’ve ever wanted to shoot someone with a Nerf gun, but just didn’t have the energy to get off the couch, this hack may be for you. It’s also a good way to ward off zombies if another apocalypse, Mayan or otherwise, is on the horizon.

Although the effects are very cool, as seen in the video after the break, the method for making this setup was quite simple. The requirements for this project were that the gun could not be permanently modified, and everything had to fire automatically. These restrictions may have contributed to the simplicity of the design as many of us would start breaking things before we had to.

Instead of some elaborate hack, the trigger was tied back in the firing position at all times. A relay was then used to interrupt the power supply to the mechanism allowing an Arduino equipped with an infrared sensor to automatically control the firing. The setup is explained after the break, but skip to around 1:55 if you’d rather just see the guns in action. Continue reading “Nerf Sentry Gun For The Apocalypse”

An Umbrella Stand That Tells You The Weather Forecast

This project takes an umbrella stand and gives it the ability to let you know if you need to take an umbrella when you leave the house. The image above is a concept drawing, but a first prototype was built and seems to work quite well. See for yourself in the video after the break.

The project was put together by openPicus. They sell a prototyping module called the Flyport which provides a WiFi connection to your projects. This board connects to a set of LEDs which are used to illuminate the translucent plastic umbrella stand. But you might not notice the color change if the LEDs were always on. Also designed into the system is a PIR motion sensor. When you walk toward the door to leave for the day it switches on the appropriate color — green for clear, blue for raining, and red for storming — catching your attention in time to grab an umbrella as you pass by.

You don’t need to spend a bundle to pull off a hack like this. You can scavenge for a PIR sensor, use one color of LEDs just to tell you when rain or storms are forecast, and an ENC28J60 is a cheap and easy Ethernet alternative to using WiFi.

Continue reading “An Umbrella Stand That Tells You The Weather Forecast”