DIY Air Bearings, No Machining Required

Seeing a heavy load slide around on nearly frictionless air bearings is pretty cool; it’s a little like how the puck levitates on an air hockey table. Commercial air bearings are available, of course, but when you can build these open-source air bearings, why bother buying?

One of the nice things about [Diffraction Limited]’s design is that these bearings can be built using only simple tools. No machining is needed past what can be easily accomplished with a hand drill, thanks to some clever 3D-printed jigs that allow you to drill holes with precision into stainless steel discs you can buy on the cheap. An extremely flat surface is added to the underside of these discs thanks to another jig, some JB Weld epoxy, and a sheet of float glass to serve as an ultra-flat reference. Yet more jigs make it easy to scribe air channels into the flat surface and connect them to the air holes through a bit of plaster of Paris, which acts as a flow restriction. The video below shows the whole process and a demo of the bearings in action.

[Diffraction Limited] mentions a few applications for these air bearings, but the one that interests us most is their potential use in linear bearings; a big CNC cutter using these air bearings would be pretty cool. We seen similar budget-friendly DIY air bearings before, including a set made from used graphite EDM electrodes.

Continue reading “DIY Air Bearings, No Machining Required”

Nuke Your Own Uranium Glass Castings In The Microwave

Fair warning: if you’re going to try to mold uranium glass in a microwave kiln, you might want to not later use the oven for preparing food. Just a thought.

A little spicy…

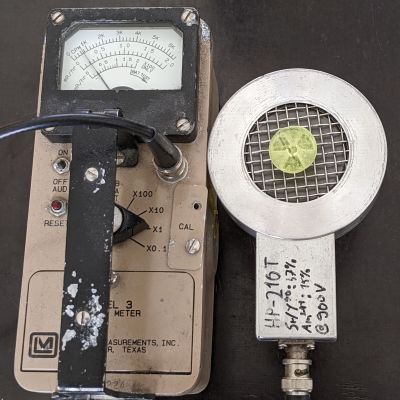
Granted, uranium glass isn’t as dangerous as it might sound. Especially considering its creepy green glow, which almost seems to be somehow self-powered. The uranium glass used by [gigabecquerel] for this project is only about 1% U3O8, and isn’t really that radioactive. But radioactive or not, melting glass inside a microwave can be problematic, and appropriate precautions should be taken. This would include making the raw material for the project, called frit, which was accomplished by smacking a few bits of uranium glass with a hammer. We’d recommend a respirator and some good ventilation for this step.

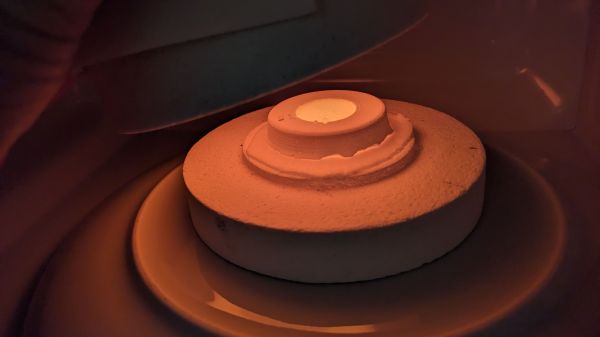
The powdered uranium glass then goes into a graphite-coated plaster mold, which was made from a silicone mold, which in turn came from a 3D print. The charged mold then goes into a microwave kiln, which is essentially an insulating chamber that contains a silicon carbide crucible inside a standard microwave oven. Although it seems like [gigabecquerel] used a commercially available kiln, we recently saw a DIY metal-melting microwave forge that would probably do the trick.

The actual casting process is pretty simple — it’s really just ten minutes in the microwave on high until the frit gets hot enough to liquefy and flow into the mold. The results were pretty good; the glass medallion picked up the detail in the mold, but also the crack that developed in the plaster. [gigabecquerel] thinks that a mold milled from solid graphite would work better, but he doesn’t have the facilities for that. If anyone tries this out, we’d love to hear about it.

Dog Bowls Show The Versatility Of Ceramic Slip Casting

Here at Hackaday, we feature projects that are built of just about every material imaginable. Silicon-spangled fiber-reinforced epoxy resin is our primary medium, but we see plastic, wood, steel, aluminum, and even textiles from time to time. It’s not often we see slip-cast ceramic molding, though, and when it pops up, it’s always good to take a look at this versatile manufacturing method.

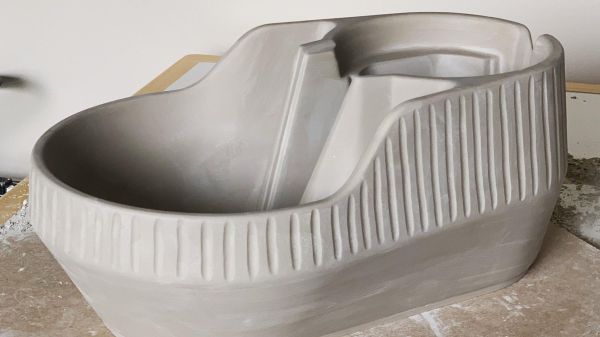
The back-story on this one is that [thoughtfulocean], a mechanical engineer idled by COVID lockdowns, wanted custom water bowls for his dogs, one of whom is clearly a grumpy Ewok. The design started with a 3D-print of the final vessel, printed in sections and glued together. These were used to create a two-piece plaster mold into which a watery slurry of clay, or slip, was poured. The plaster mold dehydrates the slip, leaving behind a semi-solid layer of clay of the desired thickness once the excess slip is poured off. The resulting casting is then fired in a kiln and glazed.

Of course, [thoughtfulocean] ran into a few problems along the way. The first mold was warped thanks to the mold box bowing under pressure from the plaster, so the whole molding process had to be revamped. The finished bowl also shrunk less than expected after firing, which led to some more revisions. But the finished bowl look really nice, and the included pump and filter keeps the Ewok’s water free from the yuck a dog’s face can introduce. As a bonus, it sounds like [thoughtfulocean] might have created a marketable product from all this. Take that, COVID!

Slip-casting ceramic may not be all that common around here, but ceramic as a material isn’t exactly a stranger. And who says slip casting is limited to ceramic? After all, we’ve seen a similar method used with plastic resin.

[via r/engineering]

Casting Concrete With 3D Printed Molds

[Thomas Sanladerer] wanted to create some molds using 3D printing for concrete and plaster. He used a delta printer with flexible filament and documented his process in the video below.

If you’ve printed with flexible filaments before, you know you need an extruder that has a contained path. [Tom] borrowed a printer, but it didn’t have that kind of set up. The first step was to swap extruders with another printer.

Continue reading “Casting Concrete With 3D Printed Molds”

Fail Of The Week: Casting A Bolt In A 3D-Printed Mold

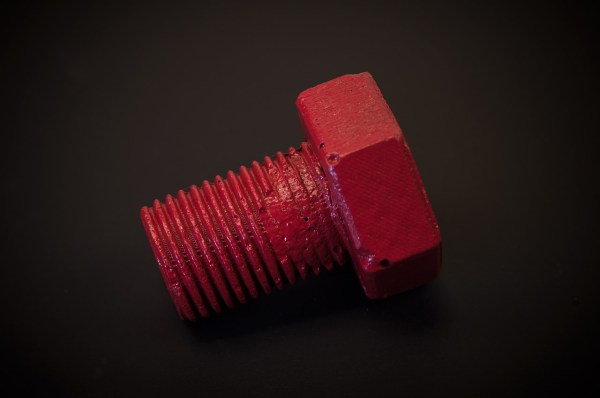
Here’s a weird topic as a Fail of the Week. [Pete Prodoehl] set out to make a bolt the wrong way just to see if he could. Good for you [Pete]! This is a great way to learn non-obvious lessons and a wonderful conversation starter which is why we’re featuring it here.

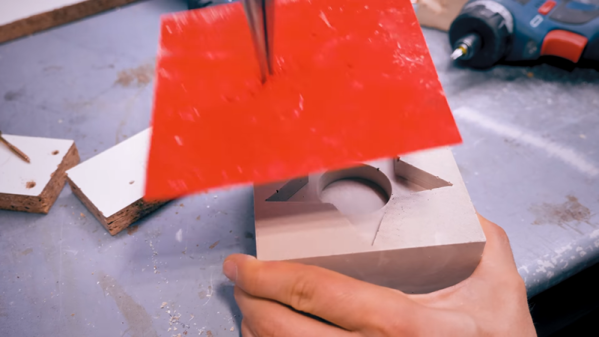
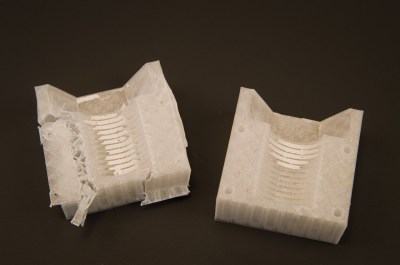
The project starts off great with a model of the bolt being drawn up in OpenSCAD. That’s used to create a void in a block which then becomes two parts with pegs that index the two halves perfectly. Now it’s time to do the casting process and this is where it goes off the rail. [Pete] didn’t have any flexible filament on hand, nor did he have proper mold release compound. Considering those limitations, he still did pretty well, arriving at the plaster bold seen above after a nice coat of red spray paint.

One side of the mold didn’t make it

He lost part of the threads getting the two molds apart, and then needed to sacrifice one half of the mold to extract the thoroughly stuck casting. We’ve seen quite a bit of 3D printed molds here, but they are usually not directly printed. For instance, here’s a beautiful mold for casting metal but it was made using traditional silicon to create molds of the 3D printed prototype.

Thinking back on it, directly 3D printed molds are often sacrificial. This method of pewter casting is a great example. It turns out gorgeous and detailed parts from resin molds that can stand up to the heat but must be destroyed to remove the parts.

So we put it to you: Has anyone out there perfected a method of reusable 3D printed molds? What printing process and materials do you use? How about release agents — we have a guide on resin casting the extols the virtues of release agent but doesn’t have any DIY alternatives. What has worked as a release agent for you? Let us know in the comments below.

This Mask Will Make You A Psycho

Videos games are a cornucopia of project ideas well-suited to the talents of makers and hackers, and Halloween is as good a time as any to show them off! Reddit user [Tavarin], a huge fan of the Boderlands video games, whipped up a plaster mask — replete with glowing eyes — of one of the game’s signature enemies: the Psycho.

[Tavarin]’s secret to forming comfortable plaster masks is to open his jaw while the wrap is setting  — that way he’ll be able to talk without breaking the mask off his face. Hot gluing in and modifying a 60mm PC fan and a pair of lenses meant that the only thing standing between him and a lot of sanding to shape the mask’s details was a few layers of thick plaster mix.

Continue reading “This Mask Will Make You A Psycho”

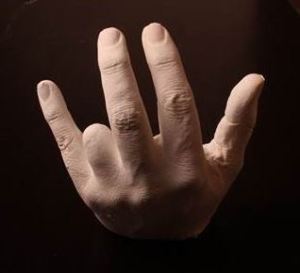
Casting a hand part 1

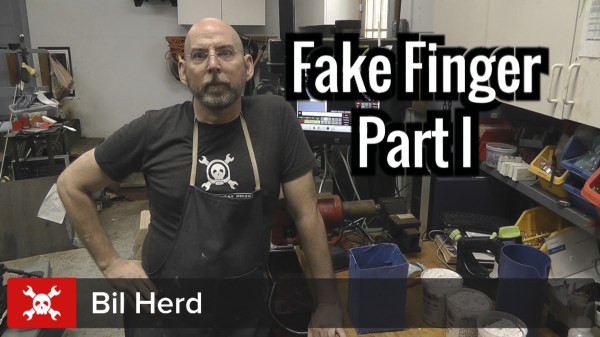
[Bil’s] Quest For A Lost Finger: Episode I

A little over a year ago I had a semi-gruesome accident; I stepped off of a ladder and I caught my wedding ring on a nail head. It literally stripped the finger off the bone. This was in spite of me being a safety-freak and having lived a whole second life doing emergency medicine and working in trauma centers and the like. I do have trauma center mentality which means, among other things, that I know you can’t wind the clock back.

hand9A few seconds make an incredible differences in people’s lives. Knowing that it couldn’t be undone, I stayed relaxed and in the end I have to say I had a good time that day as I worked my way through the system (I ended  up in a Philadelphia trauma center with a nearby hand specialist) as I was usually the funniest guy in the room. Truth be told they ask incredibly straight questions like”are you right handed?”  “Well I am NOW”.

So now I could really use a bit of a body hack, having seen the X-Finger on Hackaday long before I knew that I would one day work with them, I was hoping that we could get one to work for me. In speaking with a couple of the mechanical engineers on the Hackaday staff we decided to get [James Hobson] and [Rich Bremer] involved and that the best way to do it was to get a casting of my injured hand out to them.


Continue reading “[Bil’s] Quest For A Lost Finger: Episode I”