This Robot Barfs Comics!

If there’s one thing that’s more fun than a comic, it’s a randomly generated comic. Well, perhaps that’s not true, but Reddit user [cadinb] wrote some software to generate a random comic strip and then built a robot case for it. Push a button on the robot and you’re presented with a randomly generated comic strip from the robot’s mouth.

The software that [cadinb] wrote is in Processing, an open source programming language and “sketchbook” for learning to code if you’re coming from a visual arts background. The Processing code determines how the images are cropped and placed and what kind of background they get. Each image is hand drawn by [cadinb] and has information associated with it so the code knows what the main focus of the image is. Once the panels are created, the final image is passed on to a thermal printer for printing. Everything is controlled from a Python script running on a Raspberry Pi and the code, strip artwork, and case is all available online to check out.

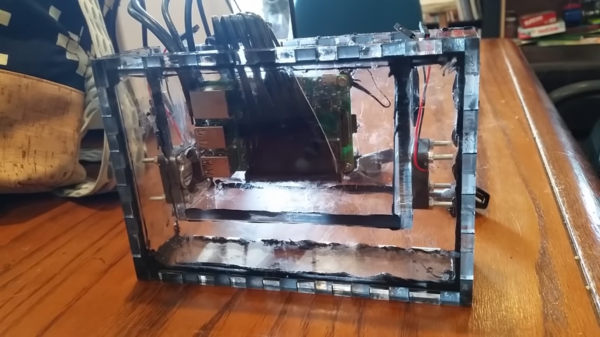
Now that the comic can print, a case is needed for the printer and controls. [cadinb] designed a case in Illustrator after creating a prototype out of foam core. The design was laser cut and then coloured – the main body with fabric dye and the arms stained with coffee!

Now [cadinb] has a robot that can sit on his table at conventions and a fan can press a button and have a randomly generated comic strip printed out before their eyes! We have a neat article about printing a comic on a strand of hair, and one about bringing the Banana Jr. 6000 to life!

Continue reading “This Robot Barfs Comics!”

Raspberry Pi Keeps Cool

In general, heat is the enemy of electronics. [Christopher Barnatt] is serious about defeating that enemy and did some experiments with different cooling solutions for the Raspberry Pi 3. You can see the results in the video below.

A simple test script generated seven temperature readings for each configuration. [Barnatt] used a bare Pi, a cheap stick-on heatsink, and then two different fans over the heatsink. He also rigged up a large heatsink using a copper spacer and combined it with the larger of the two fans.

Continue reading “Raspberry Pi Keeps Cool”

Internet Of Laundry — Let The ESP8266 Watch Your Dirty Drawers Get Clean

When you think of world-changing devices, you usually don’t think of the washing machine. However, making laundry manageable changed not only how we dress but how much time people spent getting their clothes clean. So complaining about how laborious our laundry is today would make someone from the 1800s laugh. Still, we all hate the laundry and [Andrew Dupont], in particular, hates having to check on the machine to see if it is done. So he made Laundry Spy.

How do you sense when the machine — either a washer or a dryer — is done? [Andrew] thought about sensing current but didn’t want to mess with house current. His machines don’t have LED indicators, so using a light sensor wasn’t going to work either. However, an accelerometer can detect vibrations in the machine and most washers and dryers vibrate plenty while they are running.

The four-part build log shows how he took an ESP8266 and made it sense when the washer and dryer were done so it could text his cell phone. He’d already done a similar project with an Adafruit HUZZAH. But he wanted to build in some new ideas and currently likes working with NodeMCU. While he was at it he upgraded the motion sensor to an LIS3DH which was cheaper than the original sensor.

[Andrew] already runs Node – RED on a Raspberry Pi, so incorporating this project with his system was a snap. Of course, you could adapt the approach to lots of other things, as well. The device produces MQTT messages and Node – RED subscribes to them. The Pushover handles the text messaging. Node – RED has a graphical workflow that makes integrating all the pieces very intuitive. Here’s the high-level workflow:

You might wonder why he didn’t just have the ESP8266 talk directly to Pushover. That is possible, of course, but in part 2, [Andrew] enumerates some good reasons for his design. He wants to decouple components in the system for easier future upgrades. And MQTT is simple to publish on the sensor side of things compared to API calls which are handled by the Raspberry Pi for now.

Laundry monitoring isn’t a unique idea and everyone has a slightly different take on it, even some Hackaday authors. If phone notification is too subtle for you, you can always go bigger.

Five Steps To TensorFlow On The Raspberry Pi

If you have about 10 hours to kill, you can use [Edje Electronics’s] instructions to install TensorFlow on a Raspberry Pi 3. In all fairness, the amount of time you’ll have to babysit is about an hour. The rest of the time is spent building things and you don’t need to watch it going. You can see a video on the steps required below.

You need the Pi with at least a 16 GB SD card and a USB drive with at least 1 GB of free space. This not only holds the software, but allows you to create a swap file so the Pi will have enough virtual memory to build everything required.

Continue reading “Five Steps To TensorFlow On The Raspberry Pi”

Suitcase Computer Reborn With Raspberry Pi Inside

Fun fact, the Osborne 1 debuted with a price tag equivalent to about $5,000 in today’s value. With a gigantic 9″ screen and twin floppy drives (for making mix tapes, right?) the real miracle of the machine was its portability, something unheard of at the time. The retrocomputing trend is to lovingly and carefully restore these old machines to their former glory, regardless of how clunky or underpowered they are by modern standards. But sometimes they can’t be saved yet it’s still possible to gut and rebuild the machine with modern hardware, like with this Raspberry Pi used to revive an Osborne 1.

Purists will turn their nose up at this one, and we admit that this one feels a little like “restoring” radios from the 30s by chucking out the original chassis and throwing in a streaming player. But [koff1979] went to a lot of effort to keep the original Osborne look and feel in the final product. We imagine that with the original guts replaced by a Pi and a small LCD display taking the place of the 80 character by 24 line CRT, the machine is less strain on the shoulder when carrying it around. (We hear the original Osborne 1 was portable in the same way that an anvil is technically portable.) The Pi runs an emulator to get the original CP/M experience; it even runs Wordstar. The tricky part about this build was making the original keyboard talk to the Pi, which was accomplished with an Arduino that translates key presses to USB.

As an aside, if reading this has given you a twinge of nostalgia and you’re on the Eastern seaboard you may want to check out more vintage gear at the VCF East this weekend. If you hail from Europe, get your hack on with CP/M and a retrocomputing badge at Hackaday Belgrade one wee from now.

We’ve seen the Raspberry Pi pressed into retrocomputing duty before, of course. Here’s one used to emulate a Commodore 1541 disk drive, and another in the laptop Clive Sinclair never built.

Continue reading “Suitcase Computer Reborn With Raspberry Pi Inside”

Location Sharing With Google Home

With Google’s near-monopoly on the internet, it can be difficult to get around in cyberspace without encountering at least some aspect of this monolithic, data-gathering giant. It usually takes a concerted effort, but it is technically possible to do. While [Mat] is still using some Google products, he has at least figured out a way to get Google Home to work with location data without actually sharing that data with Google, which is a step in the right direction.

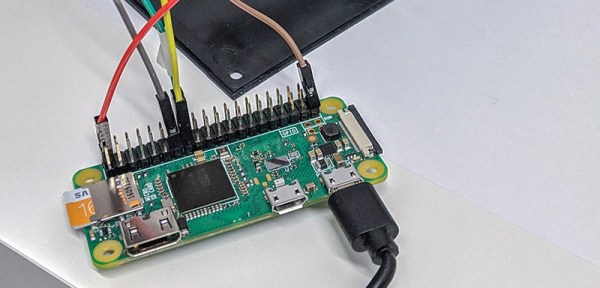
[Mat]’s goal was to use Google’s location sharing features through Google Home, but without the creepiness factor of Google knowing everything about his life, and also without the hassle of having to use Google Maps. He’s using a few things to pull this off, including a NodeRED server running on a Raspberry Pi Zero, a free account from If This Then That (IFTTT), Tasker with AutoRemote plugin, and the Google Maps API key. With all of that put together, and some configuration of IFTTT he can ask his Google assistant (or Google Home) for location data, all without sharing that data with Google.

This project is a great implementation of Google’s tools and a powerful use of IFTTT. And, as a bonus, it gets around some of the creepiness factor that Google tends to incorporate in their quest to know all the data.

Continue reading “Location Sharing With Google Home”

Welcome To The Internet Of Hamsters

It was only a matter of time. Everything else is getting its data logged and reported to the Internet for detailed analysis, so why should our rodents be any different? The cover story is that [Nicole Horward] hooked her pet hamster Harold up to the web because she wanted to see if he was getting as much exercise as he should. The real reason is, of course, that Harold wanted to show off to his “friends” on Hamsterbook.

The hardware side of this hack is very simple, a magnetic door sensor (like the kind used in alarm systems) is used to detect each time the wheel makes a complete rotation. The sensor is hooked up to the GPIO pins of a Raspberry Pi, where it’s read by a Python script. A small LCD screen was added to give some visual feedback on Harold’s daily activity, and the whole thing was boxed up in a laser cut enclosure.

That gave [Nicole] a cute little display next to Harold’s cage, but it didn’t do much for analyzing his activity. For that, a script is used to upload the data every minute to a ThingSpeak channel via MQTT. This automatically generates attractive graphs from the raw data, making it much easier to visualize what’s happening over the long term.

Now might be a good time to brush up on your MQTT knowledge, so that your pet could be the next to join the IoT revolution.

Continue reading “Welcome To The Internet Of Hamsters”