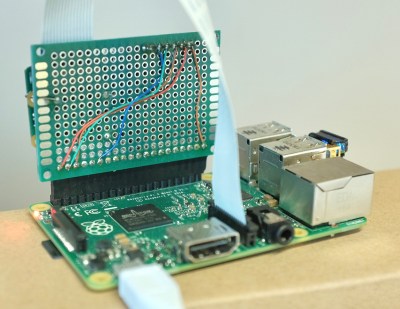
Trackpad with Arduino PS/2-to-USB converter

Raspberry Pi Trackpad From Salvaged Trackpad Plus Arduino

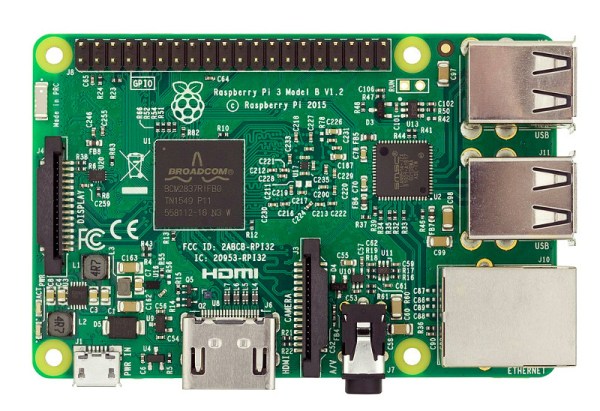
Old laptops are easy to find and many have a trackpad with a PS/2 interface hardwired into the guts of the laptop. [Build It] wanted one of those trackpads for use in the DIY Raspberry Pi laptop he’s working on. But the Raspberry Pi has no PS/2 input, and he read that a PS/2 to USB adapter wouldn’t be reliable enough. His solution? Wire the trackpad to an Arduino and have the Arduino convert the trackpad’s PS/2 to USB.

After removing a few screws, he had the trackpad free of the laptop. Looking up the trackpad’s part number online he found the solder pads for data, clock and five volts. He soldered his own wires to them, as well as to the trackpad’s ground plane, and from there to his Arduino Pro Micro. After installing the Arduino PS/2 mouse and the Mouse and Keyboard libraries he wrote some code (see his Instructables page). The finishing touch was to use generous helpings of hot glue to secure all the wires, as well as the Arduino, to the back to the trackpad. By plugging a USB cable into the Arduino, he now had a trackpad that could plug in anywhere as a USB trackpad. Watch [Build It] put it all together step-by-step in the video below.

Continue reading “Raspberry Pi Trackpad From Salvaged Trackpad Plus Arduino”

Almost An Amiga For Not A Lot

If you ask someone old enough to have been a computer user in the 16-bit era what machine they had, you’ll receive a variety of answers mentioning Commodore, Atari, Apple, or even PC brands. If your informant lay in the Commodore camp though, you’ll probably have an impassioned tale about their Amiga, its capabilities, and how it was a clearly superior platform whose potential was wasted. The Amiga was for a while one of the most capable commonly available computers, and became something of a cult within its own lifetime despite the truly dismal performance of the various companies that owned it. Today it retains one of the most active retro computer scenes, has an active software community, and even sees new hardware appearing.

For Amiga enthusiasts without the eye-watering sums required to secure one of the new Amiga-compatible machines with a PowerPC or similar at its heart, the only option to relive the glory beside finding an original machine is to run an emulator. [Marco Chiapetta] takes us through this process using a Raspberry Pi, and produces an Amiga that’s close enough to the real thing to satisfy most misty-eyed enthusiasts.

He starts with a cutesy Amiga-themed Raspberry Pi case that while it’s not essential for the build, makes an entirely appropriate statement about his new machine, We’re taken through the set-up of the Amibian emulator distro, then locating a set of Amiga ROMs. Fortunately that last step is easier than you might think, even without trawling for an illicit copy.

The result is an Amiga. OK, it’s not an Amiga, but without the classic Commodore logo is it any more not an Amiga than some of the other non-branded Amiga-compatible boards out there? Less talking, more classic gaming!

We’ve covered quite a few Amigas on these pages. Getting an A500 online was the subject of a recent post, and we brought you news of a new graphics card for the big-box Amiga’s Zorro slot.

Hackaday Prize Entry: Dongle For A Headless Pi

Mass production means that there’s a lot of great hardware out there for dirt cheap. But it also means that the manufacturer isn’t going to spend years working on the firmware to squeeze every last feature out of it. Nope, that’s up to us.

[deqing] took a Bluetooth Low Energy / USB dongle and re-vamped the firmware to turn it into a remote keyboard and mouse, and then wrote a phone app to control it. The result? Plug the USB dongle in, and the computer thinks it sees a keyboard and mouse. Connect the phone via BLE, and you’re typing — even if you don’t have your trusty Model F by your side.

[Deqing] points out that ergonomics and latency will make you hate using this in the long term, but it’s just meant to work until you’ve got SSH up and running on that headless single-board Linux thing. If you’ve ever worked with the USB or BLE specifications, you can appreciate that there’s a bit of work behind the scenes in making everything plug and play, and the web-based interface is admirably slick.

Kudos, [deqing]!

Hackaday Links Column Banner

Hackaday Links: July 16, 2017

[Carl Bass] has joined the board at Formlabs. This is interesting, and further proof that Print The Legend is now absurdly out of date and should not be used as evidence of anything in the world of 3D printing.

Here’s something cool: a breadboardable dev board for the Parallax Propeller.

Finally, after years of hard work, there’s a change.org petition to stop me. I must congratulate [Peter] for the wonderful graphic for this petition.

Want some flexible circuits? OSHPark is testing something out. If you have an idea for a circuit that would look good on Kapton instead of FR4, shoot OSHPark an email.

SeeMeCNC has some new digs. SeeMeCNC are the creators of the awesome Rostock Max 3D printer and hosts of the Midwest RepRap Festival every March. If you’ve attended MRRF, you’re probably aware their old shop was a bit on the small side. As far as I can figure, they’ll soon have ten times the space as the old shop. What does this mean for the future of MRRF? Probably not much; we’ll find out in February or something.

Rumors of SoundCloud’s impending demise abound. There is some speculation that SoundCloud simply won’t exist by this time next year. There’s a lot of data on the SoundCloud servers, and when it comes to preserving our digital heritage, the Internet Archive (and [Jason Scott]) are the go-to people. Unfortunately, it’s going to cost a fortune to back up SoundCloud, and it would be (one of?) the largest projects the archive team has ever undertaken. Here’s your donation link.

If you’re looking for a place to buy a Raspberry Pi Zero or a Pi Zero W, there’s the Pi Locator, a site that pings stores and tells you where these computers are in stock. Now this site has been expanded to compare the price and stock of 2200 products from ModMyPi, ThePiHut, Pi-Supply, and Kubii.

Automating Plant Care

[Daniyal]’s goal is to build an automated garden that allows him to grow plants in any environment he chooses. He’s got a good start with this rig, which is controlled by a Pi Zero connected via serial to an Arduino Mega clone, which  in turn controls a bank of relays and sensors.

Monitoring the environment is a temperature and humidity sensor as well as a series of  six soil moisture sensor spikes. The relays control the water pump(s?) and lights, allowing [Daniyal] to maintain specific conditions depending on what he’s growing.

[Daniyal] has ambitious goals for the project. The Pi has a camera on it, and he hopes to not only maintain the greenhouse from the Internet, but also figure out how to monitor plant growth automatically, so that the Pi can measure plant growth and adjust the conditions without his input.

We’ve covered a lot of very cool horticulture projects here on HaD, including radio-connected soil sensors, using G-cal to create an internet of lawns, and the Garden of Eden watering kit.

Making A Small-Scale Brewery With A Raspberry Pi And Python

No doubt many Hackaday readers will have tried their hand at home brewing. It’s easy enough, you can start with a can of hopped malt extract and a bag of sugar in a large bucket in your kitchen and achieve a decent enough result. Of course, once you get the taste it’s a field of infinite possibilities, so many enthusiasts go further into the realm of beer making with specialty ingredients and carefully controlled mash tuns.

Such an inductee into the brewery arts is [Christopher Aedo], who has documented his automated brewing system driven by a Raspberry Pi running CraftBeerPi. And it’s an impressive setup, with boil kettle, mash tun, and heat exchanger, a 5KW heating element, and all associated valves, pipes, pumps, and sensors. This ensures consistency and fine control over temperature over the long-term at all stages of the brew, something that would be very difficult to achieve manually at this scale.

The whole brewery is mounted on a cart for portability and has been used for a lot of brew cycles of many different styles. We can’t help a touch of envy at the array of beer taps in his kitchen.

Over the years we’ve brought you a few brewing projects. Another Pi-based setup graced these pages in 2012, as did a brewery using a Lego Mindstorms controller. Top marks go though to the brewer who fought his beer belly through brewing machinery powered by an exercise bike.

Via Recantha.

Atari 2600 In A Game Cartridge

[PJ Evans] had a ruined game cartridge lying around, just waiting for a project. As Activision’s F-14 Tomcat game for the Atari 2600 console, it seemed ripe for use as a project enclosure of some sort. When he came across a couple of 9-pin D-sub joystick ports, he had an idea. He realized his Rasperry Pi Zero could fit inside the cartridge. Add a power button, TV color selector, difficulty switch, as well as select and reset buttons, and you have an emulator.

[PJ]’s Pi Zero had more than enough GPIO pins to accommodate all of those buttons and switches plus a bunch more for the joysticks. Why not put the emulator inside a game cartridge? In terms of software [PJ] looked into Adafruit’s Retro Gaming with Raspberry Pi resource, which has tons of suggestions for setting up game emulators. He decided on the RetroPie operating system to help him map out all of the pins, with Stella doing the actual Atari 2600 emulation.

Thanks, @seb_ly]!