The Raspberry Pi Becomes A SCSI Device

SCSI devices were found in hundreds of different models of computers from the 80s, from SUN boxes to cute little Macs. These hard drives and CDROMs are slowly dying, and with that goes an entire generation of technology down the drain. Currently, the best method of preserving these computers with SCSI drives is the SCSI2SD device designed by [Michael McMaster]. While this device does exactly what it says it’ll do — turn an SD card into a drive on a SCSI chain — it’s fairly expensive at $70.

[GIMONS] has a better, cheaper solution. It’s a SCSI device emulator for the Raspberry Pi (original link dead, here’s the new location of this writeup). It turns a Raspberry Pi into a SCSI hard drive, magneto-optical drive, CDROM, or an Ethernet adapter using only some glue logic and a bit of code.

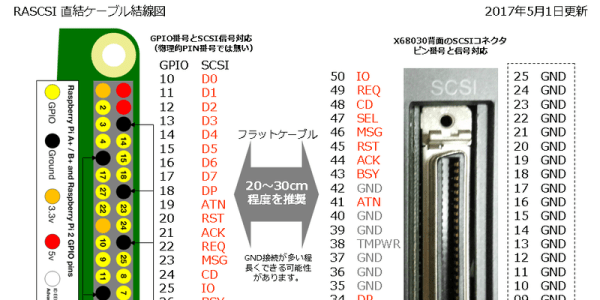
As far as the hardware goes, this is a pretty simple build. The 40-pin GPIO connector on the Pi is attached to the 50-pin SCSI connector through a few 74LS641 transceivers with a few resistor packs for pullups and pulldowns. The software allows for virtual disk devices – either a hard drive, magneto-optical drive, or a CDROM – to be presented from the Raspberry Pi. There’s also the option of putting Ethernet on the SCSI chain, a helpful addition since Ethernet to SCSI conversion devices are usually rare and expensive.

Officially, [GIMONS] built this SCSI hard drive emulator for the x68000 computer, developed by Sharp in the late 80s. While these are popular machines for retrocomputing aficionados in Japan, they’re exceptionally rare elsewhere — although [Dave Jones] got his mitts on one for a teardown. SCSI was extraordinarily popular for computers from the 70s through the 90s, though, and since SCSI was a standard this build should work with all of them.

If your retrocomputer doesn’t need a SCSI drive, and you’re feeling left out of the drive-emulation club, the good news is there’s a Raspberry Pi solution for that, too: this Hackaday Prize entry turns a Pi into an IDE hard drive.

Thanks [Gokhan] for the tip!

Raspberry Pi-Based Game Boy Emulator

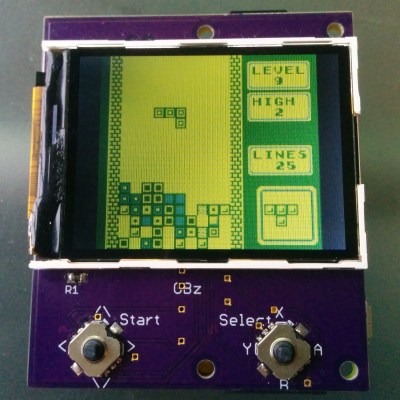
The most popular use for a Raspberry Pi, by far, is video game emulation. We see this in many, many forms from 3D printed Raspberry Pi cases resembling the original Nintendo Entertainment System to 3D printed Raspberry Pi cases resembling Super Nintendos. There’s a lot of variety out there for Raspberry Pi emulation, but [moosepr] is taking it to the next level. He’s building the smallest Pi emulation build we’ve ever seen.

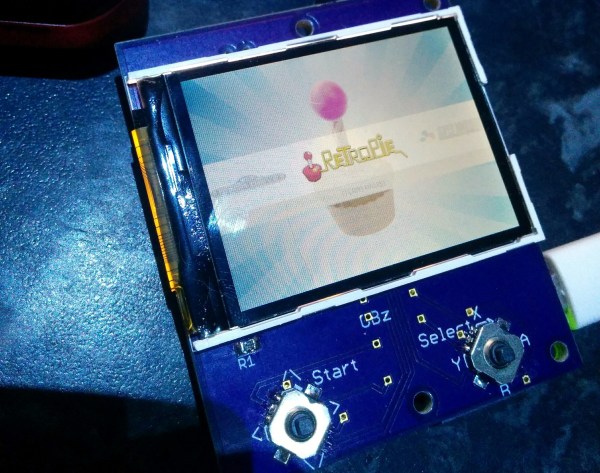
This build is based on the Pi Zero and a 2.2″ (0.56 dm) ili9341 TFT display. This display has a resolution of 240×320 pixels, which is close enough to the resolution of the systems the Pi Zero can emulate. The Pi Zero and display are attached to a beautiful purple breakout board (shared on OSH Park) along with a few 5-way nav switches, a charger for a Lipo battery, and a few other bits and bobs.

Right now, [moosepr] is experimenting with adding sound to his board. It’s easy enough to get sound out of a Pi Zero — it’s just PWM coming from a few pins — but audio also needs an amp, a speaker, and more space on the board. To solve this problem, [moose] found a few piezo transducers from musical greeting cards. These are designed to be thin and as loud as possible, and attaching these directly to the PWM pins providing audio might just work. This is a project to keep an eye on, if only to see if cheap piezos work for low-fi audio in retro emulators.

Hackaday Links Column Banner

Hackaday Links: November 20, 2016

The Raspberry Pi 2 is getting an upgrade. No, this news isn’t as big as you would imagine. The Raspberry Pi 2 is powered by the BCM2836 SoC, an ARM Cortex-A7 that has served us well over the years. The ‘2836 is going out of production, and now the Raspberry Pi foundation is making the Pi 2 with the chip found in the Raspberry Pi 3, the BCM2837. Effectively, the Pi 2 is now a wireless-less (?) version of the Pi 3. It still costs $35, the same as the Pi 3, making it a rather dumb purchase for the home hacker. There are a lot of Pi 2s in industry, though, and they don’t need WiFi and Bluetooth throwing a wrench in the works.

So you’re using a Raspberry Pi as a media server, but you have far too many videos for a measly SD card. What’s the solution? A real server, first off, but there is another option. WDLabs released their third iteration of the PiDrive this week. It’s a (spinning) hard disk, SD card for the software, and a USB Y-cable for powering the whole thing. Also offered is a USB thumb drive providing 64 GB of storage, shipped with an SD card with the relevant software.

Mr. Trash Wheel is the greatest Baltimore resident since Edgar Allan Poe, John Waters, and Frank Zappa. Mr. Trash Wheel eats trash, ducks, kegs, and has kept Inner Harbor relatively free of gonoherpasyphilaids for the past few years. Now there’s a new trash wheel. Professor Trash Wheel will be unveiled on December 4th.

YOU MUST VOICE CONTROL ADDITIONAL PYLONS. With an ‘official’ StarCraft Protoss pylon and a Geeetech voice recognition module, [Scott] built a voice controlled lamp.

Everyone loves gigantic Nixie tubes, so here’s a Kickstarter for a gigantic Nixie clock. There are no rewards for just the tube, but here’s a manufacturer of 125mm tall Nixies.

Here’s an interesting think piece from AdvancedManufacturing.org. The STL file format is ancient and holding us all back. This much we have known since the first Makerbot, and it doesn’t help that Thingiverse is still a thing, and people don’t upload their source files. What’s the solution? 3MF and AMF file formats, apparently. OpenSCAD was not mentioned in this think piece.

Add Robotic Farming To Your Backyard With Farmbot Genesis

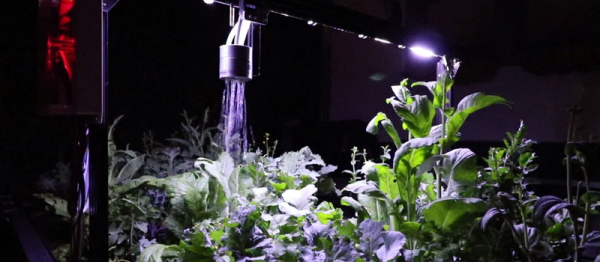
Growing your own food is a fun hobby and generally as rewarding as people say it is. However, it does have its quirks and it definitely equires quite the time input. That’s why it was so satisfying to watch Farmbot push a weed underground. Take that!

Farmbot is a project that has been going on for a few years now, it was a semifinalist in the Hackaday Prize 2014, and that development time shows in the project documented on their website. The robot can plant, water, analyze, and weed a garden filled with arbitrarily chosen plant life. It’s low power and low maintenance. On top of that, every single bit is documented on their website. It’s really well done and thorough. They are gearing up to sell kits, but if you want it now; just do it yourself.

The bot itself is exactly what you’d expect if you were to pick out the cheapest most accessible way to build a robot: aluminum extrusions, plate metal, and 3D printer parts make up the frame. The brain is a Raspberry Pi hooked to its regular companion, an Arduino. On top of all this is a fairly comprehensive software stack.

The user can lay out the garden graphically. They can get as macro or micro as they’d like about the routines the robot uses. The robot will happily come to life in intervals and manage a garden. They hope that by selling kits they’ll interest a whole slew of hackers who can contribute back to the problem of small scale robotic farming.

Raspberry Pi 3 Gets USB, Ethernet Boot

The Raspberry Pi is a great computer, even if it doesn’t have SATA. For those of us who have lost a few SD cards to the inevitable corruption that comes from not shutting a Pi down properly, here’s something for you: USB Mass Storage Booting for the Raspberry Pi 3.

For the Raspberry Pi 1, 2, Compute Module, and Zero, there are two boot modes – SD boot, and USB Device boot, with USB Device boot only found on the Compute Module. [Gordon] over at the Raspberry Pi foundation spent a lot of time working on the Broadcom 2837 used in the Raspberry Pi 3, and found enough space in 32 kB to include SD boot, eMMC boot, SPI boot, NAND flash, FAT filesystem, GUID and MBR partitions, USB device, USB host, Ethernet device, and mass storage device support. You can now boot the Raspberry Pi 3 from just about anything.

The documentation for these new boot modes goes over the process of how to put an image on a USB thumb drive. It’s not too terribly different from the process of putting an image on an SD card, and the process will be streamlined somewhat in the next release of rpi-update. Some USB thumb drives do not work, but as long as you stick with a Sandisk or Samsung, you should be okay.

More interesting than USB booting is the ability for the Pi 3 to boot over the network. Booting over a network is nothing new – the Apple II could do it uphill both ways in the snow, but the most common use for the Pi is a dumb media player that connects to all your movies on network storage. With network booting, you can easily throw a Pi on a second TV and play all that media in a second room. Check out the network booting tutorial here.

Hackaday Prize Entry: An Internet Of Things Microscope

For their entry into the Citizen Scientist portion of the Hackaday Prize, the folks at Arch Reactor, the St. Louis hackerspace, are building a microscope. Not just any microscope – this one is low-cost, digital, and has a surprisingly high magnification and pretty good optics. It’s the Internet of Things Microscope, and like all good apparatus for Citizen Scientist, it’s a remarkable tool for classrooms and developing countries.

When you think of ‘classroom microscope’, you’re probably thinking about a pile of old optics sitting in the back of a storage closet. These microscopes are purely optical, without the ability to take digital pictures. The glass is good, but you’re not going to get a scanning stage when you’re dealing with 30-year-old gear made for a classroom full of sticky-handed eighth graders.

The Internet of Things Microscope includes a scanning stage that moves across the specimen on the X and Y axes, stitching digital images together to create a very large image. That’s a killer feature for a cheap digital microscope, and the folks at Arch Reactor are doing this with a few cheap stepper motors and stepper motor drivers.

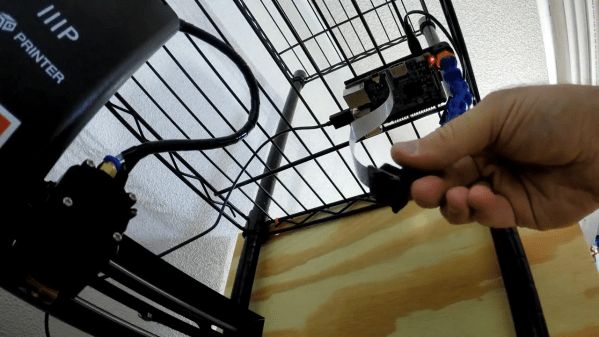
The rest of the electronics are built around a Raspberry Pi, Raspberry Pi camera (which recently got a nice resolution upgrade), and a some microscope eyepieces and objectives. Everything else is 3D printed, making this a very cheap and very accessible microscope that has some killer features.

ArduCAM Introduces A Third Party Raspberry Pi

There are hundreds of ARM-based Linux development boards out there, with new ones appearing every week. The bulk of these ARM boards are mostly unsupported, and in the worst case they don’t work at all. There’s a reason the Raspberry Pi is the best-selling tiny ARM computer, and it isn’t because it’s the fastest or most capable. The Raspberry Pi got to where it is today because of a huge amount of work from devs around the globe.

Try as they might, the newcomer fabricators of these other ARM boards can’t easily glom onto the popularity of the Pi. Doing so would require a Broadcom chipset. Now that the Broadcom BCM2835-based ODROID-W has gone out of production because Broadcom refused to sell the chips, the Raspberry Pi ecosystem has been completely closed.

Things may be changing. ArduCAM has introduced a tiny Raspberry Pi compatible module based on Broadcom’s BCM2835 chipset, the same chip found in the original Raspberry Pis A, B, B+ and Zero. This module is tiny – just under an inch square – and compatible with all of the supported software that makes the Raspberry Pi so irresistible.

nano-rpi-cmio-backAlthough this Raspberry Pi-compatible board is not finalized, the specs are what you would expect from what is essentially a Raspberry Pi Zero cut down to a square inch board. The CPU is listed as, “Broadcom BCM2835 ARM11 Processor @ 700 MHz (or 1GHz?)” – yes, even the spec sheet doesn’t know how fast the CPU is running – and RAM is either 256 or 512MB of LPDDR2.

There isn’t space on the board for a 2×20 pin header, but a sufficient number of GPIOs are broken out to make this board useful. You will fin a micro-SD card slot, twin micro-USB ports, connectors for power and composite video, as well as the Pi Camera connector. This board is basically the same size as the Pi Camera board, making the idea of a very tiny Linux-backed imaging systems tantalizingly close to being a reality.

It must be noted that this board is not for sale yet, and if Broadcom takes offense to the project, it may never be. That’s exactly what happened with the ODROID-W, and if ArduCAM can’t secure a supply of chips from Broadcom, this project will never see the light of day.