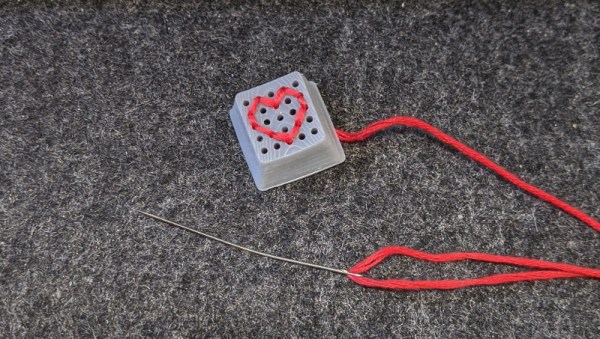
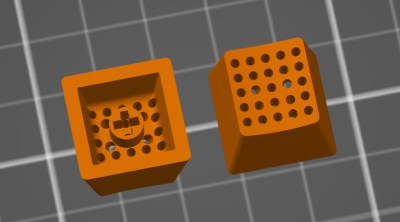
The idea is to take a standard keycap blank and pop an array of 25 holes in the face. Your thread or yarn is run through these holes, allowing you to create whatever shape you wish within the 5 x 5 matrix. While it’s somewhat tight quarters on the underside of the cap, nothing prevents you from using multiple colors or even materials to do your stitching. As an added bonus, the soft threads should provide a very comfortable and particularly tactile surface to tap on.
Now the most obvious application is to simply stitch up versions of all the alphanumeric keys, but there’s clearly room for some interpretation here. [Billie] has already shown off some simple iconography like a red heart and we’re sure creative folks will have no trouble coming up with all sorts of interesting needlepoint creations to top their prized mechanical keyboards.
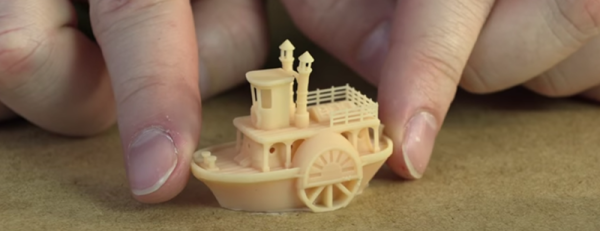
The intricate details necessary to make this idea work may be beyond the common desktop FDM 3D printer, so [Billie] ran these prototypes off on a resin printer (she attributes the visible layer lines to a hasty print). She’d love to hear feedback from other keyboard aficionados who’ve made the leap to liquid goo printing, so be sure to drop her a line if you print out a set of your own. It sounds like a new version is in the works which will provide a false bottom to cover the stitching from below, but functionally these should get you started.
It is funny how we always seem to pay the same for a new computer. The price stays the same, but the power of the computer is better each time. It would appear 3D printers may be the same story. After all, it wasn’t long ago that sinking a thousand bucks or more on a 3D printer wouldn’t raise any eyebrows. Yet today you can better printers for a fraction of that and $1,300 will buy you an open source Moai SLA printer as a kit. [3D Printing Nerd] took a field trip to MatterHackers to check the machine out and you can see the results in the video below.
The printer uses a 150 mW laser to make parts up to 130 mm by 130 mm by 180 mm. The laser spot size is 70 micron (compare that to the typical 400 micron tip on a conventional printer). The prints require an alcohol bath after they are done followed by a UV curing step that takes a few hours.
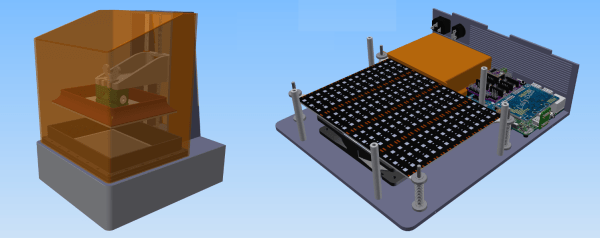
Resin-based SLA 3D printers are seen more and more nowadays but remain relatively uncommon. This Low Cost, Open Source, LCD based SLA 3D Printer design by [Dylan Reynolds] is a concept that aims to make DIY SLA 3D printing more accessible. The idea is to use hardware and manufacturing methods that are more readily available to hobbyists to create a reliable and consistent DIY platform.
[Dylan]’s goal isn’t really to compete with any of the hobbyist or prosumer options on the market; it’s more a test bed for himself and others, to show that a low-cost design that takes full advantage of modern hardware like the Raspberry Pi can be made. The result would be a hackable platform to let people more easily develop, experiment, or simply tamper with whatever part or parts they wish.
The Midwest RepRap Festival is the best 3D printer con on the planet. In the middle of Indiana, you’ll find the latest advances for CNC hot glue guns and the processes that make squirting filament machines better, more accurate, and more efficient. There’s more to 3D printing than just filament-based machines, though, and for the last few MRRFs we’ve been taking a look at resin-based machines.
While most of the current crop of resin printers use either DLP projectors or LCDs and a big, bright backlight [Mark Peng]’s Moai printer uses a 150 mW laser diode and galvos. This is somewhat rare in the world of desktop 3D printers, thanks in no small part to the ugliness between Formlabs and 3D Systems. Still, it’s a printer that looks fantastic and produces prints that are far beyond what’s possible with a filament-based machine.
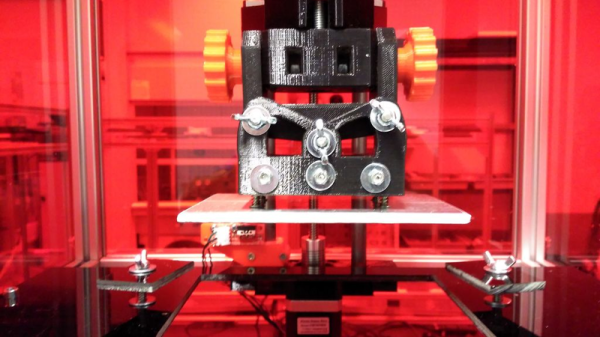
This open-source 3D printer was inspired by the Cristelia – SLA/LCD 3d printer and the Vulcanus MAX 3D printer (that he designed). RooBee One has an aluminium frame and an adjustable print area of 80x60x200 mm, with up to 150x105x200mm build volume using an ACER DLP projector. In addition, a fan on top of the printer was added to extract the toxic vapours outside and away from the printer operator. The electronics are based on the Arduino MEGA with the RAMPS 1.4 shield and one NEMA 17 stepper motor. As for the Arduino Mega firmware, [Aldric] choose to use Repetier, which he usually uses in his other printers.
The SLA resin he used is the Standard Blend Resin from Fun to Do Resins. These resins tend to release toxic airborne particles, so extra care should be taken to ventilate the area while printing and also do a proper cleaning afterwards.
You can get a glimpse of the printer making a small gear come to life in the following video:
The Peachy Printer, originally a crowdfunding campaign for a $100 stereolithography 3D printer, is now dead in the water.[Rylan Grayston], the creator of the Peachy Printer, announced that [David Boe] — investor, 50% owner of Peachy Printer, and business partner — had stolen over $300,000 in Kickstarter campaign funds. According to [Rylan], this money was used to build a house.
When the Peachy Printer was announced on Kickstarter, it was, by any measure, a game changing product. Unlike other stereolithographic printers like the Form 1 and DLP projector kit printers, the Peachy was cheap. It was also absurdly clever. Instead of using a stepper motor to raise a print out of a vat of resin, the Peachy Printer floated the resin on a vat of salt water. By slowly dripping salt water into this vat, the level of the resin rose up, allowing the galvanometers and laser diode to print the next layer of a 3D object. In our first coverage of the Peachy Printer, everyone was agog at how simple this printer was. It wasn’t a high-resolution printer, but it was a 3D resin printer that only cost $100. Even today, nearly three years after the launch of the Kickstarter campaign, there’s nothing like it on the market.
For the last two years, [Rylan] appeared to have the Peachy Printer in a pseudo-stealth mode. Whispers of the Peachy Printer circled around 3D printer forums, with very little information coming from [Rylan]. For the last year, the Peachy Printer appeared to be just another failed crowdfunded 3D printer. Either [Rylan] didn’t have the engineering chops to take a novel device to market, there were problems with suppliers, or [Rylan] just couldn’t get the product out the door.
In the update published to the Kickstarter campaign, the reason for the failure of Peachy Printer to deliver becomes apparent. The Kickstarter campaign was set up to deliver the funds received – $587,435.73 – directly into [David Boe]’s account. Thirty days after the funds were received, [David] had spent over $165,000. In just over three months, all the Kickstarter funds, save for $200,000 transferred into the Peachy Printer corporate account, were spent by [David].
With no funds to complete the development of the Peachy Printer, [Rylan] looked into alternative means of keeping the company afloat until Kickstarter rewards had shipped. Peachy Printer received two government grants totalling $90,000 and $135,000. In March of 2015, one of [Rylan]’s family members loaned $50,000 to Peachy Printer. A plan to finance the delivery of Kickstarter rewards with new sales – a plan that is usually looked down upon by Kickstarter backers – was impossible, as cost and time required of certifying the laser in the Peachy Printer would have put the company in the red.
Right now, [Rylan] and the Peachy Printer are pursuing repayment from [David Boe], on the basis that Kickstarter reward money is still tied up in the construction of a house. Once the house is complete, the bank will disburse funds from the construction mortgage, and funds can then be transferred from [David] to Peachy Printer.
In all, the Peachy Printer is a mess, and has been since the Kickstarter funds were disbursed to [David]. There is – potentially – a way out of this situation that gets Peachy Printers into the hands of all the Kickstarter backers if the mortgage construction funds come through and production resumes, but that’s a lot of ‘ifs’. Failed Kickstarter projects for 3D printers are nothing new, but [Rylan]’s experience with the Peachy Printer is by far the most well-documented failure of a crowdfunding project we’ve ever seen.
What if we could reduce the cost of a photopolymer resin-based 3D printer by taking out the most expensive components — and replacing it with something we already have? A smartphone. That’s exactly what OLO hopes to do.
A resin-based 3D printer, at least on the mechanical side of things, is quite simple. It’s just a z-axis really. Which means if you can use the processing power and the high-resolution screen of your smart phone then you’ve just eliminated 90% of the costs involved with the manufacturing of a resin-based 3D printer. There are a ton of designs out there that use DLP projectors to do just this. (And there have been open-source designs since at least 2012.)
The question is, does it work with a cellphone’s relatively weak light source?