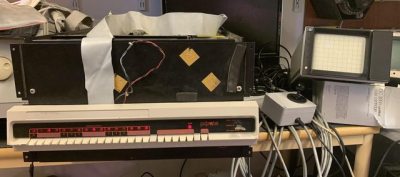
If you want to play the original Spacewar! but you don’t have a PDP-1 nearby, then you’re in luck — assuming you have a PDP-11, that is. [Mattis Lind] has successfully restored a PDP-11 port of the game from PDF scans of the source code, which was thought to have been lost to the trash bins of DECUS (Digital Equipment Computer Users’ Society). Fortunately, [Mattis] learned that [Bill Seiler], one of the original authors, had saved a printout of the assembly language. Using a combination of OCR and manual transcription to retrieve the code, [Mattis] took a deep dive into cleaning up the errors and solving a whole lot of system library and linking issues. Adding to the difficulty is that his PDP-11 is slightly different from the one used in 1974 when this port was written.
The project was not all software — [Mattis] also needed to make a pair of joysticks, which he made from a handful of items found on AliExpress. As you can see in the video below, he indeed got it all working. [Mattis] is no stranger to the PDP-11 world. We wrote about his PDP-11 restoration project back in 2015, a quest that took over 18 months.
The Game Boy DMG-01 is about as iconic as a piece of consumer electronics can get, but let’s be honest, it hasn’t exactly aged well. While there’s certainly a number of games for the system that are still as entertaining in 2021 as they were in the 80s and 90s, the hardware itself is another story entirely. Having to squint at the unlit display, with its somewhat nauseating green tint, certainly takes away from the experience of hunting down Pokémon.
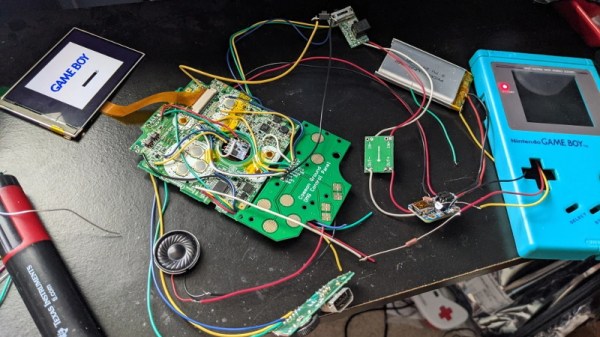
Which is precisely why [The Poor Student Hobbyist] decided to take an original Game Boy and replace its internals with more modern hardware in the form of a Game Boy Advance (GBA) SP motherboard and aftermarket IPS LCD panel. The backwards compatibility mode of the GBA allows him to play those classic Game Boy and Game Boy Color games from their original cartridges, while the IPS display brings them to life in a way never before possible.
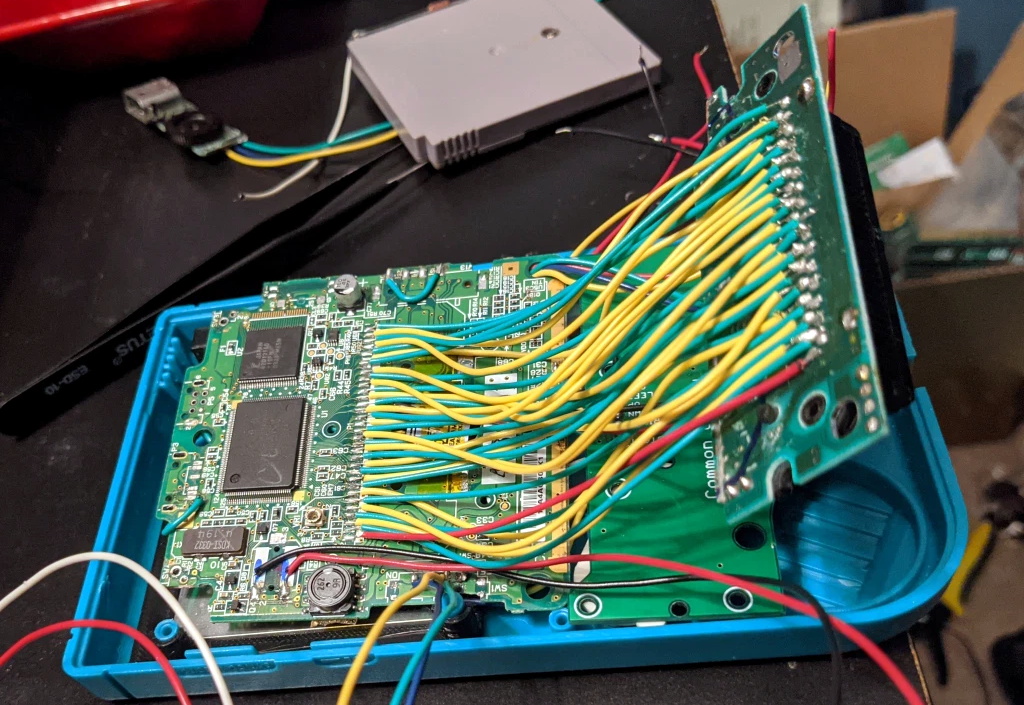
Relocating the cartridge connector took several attempts.
Now on the surface, this might seem like a relatively simple project. After all, the GBA SP was much smaller than its predecessors, so there should be plenty of room inside the relatively cavernous DMG-01 case for the transplanted hardware. But [The Poor Student Hobbyist] made things quite a bit harder on himself by deciding early on that there would be no external signs that the Game Boy had been modified; beyond the wildly improved screen, anyway.
That meant deleting the GBA’s shoulder buttons, though since the goal was always to play older games that predated their addition to the system, that wasn’t really a problem. The GBA’s larger and wider screen is still intact, albeit hidden behind the Game Boy’s original bezel. It turns out the image isn’t exactly centered on the physical display, so [The Poor Student Hobbyist] came up with a 3D printed adapter to mount it with a slight offset. The adapter also allows the small tactile switch that controls the screen brightness to be mounted where the “Contrast” wheel used to go.
An incredible amount of thought and effort went into making the final result look as close to stock as possible, and luckily for us, [The Poor Student Hobbyist] did a phenomenal job of documenting it for others who might want to make similar modifications. Even if you’re not in the market for a rejuvenated Game Boy, it’s worth browsing through the build log to marvel at the passion that went into this project.
The first issue that needed sorting out was the broken case. This Amiga must have had one wild ride, as there were several nasty cracks in the front panel and whole chunks had been broken off. We’ve seen [Drygol] repair broken computer cases before, but it seems like each time he comes up with some new tricks to bring these massacred pieces of plastic back to like-new condition. In this case plastic welding is used to hold the parts together and fill in the gaps, and then brass mesh is added to the backside for strength. The joints are then sanded, filled in with polyester putty, and finally sprayed with custom color matched paint. While he was in the area, he also filled in a hole the previous owner had made for a toggle switch.
Before
After
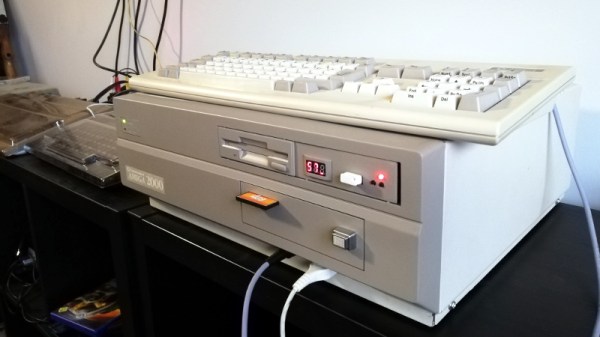
Then [Drygol] moved onto the internals. Some of the traces on the PCB had been corroded by a popped battery, a socket needed to be replaced, and as you might expect for a machine of this vintage, all of the electrolytic capacitors were suspect and needed to go. Finally, as the system didn’t have a power supply, he wired in a picoPSU. That got the 34 year old computer back up and running, and at this point, the machine was almost like new again. So naturally, it was time to start with the upgrades and modifications.
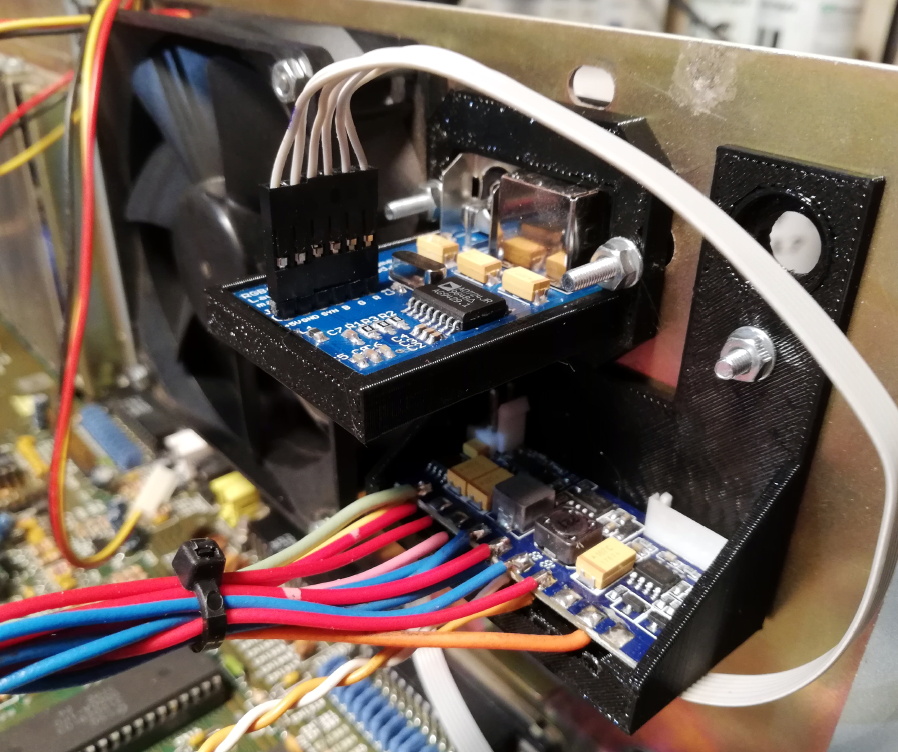
Case fan, video adapter, and picoPSU.
[Drygol] added an IDE interface and connected a CompactFlash adapter as the computer’s primary drive. For the secondary, he installed a GoTek floppy drive emulator that lets you replace a mountain of physical disks with a USB flash drive full of images. Between the two, all of the computer’s storage needs are met with nary a moving part.
The emulator was given its own 3D printed front panel to fit with the Amiga’s visual style, and he also printed out a holder for the RGB4ALL S-Video/Composite adapter installed on the rear of the machine. To help keep all this new gear cool, he finished things off with a new case fan.
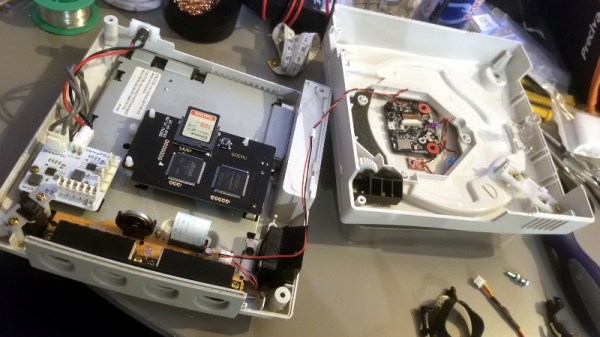
[Bren Sutton] has been a long time fan of SEGA’s Dreamcast, eagerly snapping one up right around its October 1999 European release. But after years of neglect and a somewhat questionable paint job a decade or so back, he decided it was time to spruce his old friend up. He could have just cleaned the machine and been done with it, but he took the opportunity to revamp the console’s internals with both practical and cosmetic trickery.
The first step was getting the system looking a bit fresher. Removing the silver metallic paint he applied in his youth with a rattle can wasn’t going so well, so he ended up buying a broken donor console on eBay so he’d have a new shell to work with. The donor was yellowed with age, but a coating of peroxide cream and a few hours under a cheap UV light got it whitened up nicely. Now that he had a fresh new case, [Bren] turned his attention to the internal components.
Those who might be plugged into the active Dreamcast homebrew scene may already know that several upgrade modules exist for SEGA’s last home game console. One of the most popular replaces the optical drive with an SD card filled with your favorite game ISOs. You can also get a modern high efficiency power supply, as well as a board that replaces the original soldered-on clock battery with a slot that fits a CR2032. [Bren] threw them all in, ensuring several more years of gaming bliss.
But he wasn’t done yet. He also wanted to add some visual flair to his new and improved console. After some consideration, he gingerly cut the logo out of the Dreamcast’s lid, and installed an Adafruit CLUE board underneath it. With a few carefully crafted GIFs installed onto the CircuitPython-powered board, the console now has a gorgeous fully animated logo that you can see in the video after the break.
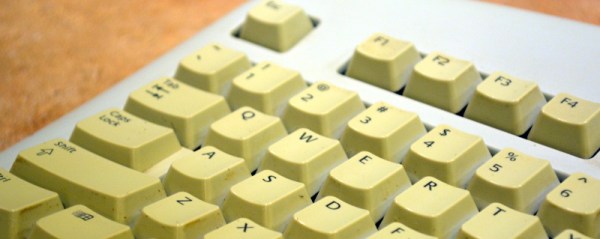
Considerable effort is often required to rejuvenate the yellowed and grungy plastic cases of retrocomputing gear. One generally does well to know their enemy in order to fight it, though, which is where this guide to the chemistry of plastic yellowing and whitening (PDF) comes in handy.
“The Retrobright Mystery” was written and sent in to us by [Caden Xu], a high school student who also goes by the alias [Saltypretzel]. The paper begins with an excellent description of the chemistry of plastic yellowing. We had always heard that the yellowing in ABS, or acrylonitrile-butadiene-styrene, the plastic most commonly used for cases back in the day, was primarily caused by brominated compounds added to the plastic as flame retardants. It turns out that’s only a minor contributor, with the bulk of yellowing occurring thanks to a complex chain of reactions starting with free radicals liberated from the butadiene copolymer through a reaction requiring oxygen and energy.
Reactive radicals from the decomposing synthetic rubber, added to ABS to increase its flexibility, unroll the benzene ring in styrene copolymers to form a conjugated compound called 2-hydroxymuconic acid. The alternating double and single bonds in this compound tend to absorb light towards the blue end of the spectrum strongly, so the accumulation of 2-HMA in the plastic over time thus makes it reflect more and more yellow and red wavelengths, giving aged ABS its unhealthy bronze glow.
Luckily, just as ketchup smears and grass stains, both rich in conjugated compounds like lycopene and chlorophyll, can be bleached out of existence, so too can yellowed plastics. [Caden] notes that Retrobright, which contains a powerful dose of hydrogen peroxide, does its whitening trick by breaking the UV-absorbing double bonds in 2-HMA. There’s little that can be done about the embrittlement of the ABS caused by the breakdown of butadiene copolymers, but at least it’ll look good.
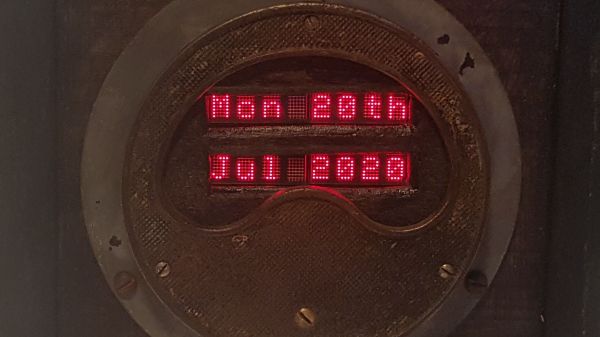
One time-proven method to make a lesson memorable is to make it a story, but that is not easy if your core material is the repair log of a rotted out analog ammeter. Most folks don’t need a 300A meter on their drill press, so [Build Comics] converted it to a text display and describes the procedure like they are writing a comic book. He is using HDLO-3416 LED cluster arrays for that dated-but-legible industrial feel, and everything looks right at home in a box made from oak and steel. Even the USB cord even gets a facelift by running it inside a fabric shoelace. In our own lives, covering charging cables is a hack on its own because we don’t want to fumble with the wrong charger when it is time to sleep or drive. Glow-in-the-dark cord upgrades, anyone?
We don’t have a pre-operation picture of the subject, but the innards suggest that it comes from the bottom of an industrial scrap pile. There is a cross-hatch pattern on the front plate, which hinted at 3D printing, but if you look closely at the early images, you can see that it is original. There is a nodeMCU board to fetch the date information and control the four alphanumeric displays. Except for the red lights, all the new hardware hides behind wood or steel, so this old workhorse’s aesthetic lives on and has a story to share that is a delight to read.
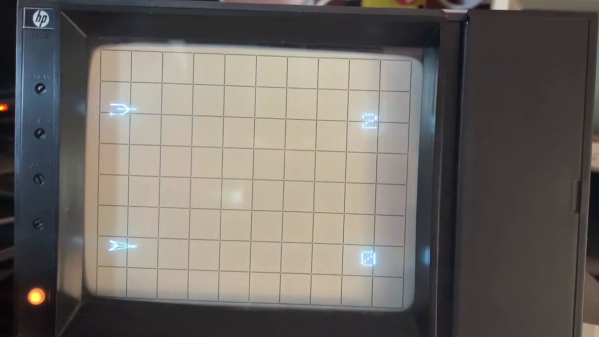
Trawling classified ads or sites like Craigslist for interesting hardware is a pastime enjoyed by many a hacker. At a minimum, you can find good deals on used tools and equipment. But if you’re very lucky, you might just stumble upon something really special.
Which is exactly how [John] came into possession of the TRANSBINIAC. Included in a collection of gear that may have once belonged to a silent key, the device is a custom-built solid-state computer that appears to have been assembled in the early 1960s. Featuring a large see-through window not unlike what you might find on a modern gaming computer and a kickstand that tilts it back at a roughly 45° angle, it was obviously built to be shown off. Perhaps it was a teaching aid or even a science fair entry.
After some digging, it looks like the design of the TRANSBINIAC was based on plans published in the January 1960 issue of Electronics Illustrated. Though there are some significant differences. This computer uses eight bistable flip-flip modules instead of the original six, deletes the multiplication circuit, and employs somewhat simplified wiring. Whoever built this machine clearly knew what they were doing, which for the time, is really saying something. This truly unique machine may well have been one of the first privately owned digital computers in the world.
Which is why we’re glad to see [John] trying to restore the device to its former glory. Naturally it’s a little tricky since the computer came with no documentation and its design doesn’t exactly match anything out there. But with the help of other Hackaday.io users, he’s hoping to get everything figured out. It sounds like the first step is to try and diagnose the 2N554 germanium transistor flip-flop modules, as they appear to be behaving erratically. If you have experience with this sort of hardware, feel free to chime in.
 Using a combination of OCR and manual transcription to retrieve the code, [Mattis] took a deep dive into cleaning up the errors and solving a whole lot of system library and linking issues. Adding to the difficulty is that his PDP-11 is slightly different from the one used in 1974 when this port was written.