HoloLens NES Emulator For Augmented Retro Gaming

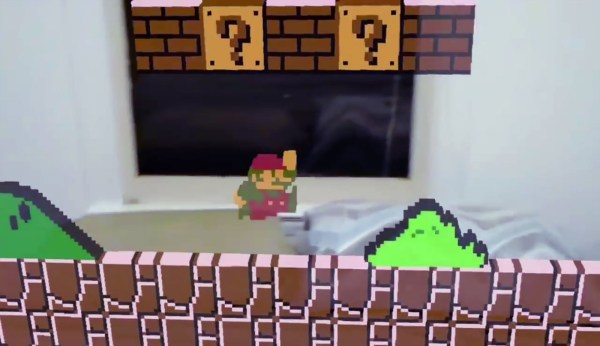
[Andrew Peterson] was looking for a way to indulge in his retro gaming passions in a more contemporary manner. His 3D NES emulator “N3S” for Windows brings Nintendo classics to the HoloLens, turning pixels into voxels, and Super Mario into an augmented reality gingerbread man.

To run NES games on the HoloLens, [Andrew’s] emulator uses the Nestopia libretro core. Since AR glasses cry for an augmentation of the game itself, the N3S re-emulates the NES’ picture processing unit (PPU), allowing it to interpret a Nintendo game’s graphics in a 3D space. [Andrew] also put together a comprehensive explanation of how the original Nintendo PPU works, and how he re-implemented it for the HoloLens.

The current version of the N3S PPU emulator automatically generates voxels by simply extruding the original pattern data from the game’s ROM, but [Andrew] is thinking about more features. Users could sculpt their own 3D versions of the original graphic elements in an inbuilt editor, and model sets could then be made available in an online database. From there, players would just download 3D mods for their favorite games and play them on the HoloLens.

According to [Andrew], the emulator reaches the limits of what the current pre-production version of the HoloLens can render fluently, so the future of this project may depend on future hardware generations. Nevertheless, the HoloLens screen capture [Andrew] recorded makes us crave for more augmented retro gaming. Enjoy the video!

Hacklet 119 – Retrogaming Console Hacks

If you haven’t heard, retrogaming is a thing. 40-somethings are playing the games of their youth alongside millennials who are just discovering these classic games. There are even folks developing new homebrew games for consoles as far back as the Nintendo Entertainment System and the Atari 2600. This week on the Hacklet, we’re highlighting some of the best retrogaming console hardware hacks on Hackaday.io. Note that I did say hardware hacks. The focus this week is on games played on the original hardware. Don’t worry though, I’ll give emulated projects some love in a future Hacklet.
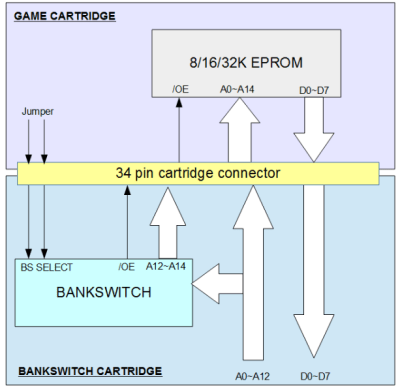
bankerWe start with [danjovic] and Atari 2600 Bankswitch Cartridge. The Atari 2600 is a legendary system. Millions of hackers’ first exposure to gaming came through its one button joystick. To make the unit affordable, Atari used a MOS Technology 6507 processor. Essentially it’s a 6502 in a 28-pin package. This meant several features got nerfed, most notably the address space. The 6507 can only address 8KB of RAM. In the Atari, only 4KB is available to the cartridge. Games got around the 4KB limit by bank switching – write a value to a magic address, and the bank switching logic would swap in a whole different section of cartridge ROM. There were several different bank switching schemes used over the years. [Danjovic] has created his own version of this bank switching logic, using only classic 74 series logic chips.
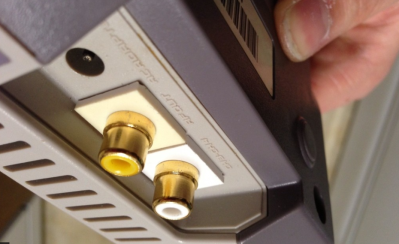
 

nesmodNext up is [ThunderSqueak] with Top Loader NES composite mod. Toward the end of the NES’s life, Nintendo introduced a cost-reduced version known as the “top loader”. This version had a top loading cartridge and no DRM lock-out chip. Unfortunately it also did away with composite AV ports. The only way to hook this NES to your TV was through the RF modulated output. [ThunderSqueak] and a number of other intrepid hackers have fixed this problem. All it takes is a 2N3906 PNP transistor and a few jellybean parts. The video and audio outputs are pulled from the motherboard before they enter the RF modulator. One nice feature is the clean connectors. [ThunderSqueak] used connectors from modular in-wall AV boxes for a setup that looks as good as it works.
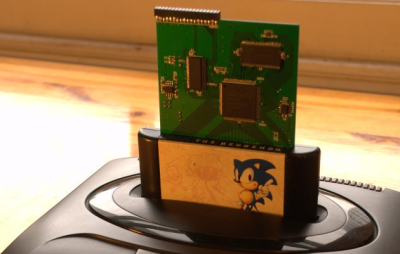
segaNext we have [makestuff] with USB MegaDrive DevKit. Sega’s MegaDrive, or Genesis as it was known here in the USA, was a groundbreaking console. It used a Motorola 68000 16-bit CPU while most other systems were still running a Z80 or a 6502. People loved this console, and there are plenty who still want to develop software for it. Enter [makestuff] with his development kit. On a card with a $40 USD bill of materials, he’s managed to fit SDRAM, an FPGA, and a USB interface. This is everything you need to load and debug software on an unmodified console. The FPGA had enough logic left over that [makestuff] was able to implement a continuous bus cycle tracer over USB. Nice work!
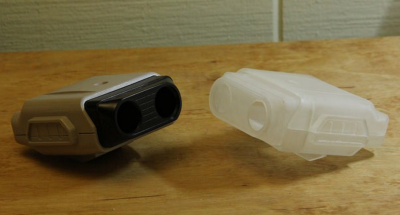
robbbFinally, we have our own [Joshua Vasquez] with R.O.B. 2.0. The original NES came in a deluxe version with a special pack in – a robot. Robotic Operating Buddy, or ROB for short, would play games with the player. Unfortunately ROB was a bit of a flop. It only worked with two games, Gyromite and Stack-Up Ice Climber. Most ROB units eventually found their way to the recycling bin. [Joshua] is building a new version of the ROB, with modern controls. He’s already modeled and 3D printed ROB’s head. I can’t wait to see this project come together!

If you want to see more retrogaming goodness, check out our new retrogaming hardware hacks list. See a project I might have missed? Don’t be shy, just drop me a message on Hackaday.io. That’s it for this week’s Hacklet, As always, see you next week. Same hack time, same hack channel, bringing you the best of Hackaday.io!

The Most Immersive Pinball Machine: Project Supernova

Over at [Truthlabs], a 30 year old pinball machine was diagnosed with a major flaw in its game design: It could only entertain one person at a time. [Dan] and his colleagues set out to change this, transforming the ol’ pinball legend “Firepower” into a spectacular, immersive gaming experience worthy of the 21st century.

A major limitation they wanted to overcome was screen size. A projector mounted to the ceiling should turn the entire wall behind the machine into a massive 15-foot playfield for anyone in the room to enjoy.


With so much space to fill, the team assembled a visual concept tailored to blend seamlessly with the original storyline of the arcade classic, studying the machine’s artwork and digging deep into the sci-fi archives. They then translated their ideas into 3D graphics utilizing Cinema4D and WebGL along with the usual designer’s toolbox. Lasers and explosions were added, ready to be triggered by game interactions on the machine.

pinnball-ocr-comp

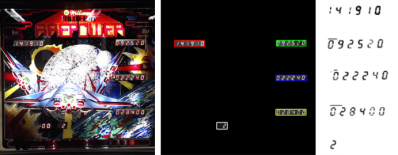
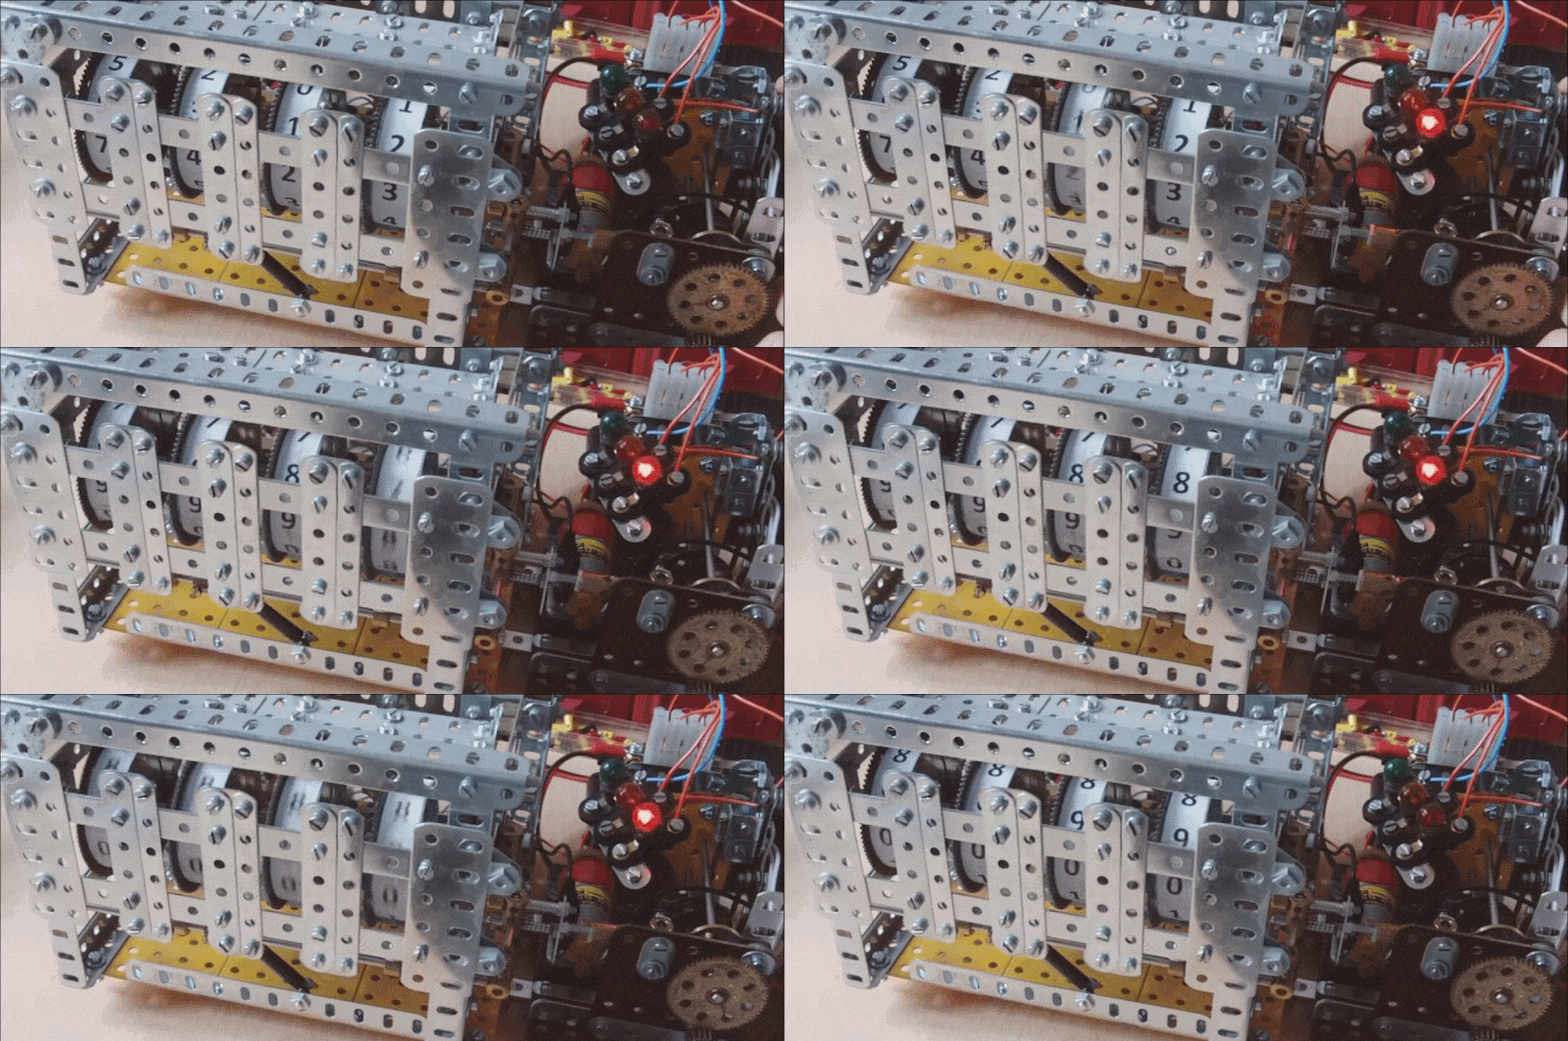
To hook the augmentation into the pinball machine’s own game progress, they elaborated an elegant solution, incorporating OpenCV and OCR, to read all five of the machine’s 7 segment displays from a single webcam. An Arduino inside the machine taps into the numerous mechanical switches and indicator lamps, keeping a Node.js server updated about pressed buttons, hits, the “Lange Change” and plunged balls.

The result is the impressive demonstration of both passion and skill you can see in the video below. We really like the custom shader effects. How could we ever play pinball without them?

Continue reading “The Most Immersive Pinball Machine: Project Supernova”

Coleco Chameleon Is A Kickstarter Scam

Retro gaming consoles exploded with the introduction of the Raspberry Pi and other similar single-board Linux computers. They all work the same way in that they emulate the original game console hardware with software. The game ROM is then dumped to a file and will play like the original. While this works just fine for the vast majority of us who want to get a dose of nostalgia as we chase the magic 1-up mushroom, gaming purists are not satisfied. They can tell the subtle differences between emulation and real hardware. And this is where our story begins.

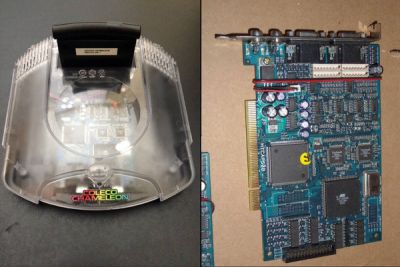
Meet the Coleco Chameleon. What appears to be just another run-of-the-mill retro gaming console is not what you think. It has an FPGA core that replicates the actual hardware, to the delight of hardcore retro game scam_04enthusiasts around the world. To get it to the masses, they started an ambitious 2 million US dollar Indiegogo campaign, which has unfortunately come to a screeching halt.

Take a close look at the header image. That blue circuit board in there is nothing but an old PCI TV tuning card. To make matters worse, it also appears that their prototype system which was displayed at the Toy Fair in New York was just the guts of an SNES Jr stuffed into their shell.

This scam is clearly busted. However, the idea of reconstructing old gaming console hardware in an FPGA is a viable proposition, and there is demand for such a device from gaming enthusiasts. We can only hope that the owners of the Coleco Chameleon Kickstarter campaign meant well and slipped up trying to meet demand. If they can make a real piece of hardware, it would be welcomed.

nintendo

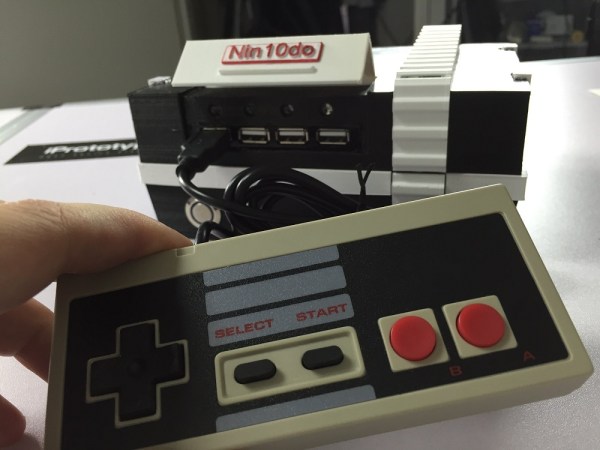
Nin10do Retro Game Console Stands Above All Others

If your living room entertainment area is not home to a Raspberry Pi based retro game console, you no longer have any excuses. Break out your soldering iron and volt/ohm meter and preheat the 3d printer, because you will not be able to resist making one of the best retro game consoles we’ve ever seen – The Nin10do.

It’s creator is [TheDanielSpies]. Not only did he make the thing from scratch, he’s done an extraordinary job documenting all the build details, making it easier than ever to follow in his footsteps and make one of your own. He designed the case in Autodesk and printed it out with XT Co-polyester filament. He uses a Raspi of course, along with an ATX Raspi board from Low Power Labs to make the power cycling easier. There’s even a little stepper that opens and closes a cover that hides the four USB ports for controllers. Everything is tied together with Python, making the project super easy to modify and customize to your liking.

All code, schematics and .stl files are available on his github. It even has its own Facebook page! Be sure to check out the vast array of videos to help you along with your build.

Continue reading “Nin10do Retro Game Console Stands Above All Others”

Hacklet 22 – Retro Console Projects

Everyone loves arcade games, and it didn’t take long for designers to figure out that people would love to take the fun home. The home gaming console market has been around for decades. Through the early days of battery-powered pong style consoles through Atari and the video game crash of the early 80’s, to the late 8 and 16 bit era spearheaded by The Nintendo Entertainment System and The Sega Master System and beyond, consoles have become a staple of the hacker home. This week’s Hacklet features some of the best retro console projects from Hackaday.io!

52001We start with [ThunderSqueak] saving the world with her Atari 5200 Custom Controller Build. For those who don’t know, the Atari 5200 “Super System” was an 8 bit system ahead of its time. The 5200 was also saddled with on of the worst controller designs ever. The buttons would stop responding after a few hours of game play. With 17 buttons, (including a full number pad), that was a pretty major design flaw! [ThunderSqueak] hacked a cheap commercial fighting game stick to make it work with the 5200. 12 individual buttons were wired in a matrix to replace the telephone style keys on the original 5200 controller. Atari’s non-centering analog stick was converted over to a standard 4 switch arcade style stick. [ThunderSqueak] did leave the original pots accessible in the bottom of the enclosure for centering adjustments. Many 5200 games work great with the new setup.


snes[DackR] is bringing back the glory days of Nintendo with Super Famicade, a homebrew 4 SNES arcade system inspired by Nintendo’s Super System. Nintendo’s original Super System played several customized versions of games which were available on the Super Nintendo Entertainment System (SNES). [DackR] is building his own with parts from four SNES consoles. He’s also adding a few features, like a touch screen, video overlay, and enhanced RGB.

He’s going to add custom memory monitoring hardware, which will allow him to check how many lives a player has left and handle coin operation, all without the original Super System Hardware. If you’re curious what the original Super Systems looked like, check out Hackaday’s Tokyo Speedrun video.You might just catch a glimpse of one!

rgb[Bentendo64] is improving on the past with RGB For ‘Murica. European systems have enjoyed the higher quality afforded by separate red, green and blue video lines for decades. North American gamers, however were stuck in the composite or S-Video realm until shortly before the HDTV age. [Bentendo64] had an old hotel CRT based monitor, and decided to hack an RGB input. After opening up the back of the set, he removed the yolk board and added direct inputs to the video amplifiers. We’re not sure if this mod will work with every CRT, but it can’t hurt to try! Just be sure to discharge those high voltage capacitors before wrenching on these old video systems. Even if a set has been unplugged for days, the caps can give a seriously painful (and dangerous) shock!

snes2[Ingo S] is also working to improve the SNES with SNES AmbiPak, a mod which brings ambient lighting and “rumble pack” controller feedback to the vintage Super Nintendo. [Ingo S] used the popular SNES9X emulator to figure out where game data is stored while the SNES is running. His proof of concept was the original F-ZERO SNES game. [Ingo S] found that Every time the player’s car hits the wall, the system would perform a write on address 3E:0C23. All he would need to do is monitor that address on the real hardware, and rumble the controller on a write. The real hardware proved to be a bit harder to work with though. Even these “slow” vintage systems clock their ram at around 3MHz, way too fast for an Arduino to catch a bus access.  [Ingo S] is solving that problem with a Xilinx XC9572 Complex Programmable Logic Device (CPLD). CPLDs can be thought of as little brothers to Field Programmable Gate Arras (FPGAs). Even though they generally have less “room” for logic inside, CPLDs run plenty fast for decoding memory addresses.  With this change, [Ingo S] is back on track to building his SNES rumble pack!

It feels like we just got started – but we’re already out of space for this week’s Hacklet! As always, see you next week. Same hack time, same hack channel, bringing you the best of Hackaday.io!
75 Controllers, One Gaming System

Multi Video Games System

This gaming cabinet lets two players select games from a wide array of consoles and play them using the original controllers. [Patrice] built it around his Multi Video Games System 2, which converts each of the 75 controllers to a common format. Players pick controllers from the display case, plug in an  HD-15 connector, and choose the game they want to play. The cabinet contains a PC that runs a variety of emulators, and uses HyperSpin as a menu system.

Using adapters, the converted controllers can also be used on other game systems, tablets, or smartphones. [Patrice] claims that they’ll work across 110 different game systems. A full list of the controllers and systems is shown here.

This cabinet is definitely one of the most comprehensive video game installations we’ve seen, and the display case of controllers looks fantastic. Check out a video of the system and some controller porn after the break.

Continue reading “75 Controllers, One Gaming System”