Portable RetroPie Builds On The Shoulders Of Giants

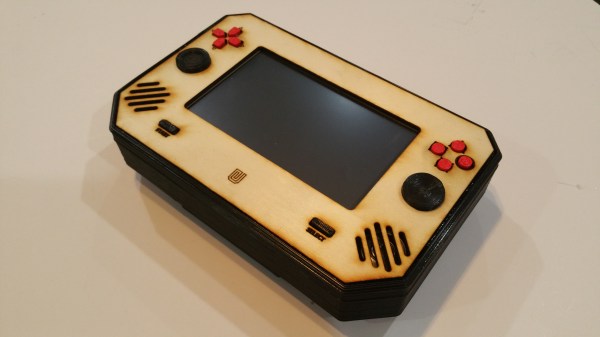
For anyone wanting to get that shot of nostalgia without the hassle of finding an NES Classic, the Retropie project is a great starting point. Of course, it’s not too noteworthy to grab a Raspberry Pi, throw a pre-built distribution on it, and plug in an SNES to USB converter. What is noteworthy, however, is building a Retropie that’s portable and that has the quality and polish of the latest build from [fancymenofcornwood].

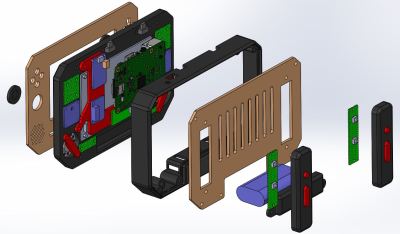
render-blowup-of-retropieFor starters, the laser cut wood case was custom-made. From there, all of the PCBs were fitted including specific ones to handle each set of buttons (complete sets of D-pads, shoulder buttons, and joysticks) and another for the 5″ HDMI screen. It has stereo speakers and its own headphone jack (to the envy of all new iPhone owners), and is powered from a Raspberry Pi 2 running Retropie 4.1. The battery pack shouldn’t leave you stranded, either, especially not if you grew up playing the Sega Game Gear.
The quality of the build here is outstanding, and its creator made a design choice to make it easily replicable, so if you’ve wanted to play N64 or PS1 games while on the go, this might be what you’ve been waiting for. There are lots of other options for getting some fun from a Retropie going though, from building one into a coffee table to re-purposing that infamous Game Gear.

Obligatory clip of this portable playing Doom is found after the break.

Continue reading “Portable RetroPie Builds On The Shoulders Of Giants”

Wii U RetroPie Console Looks Gorgeous

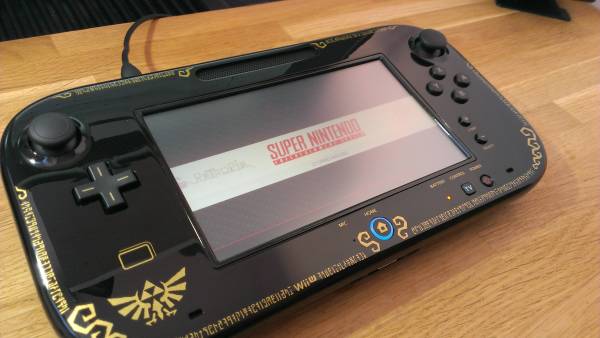
What to do with your broken gaming consoles? Gut it and turn it into a different gaming console! Sudomod forum user [banjokazooie] has concocted his own RetroPie console from the husk of a WiiU controller — an ingenious demonstration of how one can recycle hardware to a perfectly suited purpose.

[banjokazooie] actually used an original shell for this build, but if you happen to have a broken controller around — or know someone who does — this is a great use for it. A Raspberry Pi 3 is the brains of this operation (not counting [banjokazooie]), and it features a 6.5″ HDMI display, a Teensy 2.0 setup for the inputs, a headphone jack with automatic speaker disconnection, dual 3400 mAh batteries, an external SD card slot, and a lot of hard work on the power supply circuit — although [banjokazooie] reports that the hardest part was cutting to size a custom PCB to mount it all on. The original plan was to see if the idea was possible, and after a three month effort, it appears to work beautifully.

Continue reading “Wii U RetroPie Console Looks Gorgeous”

Pi Cart: 2,400 Games In One

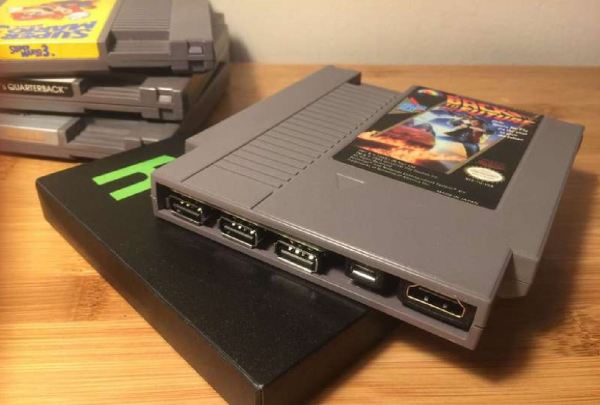
What’s the quickest way to turn one game into 2,400? Cram a Raspberry Pi Zero running RetroPie into an NES cartridge and call it Pi Cart.

This elegant little build requires no soldering — provided you have good cable management skills and the right parts. To this end, [Zach] remarks that finding a USB adapter — the other main component — small enough to fit inside the cartridge required tedious trial and error, so he’s helpfully linked one he assures will work. One could skip this step, but the potential for couch co-op is probably worth the effort.

Another sticking point might be Nintendo’s use of security screws; if you have the appropriate bit or screwdriver, awesome, otherwise you might have to improvise. Cutting back some of the plastic to widen the cartridge opening creates enough room to hot glue in the USB hub, a micro USB port for power, and an HDMI port in the resulting gap. If you opted to shorten the cables, fitting it all inside should be simple, but you may have to play a bit of Tetris with the layout to ensure everything fits.

Continue reading “Pi Cart: 2,400 Games In One”

Galaga Cabinet Is Out Of This World

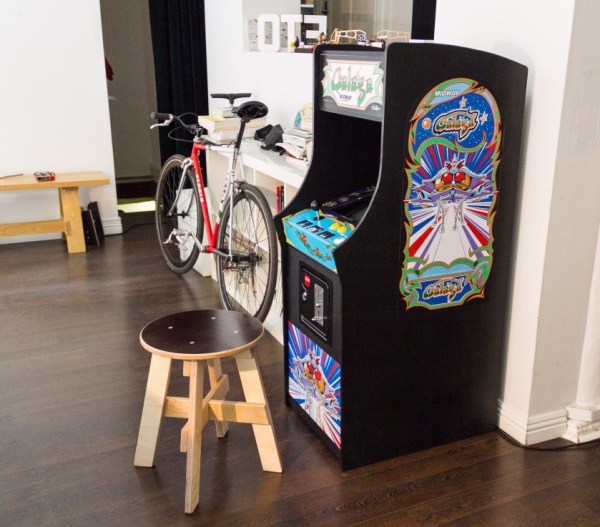
Like many of us, [Alex] spent a large part of his childhood feeding coin after coin into one arcade game or another. Galaga is one of his all-time favorites, and he has wanted to build a Galaga cabinet for a long time. Once his workshop was ready for the job, it was time to cross it off the list.

The cabinet is built to 4/5 scale. This is a great size because he gets the stability and feel of a full-size machine, but it’s much easier to move it around. As you might expect, there’s Pi in the cabinet.  The display is an old TV that [Alex] found in a Dumpster. And although it works great, it would go into standby instead of powering off along with everything else. To get around this, [Alex] built an automatic remote control with an IR LED and an Arduino Diecimila. After a five-second wait, it sends the power-on code to the TV and switches the input. The TV is supposed to be in portrait mode for Galaga, but this proved to be a challenge. Changing the orientation at the Pi level resulted in poor performance and choppy sound, so he changed it at the game execution level.

We are continually impressed by the diversity of [Alex]’s builds and the care that goes into them. Who could forget his beautiful sidewalk graffiti machine or the time he showed us how to photograph stuff that’s not there? Make the jump to see a brief demonstration followed by a two-part build video.

Continue reading “Galaga Cabinet Is Out Of This World”

Classing Up A RetroPie Arcade With A Wine Barrel

Arcade cabinets are a lot of fun, and something most of us would probably like in our homes. Unfortunately, space and decor constraints often make them impractical. Or, at least, that’s what our significant others tell us. Surely there must be a workaround, right?

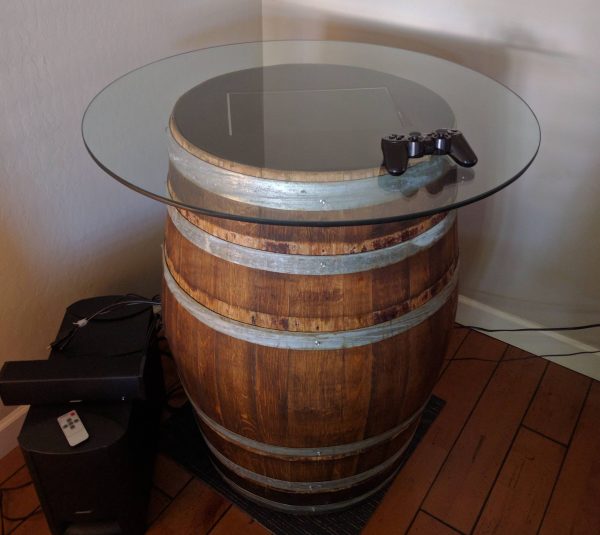
Right! In this case, the workaround [sid981] came up with was to build a RetroPie arcade into a fancy looking wine barrel. The electronics are pretty much what you’d expect for a RetroPie system, and the screen is set into the top of the barrel. Control is handled by a wireless controller that can be tucked away when it’s not in use, and a glass top simultaneously protects the screen and lets guests use the barrel as a bar table.

Continue reading “Classing Up A RetroPie Arcade With A Wine Barrel”

Game Pie Advance Brings Retro Gaming To Your Fingertips

We love our Game Boy and RetroPie mods here at Hackaday because the Raspberry Pi Zero has made it easier than ever to carry a pocket full of classic games. [Ed Mandy] continues this great tradition by turning a matte black Game Boy Advance into a RetroPie handheld.

Details are scant on how [Mandy] built his Game Pi Advance, but we can glean a few details from the blog post and video. A Raspberry Pi Zero running RetroPie appears to be piggybacking on a custom PCB that slots neatly into the GBA case. This provides easy access to the Pi Zero’s USB and micro HDMI via the cartridge slot to connect to an external screen, as well as a second controller to get some co-op NES and SNES action on. It’s worth noting here that [Mandy] has foregone adding X and Y buttons in the current version.

Continue reading “Game Pie Advance Brings Retro Gaming To Your Fingertips”

Madison Maker Faire

Saturday was the first Madison Mini Maker Faire. In this case, it’s Madison, Wisconsin (sorry Madison, SD I didn’t mean to get your hopes up) where I live. Of course I’m not the only crazy hardware hacker in the area. As soon as I got there I almost tripped over Ben Heckendorn who also lives in the area.

ben-heck-gameboy

Check out that incredible Giant Game Boy the he was exhibiting. Okay, you think to yourself: Raspberry Pi and an LCD. Wrong! He’s actually using an FPGA to drive the LCD. Even cooler, it’s using an original Game Boy brain board, which the FPGA is connected to in order to translate the handheld’s LCD connector signals to work with the big LCD.

Continue reading “Madison Maker Faire”