Can You Live Without The WS2812?

As near as we can tell, the popular WS2812 individually addressable RGB LED was released to the world sometime around the last half of 2013. This wasn’t long ago, or maybe it was an eternity; the ESP8266, the WiFi microcontroller we all know and love was only released a year or so later. If you call these things “Neopixels”, there’s a good reason: Adafruit introduced the WS28212 to the maker community, with no small effort expended on software support, and branding.

The WS2812 is produced by WorldSemi, who made a name for themselves earlier with LED driver solutions, especially the WS2811, an SOIC chip that would turn a common anode RGB LED into one that’s serially controllable. When they stuffed the brains from the WS2811 into a small package with a few LEDs, they created what is probably the most common programmable LED lighting solution available today.

A lot has changed in the six years that the WS2812 has been on the market. The computer modding scene hasn’t heard the words ‘cold cathode’ in years. Christmas lights are much cooler, and anyone who wants to add blinky to their bling has an easy way to do that.

But in the years since the WS2812 came on the market, there are a lot of follow-up products that do the same thing better. You now have serially addressable LEDs that won’t bring down the rest of the string when they fail. You have RGBW LEDs. There are LEDs with a wider color gamut and more. This is a look at the current state of serially addressable RGB LEDs, and what the future might have in store.

Continue reading “Can You Live Without The WS2812?”

An ESP8266 Sundial For Your Wall

Hackers absolutely love building clocks. Seriously, there are few other devices for which we’ve seen such an incredible number of variations. But while the clocks that hackers build might blink out the time in binary, or write it out in words, they generally don’t feature hands. Apparently in 2019 it’s more reasonable to read binary than know which way the “little hand” is supposed to be pointing.

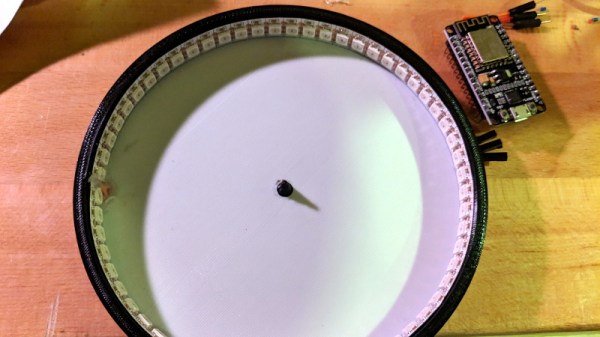
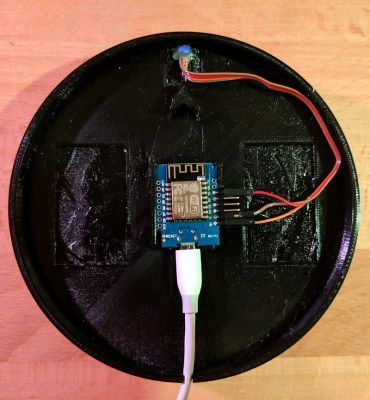
This ESP8266 powered “shadow clock” from [Dheera Venkatraman] technically keeps that tradition intact, but only just. His clock doesn’t feature physical hands, but it does use a strip of RGB LEDs to cast multi-colored shadows which serve the same function. With his clock, you don’t even have to try and figure out which hand is the big one, since they’re all the same length. Now that’s what we call progress.

Probably the biggest surprise about this clock, beyond how legitimately good it looks hanging on the wall, is how little work it takes to build your own version. That’s because [Dheera] specifically set out to design something that was cheaper and easier to build than what he’d seen previously, and we think he delivered on that goal in a big way. All you need are the 3D printed components, an ESP8266 board, and a strip of 144 WS2812B LEDs.

The software side of the project is similarly simplistic, and all you need to do is plug in your WiFi network credentials to have the ESP pull the current time from NTP. If you were so inclined, his source code would be an excellent base on which to implement additional features such as animations at the top of the hour.

Compared to something like the Bulbdial clock from 2009, it’s incredible how simple some of these projects have become in the last decade. With the tools and components available to hackers and makers today, there’s truly never been a better time to build something amazing.

Fueled By Jealousy, This Smart Lamp Really Shines

As a lover of lava lamps, [Julian Butler] knew when he saw a coworker’s modern LED incarnation of the classic piece of illuminated decor that he had to have one for himself. The only problem was that the Kickstarter for it had long since ended, and they were no longer available. So he did what any good hacker would do: he studied it closely, took a bunch of notes, and built his own version that ended up being even better than the original.

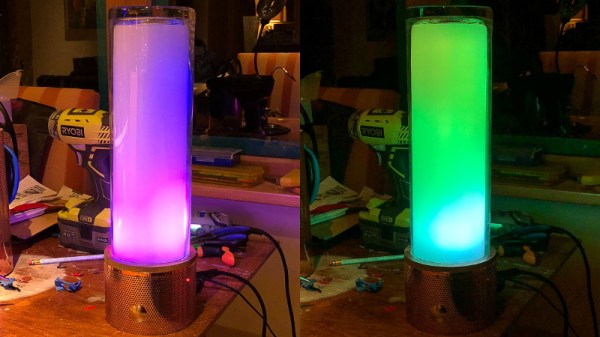
In the three part series on his blog, [Julian] takes us through the design and construction of his take on the Ion Mood Light, which raised over $72,000 back in 2014. The details in the Kickstarter campaign plus his own first-hand observations of the device were enough to give him the high-level summary: the device has a core of RGB LEDs behind a diffuser, and uses some software trickery to pulse out some pleasing effects and patterns. He wasn’t concerned about the Bluetooth or the smartphone application, so all he really needed to do was put some NeoPixel LEDs inside a glass cylinder and he’d be done. Of course, it always sounds easy…

The actual journey to get there, as you might have guessed from the three part series, took awhile. Sourcing the LEDs was easy enough, and using a Fadecandy controller made getting the LEDs to blink out some cool patterns fairly straightforward. But it took [Julian] a bit of experimentation and a few trips to the crafts store before he found a material which would diffuse the LEDs enough for his tastes. Though in the end, he thinks the multiple layers of acrylic he ended up going with actually do a better job of blending the light from the individual LEDs than in the original Ion.

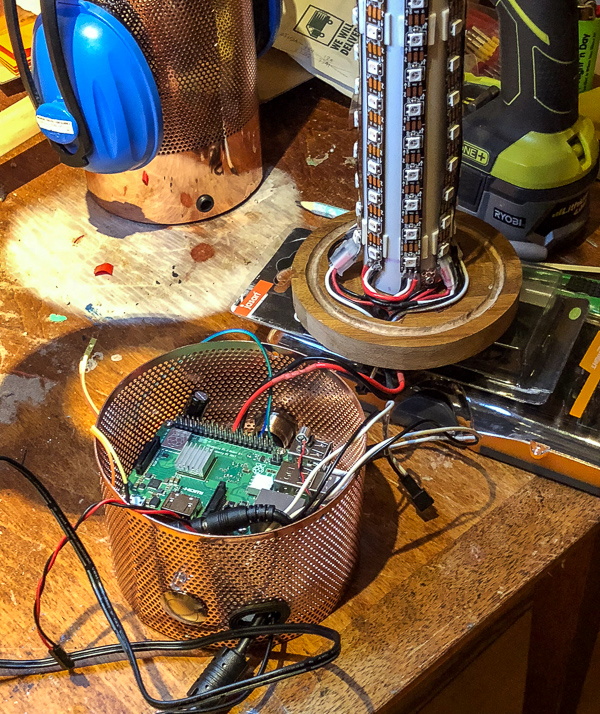
Using the Fadecandy made it easy to drive the LEDs, but he still needed something to provide it with the commands. To that end, he added a decorative base to his LED column that hides a Raspberry Pi and all the lamp’s associated electronics. This includes a microphone which gives his lamp the same sort of sound reactive features that made the Ion so popular. The base does make his lamp a bit bulkier than the original version, but the metallic mesh construction is attractive enough the overall look works.

Of course, you might be wondering how [Julian] got the LEDs to react to sound, or do any of the other gorgeous effects shown off in the video after the break. The software which makes this possible makes up the third and final post in the series, and is really a whole project in itself. The short version of the story is that he used Python and Processing to do real-time computational fluid dynamics, but not before making the necessary adjustments to speed up the simulation on ARM hardware. You know, normal lamp stuff.

This isn’t the first time we’ve seen projects using the Fadecandy board. From creating a Tron inspired desk to building the 5,760 LED “Space Tunnel”, it looks like a great choice if you’ve got a problem that can be solved by the application of a ridiculous number of LEDS.

Continue reading “Fueled By Jealousy, This Smart Lamp Really Shines”

Cylindrical LED Display Comes Full Circle

According to [makeTVee], his latest project started out as an experiment to see how well the LED matrix techniques he’s worked with in the past would translate to a cylindrical form factor. We’re going to go ahead and say that not only was the test a success, but that the concept definitely holds promise for displays that are both functional and aesthetically pleasing. This build stops a bit short of being a complete implementation, but what he has so far is very promising and we hope he continues fleshing it out.

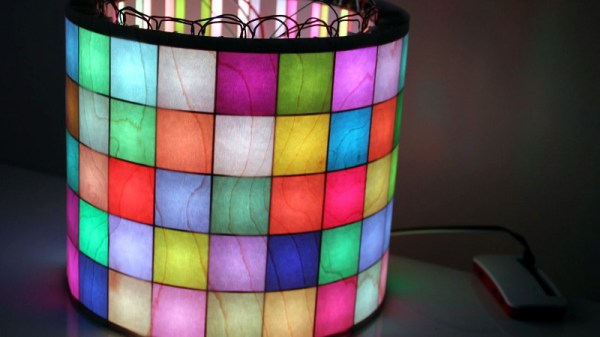
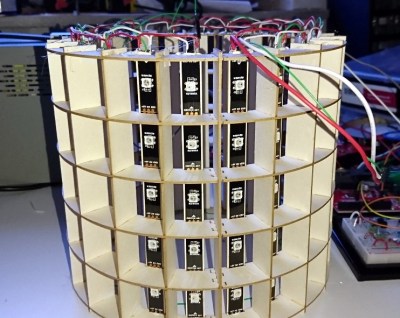
A laser cutter was used to create the interlocking segments that make up the display’s frame, but we imagine you could pull off a similar design using 3D printed parts if you don’t have access to a laser. Strips of WS2812 LEDs are mounted along the inside of the cylinder so that each individual LED lines up with the center of a cell. To finish off the outside of the cylinder [makeTVee] used a thin wood veneer called MicroWOOD, which gives the LEDs a nice diffused glow. The wood grain in the veneer also provides an organic touch that keeps the whole thing from looking too sterile.

Of course, a display like this only works if you’ve got software to drive it. To that end, [makeTVee] has used pygame to create a simulator on his computer that shows what the display would look like if it were unrolled and flattened it out. This makes it a lot easier to create content, as you can see the whole display at once. He says the source for the new tool will be coming to GitHub soon, and we’re very interested in taking a look.

If this display looks familiar, it’s probably because a distinctly flatter version of it took the top spot in our “Visualize it with Pi” contest last year.

Continue reading “Cylindrical LED Display Comes Full Circle”

Ask Hackaday: Can We Get Someone To Buy And Destroy RAM?

We like blinky things. We’re moths drawn to the flame of serially-addressable RGB LEDs. If the LEDs are smaller, we want to know. If you can drive more of them, we want to know. That said, the most interesting news out of CES last January was both right up our alley, and immensely disappointing. Corsair, makers of RGB computer fans, RGB CPU coolers, and RGB keyboards and mice, have a new product out: RGB RAM, because professional gamers and streamers have a higher win percentage when their RAM is illuminated.

The key innovation of the new Corsair Dominator Platinum RGB DDR4 DRAM is called, ‘Capellix LEDs’. The press surrounding these LEDs gives a clear advantage: right now, the RGB LEDs in your gaming system are mounted in a large SMD package, like a WS2812 or APA101. These large packages reduce LED density, and making LEDs smaller means moar RGB — more colors, or brighter colors, or better efficiency. The key advancement in Capellix LEDs is taking the guts of a serially addressable RGB LED and putting it in a smaller package. Instead of a package that’s 2.8mm³ in volume, the Capellix LED is ‘just 0.2mm³ in size’. The few pictures available of these LEDs give the impression they’re about the size of an 0805 package. It’s small, and we’d like to get our hands on some.

Where these LEDs come from is anyone’s guess, but Corsair did partner with Primax, a Taiwanese manufacturer of computer peripherals, to pull this off. There is no mention of Capellix LEDs in Primax’s press releases, and we don’t actually know if these are the smallest serially addressable RGB LEDs available; we don’t even know if they’re serially addressable. There could easily be a small microcontroller in the Corsair Dominator Platinum RGB DDR4 DRAM, as each stick is only driving twelve individually controllable RGB LEDs.

The bottom line is, someone needs to spend $160 for 16GB of RAM, then tear the whole thing apart, preferably with close-up pics of the fancy new RGB LEDs.

A cynical reader would say that Capellix LEDs are simply existing LEDs, the name ‘Capellix’ was trademarked by Corsair, and these LEDs were shoved into a stick of RAM with a significant markup. This, surprisingly, is demonstrably wrong because there is no entry for ‘Capellix’ in the United States Patent and Trademark Office Trademark Electronic Search System. That doesn’t mean the spirit of the cynic is wrong, though; ROHM semiconductors just released a new side-view RGB LED that might be smaller than Corsair’s Capellix LEDs. There are, of course, RGB LEDs available in similar sizes, but none of these are serially-addressable like a WS2812 or APA101. We don’t know what’s in these fancy sticks of RAM, but we’re waiting for someone to do a tear down so we can find out.

Pringles Can Turned Vaporwave Lamp

We play host to a lot of incredibly complex projects here at Hackaday; take a look at some of the entries in the Hackaday Prize for some real world-class engineering. But the hacks you can knock out in an afternoon are often just as compelling as the flagship projects. After all, not everyone is looking to devote years of their lives into building some complex machine.

Case in point, this very slick lamp built by [mytzusky]. Made of nothing more exotic than an old Pringles can and an RGB LED strip, this is something that can potentially be built with what you have laying around right now. All you need to provide is a bit of geometry, a steady hand, and a love for anything that looks like it could pass as a prop in a TRON fan film.

The first step is getting the Pringles can: either find one in the trash or treat yourself to a stack of weird hard potato chip sorta things. Once you’ve got the can, you need to cut out your design. You could print out the template provided by [mytzusky] if you want, but you could put your own spin on it instead. Just remember that the design needs to make sense when you wrap it around the can.

With the lines cut out of the can, the whole thing gets wrapped with a few sheets of standard white paper. This will not only cover the original label but diffuse the light coming from the cuts you’ve just made. [Mytzusky] doesn’t mention it, but some kind of sealer applied to the paper might be a good idea if you’re looking to keep this thing around for the long haul.

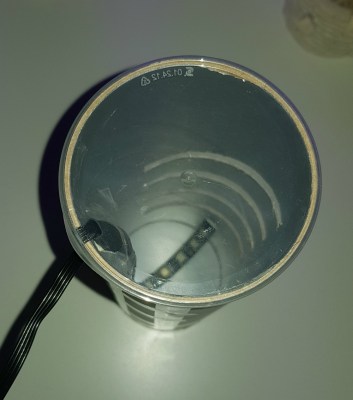
Finally, an RGB LED strip goes inside the can. Make sure to flip the can upside down for this part, with the solid end on the top and the clear lid on the bottom. Not only does this let you run the wire out of the bottom, but provides a very cool ring of diffuse light at the bottom of the lamp.

This is another excellent example of an “upcycled” project which uses literal trash as a building material. It might take a little outside the box thinking, but the results can be very impressive.

Lightsaber Uses Pogo Pins To Make Assembly A Breeze

There was an endless supply of fantastic projects at Supercon this year, but one whose fit and finish really stood out was [Scott]’s lightsaber. If you were walking around and saw someone with a very bright RGB device with a chromed-out handle hanging off their belt it was probably this, though it may have been hard to look at directly. On the outside, the saber looks like a well-polished cosplay prop, and it is! But when Scott quickly broke down the device into component pieces it was apparent that extra care had been put into the assembly of the electronics.

Like any good lightsaber replica the blade is lit, and wow is it bright. The construction is fairly simple, it’s a triplet of WS2812B LED strips back to back on a triangular core, mounted inside a translucent polycarbonate tube with a diffuser. Not especially unusual. But the blade can be popped off the hilt at a moments notice for easy transport and storage, so the strips can’t be soldered in. Connectors would have worked, but who wants flying wires when they’re disconnecting their lightsaber blade. The answer? Pogo pins! Scott runs the power, ground, and data lines out of the strips and into a small board with slip ring-style plated rings. On the hilt, there is a matching array of pogo pins to pass along power and data. The data lines from all the strips are tied together minimizing the number of connections to make, and the outer two power rings have more than one pin for better current-carrying capacity. A handy side effect is that there is nowhere on the blade where there aren’t LEDs; the strips go down to the very end of the blade where it meets the main board inside the hilt.

The hilt is filled with an assembly of 18650’s and a Teensy mounted with a custom shield, all fit inside a printed midframe. The whole build is all about robust design that’s easy to assemble. The main board is book-ended by perpendicular PCBs mounted to the ends, one at the top to connect to the blade and one at the bottom to connect to a speaker. Towards the bottom there is space for an optional Bluetooth radio to allow remote RGB control.

Scott is selling this as a product but also provides detailed instructions and parts lists for each component. Assembly instructions for the blade are here. The hilt is here. And pogo adapters are on OSH Park here. An overview of the firmware with links to GitHub is here. Check out a walkthrough of the handle assembly and blade attachment after the break!

Continue reading “Lightsaber Uses Pogo Pins To Make Assembly A Breeze”