FlowFree Goes Life Sized At Maker Faire NY

Maker Faire 2013SetupWillow Glen MakersTeam PathfinderFlow*26

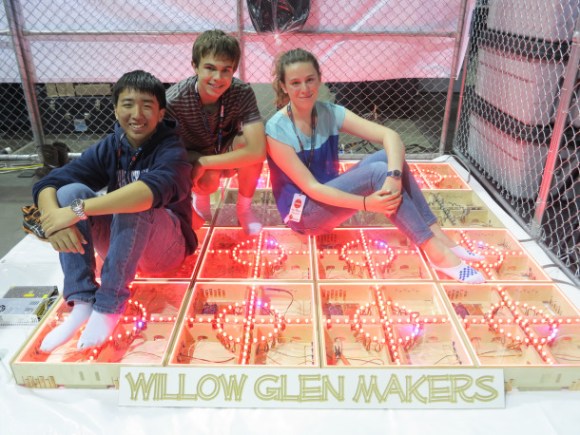
What began as a smartphone game turned into a Maker Faire New York 2013 project for the [Willow Glen Makers]. FlowX26 is a life sized version of the game FlowFree. [The Willow Glen Makers] wanted to build an extendable, easy to set up grid of floor tiles to emulate the game. A CNC machine was employed to create a plywood framework. Not visible in the picture is the fact that each cross member is cut slightly concave.  This concavity allows the clear plastic top to deflect just enough to activate a micro switch inside the tile. The switch sends a signal to the tile’s Arduino Mega controller. The Mega then uses this data to control an array of RGB LEDs.

The next problem was interconnection and communication between the tiles. [The Makers] used copper tape, along with a 3D Printed latch system between each tile side. Six connections per side allow power and data to be transmitted throughout the grid.

Continue reading “FlowFree Goes Life Sized At Maker Faire NY”
FLASH.IT: The RGB LED Climbing Wall

rockWallLEDs2

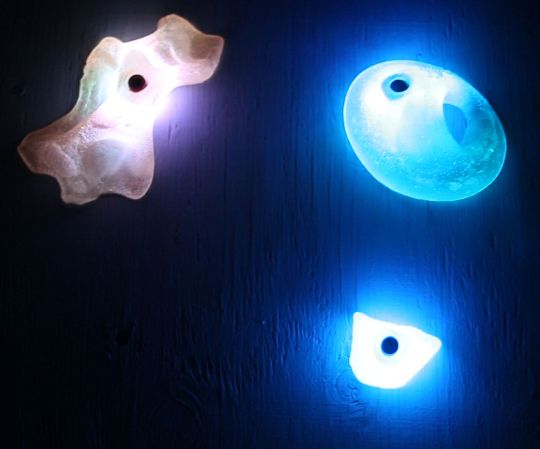
[Chris] and his friends were kicking around ideas for a Burning Man project, and this is the one that stuck: a rock climbing wall with RGB LEDs embedded in the holds. The holds themselves were custom made; the group started by making silicone molds of varying shapes and sizes, then added the electronics and poured in polyurethane resin to create the casting. The boards for these LEDs are equipped with a central hole that pairs up with a peg in the silicone mold. [Chris] also solved an annoying spinning problem by affixing a bolt to the far end of the LED board: once embedded in the polyurethane, the bolt provides resistance that the thin board cannot. The finished holds bolt onto the wall with all their wires neatly sticking out of the back to be hooked up to a central controller.

The Instrucables page suggests a few ways to get the lights working, including grabbing the nearest Arduino and relying on the Neopixel Library from Adafruit. [Chris] went the extra mile for Burning Man, however, designing Arduino-software-compatible controller boards capable of communicating via DMX, which expanded the system from a simple display to one capable of more complex lighting control. Stop by the Github for schematics and PCB layouts, and stick around for a video of the wall after the break. If the thrill-seeking outdoorsman inside you yearns for more, check out WALL-O-TRON from earlier this summer.

Continue reading “FLASH.IT: The RGB LED Climbing Wall”

Octoscroller Takes The Hexascroller To The Next Level

octosc2

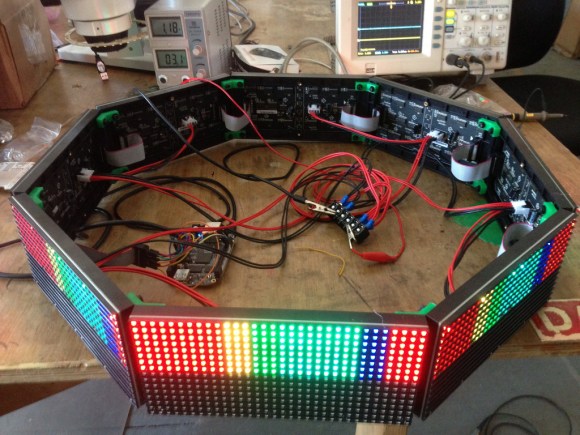
The folks at NYCResistor have a new toy in the Octoscroller. For a couple of years now the NYCResistor crew has used the HexaScroller as a clock and general alert system. Now that RGB LED panels are cheaply available, the group decided to upgrade both the number of sides and the number of colors.

Octoscroller uses eight 16×32 RGB LED panels. These panels are relatively easy to interface to, but require constant refresh even to display a static image. This makes them both memory and CPU intensive for smaller microcontrollers. Brightness control via PWM only increases the difficulty.

On the plus side, the panels are structurally strong. This allows the Octoscroller to avoid the plywood ring which made up the frame of the Hexascroller. 3D printed brackets and hardware were all that was needed to complete the Octoscroller frame.

The brain of the this beast is a BeagleBone Black running LEDscape along with some custom software. Imagery comes from the Disorient Pyramid.

If you’re in the New York area, NYCResistor plans to offer classes on building your own Octoscroller.  You can also see the Octoscroller in person at MakerFaire NYC this weekend.

Four Meter Light Paintings

HaD

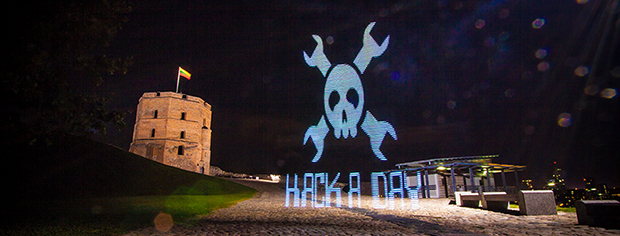
We’ve seen some light painting before – waving a microcontroller and LED strip in front of a camera is a very interesting project after all. [Saulius]’ light painting stick is unlike anything we’ve seen before, though. It’s huge – four meters high, and is also very flexible in the field, drawing images served up from a smart phone.

To get his pictures onto his light painting stick, [Saulius] used the very cool Carambola, an exceedingly small board that also runs Python. The images were converted to a 128xWhatever .BMP file served to the Carambola over WiFi with a smart phone, Since the Carambola runs Linux, sometimes a kernel interrupt would mistakenly restart the drawing process. [Saulius] found a way around that by writing the drawing code in C and wrapping that in a Python module. The speed of C and the flexibility of Python, who could ask for more.

On the project page, you can see [Saulius] pulling off some very cool light paintings. Even though the Hackaday logo is the best way to get on the front page here, this pic is probably the most impressive

An Improved Bubble Display With RGB LEDs

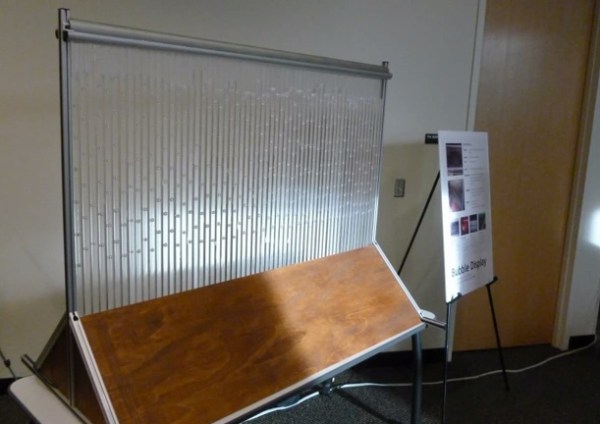
Making a bubble display is quite an undertaking, but [Jay] takes advantage of iterative design to construct this impressive (and at 60 tubes, massive) bubble display. The display functions by dispensing bubbles to serve as illuminated pixels in each tube as they rise through the fluid. His build log steps through the display’s construction with a keen attention to detail and above all, patience.

Rather than diving right in and slapping some tubes together, [Jay] took the time to research other bubble display projects, including one we featured a few years back that grew out of yet another HackaDay article. His prototypes started off small to test potential features: whether to use water or glycerin, timing for the air pumps and bubble size, and several others. [Jay] even filled the log with videos of every test, so you can watch the problems and solutions unfold at each step.

The finished display boasts sixty 30″ tall tubes, making it 64″ wide. [Jay] also installed RGB LEDs at every edge where the tubes meet to better distribute the light. You can watch one of the many videos of the display at work below.

Continue reading “An Improved Bubble Display With RGB LEDs”

RGB Infinity Mirror

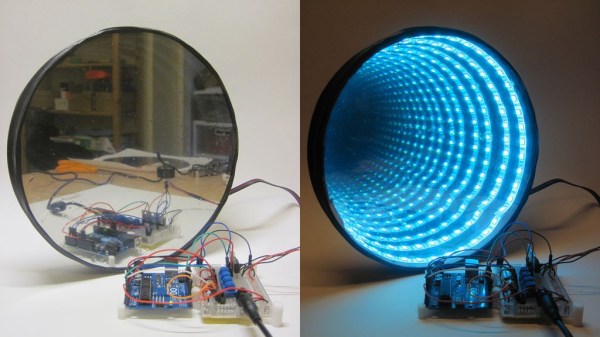
If you’ve been waiting for a more detailed guide before you set off to work on your own Infinity Mirror, [Ben]’s write-up is perhaps the most approachable one you will find. This build uses a set of four potentiometers to control an analog RGB LED strip (these lights are not individually addressable: but that makes coding simpler). [Ben] powers everything from a 12V 5A DC adapter, which is more than enough to run the 12V RGB strip along with the Arduino.

The mirror has two different ‘modes:’ individual channel color control and color-fade. In the first mode, three pots drive the RGB channels respectively. The color-fade mode has a mind of its own, sliding between all possible colors; you can spin the fourth potentiometer to control the speed of the transition.

The video below better illustrates the different modes. We definitely recommend [Ben’s] excellent guide as an ideal first project for anyone who has yet to take the plunge beyond simple microcontroller exercises. Check out Freeside Atlanta’s Infinity Mirror prototype for more inspiration.

Continue reading “RGB Infinity Mirror”