The 10 Kinds Of Programmers That Use Calcutron-33

It is interesting how, if you observe long enough, things tend to be cyclical. Back in the old days, some computers didn’t use binary, they used decimal. This was especially true of made up educational computers like TUTAC or CARDIAC, but there was real decimal hardware out there, too. Then everyone decided that binary made much more sense and now it’s very hard to find a computer that doesn’t use it.

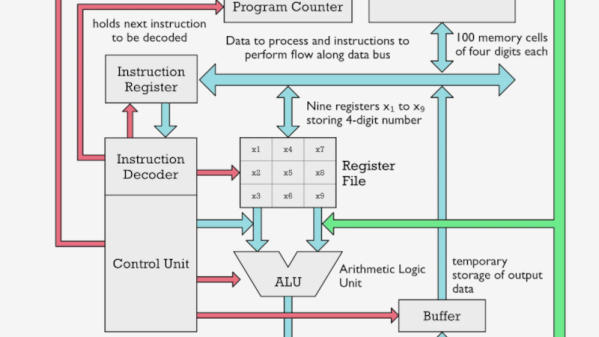
But [Erik] has written a simulator, assembler, and debugger for Calcutron-33, a “decimal RISC” CPU. Why? The idea is to provide a teaching platform to explain assembly language concepts to people who might stumble on binary numbers. Once they understand Calcutron, they can move on to more conventional CPUs with some measure of confidence.

To that end, there are several articles covering the basic architecture, the instruction set, and how to write assembly for the machine. The CPU has much in common with modern microprocessors other than the use of decimal throughout.

There have been several versions of the virtual machine with various improvements and bug fixes. We’ll be honest: we admire the work and its scope. However, if you already know about binary, this might not be your best bet. What’s more is, maybe you should understand binary before tackling assembly language programming, at least in modern times. Still, it does cover a lot of ground that applies regardless.

Made-up computers like TUTAC and CARDIAC were all the rage when computer time was too expensive to waste on mere students. There was also MIX from computer legend Donald Knuth.

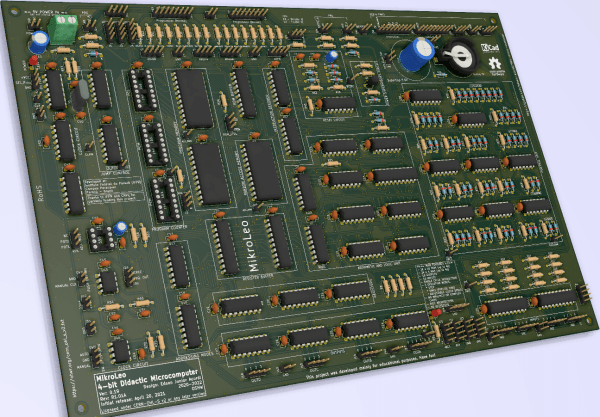
MikroLeo, A 4-Bit Retro Learning Platform

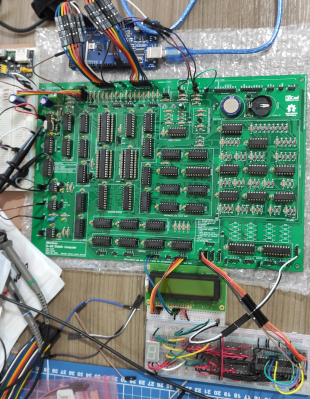
MikroLeo is a discrete TTL logic-based microcomputer intended for educational purposes created by [Edson Junior Acordi], an Electronics Professor at the Brazilian Federal Institute of Paraná, Brazil. The 4-bit CPU has a Harvard RISC architecture built entirely from 74HCT series logic mounted on a two-sided PCB using only through-hole parts. With 2K words of instruction RAM and 2K words of addressable RAM, the CPU has a similar resource level to comparable machines of old, giving students a feel for how to work within tight constraints.
Simulation of the circuit is possible with digital, with the dedicated PCB designed with KiCAD, so there should be enough there to get cracking with it. Four 4-bit IO ports make interfacing easy, with dedicated INput and OUTput instructions for the purpose. An assembler, compiler, and emulator are all being worked on (as far as we can tell) so keep an eye out for that, if this project is of interest to you.

We like computers a bit around these parts, the “hackier” and weirder the better. Even just in the 4-bit retro space, we’ve seen so many, from those built around ancient ALU chips to those built from discrete transistors and diodes, but you don’t need to go down that road, an emulation platform can scratch that retro itch, without the same level of pain.

Home-Built CPU Runs With Home-Built Toolchain

A few years ago [Takaya Saeki] and fellow students of the University of Tokyo, were given a very limited instruction during their ‘CPU exercise’ class, along the lines of:

Take this ray-tracing program written in OCaml and run it on your CPU implemented on an FPGA

Splitting into groups to cover the CPU, FPU, simulator tool, and compiler toolchain, the students started with designing a RISC ISA, then designed a CPU around that. You can follow along with the retrospective writeup of the class, then dive into the GitHub pages for each of the components of the system, although the commentary is mainly in Japanese. Hey, you can google translate right? Continue reading “Home-Built CPU Runs With Home-Built Toolchain”

FPGA Retrocomputer: Return To Moncky

Part of the reason that retrocomputers are still so popular despite their obsolescence is that it’s possible to understand the entire inner workings of a computer like this, from the transistors all the way up to the software. Comparatively, it will likely be a long time (if ever) before anyone is building a modern computer from discrete components. To illustrate this point, plenty of 8-bit computers are available to either restore from original 80s hardware or to build from kits. And if you’d like to get even deeper into the weeds you can design your own computer including the instruction set completely from the ground up using an FPGA.

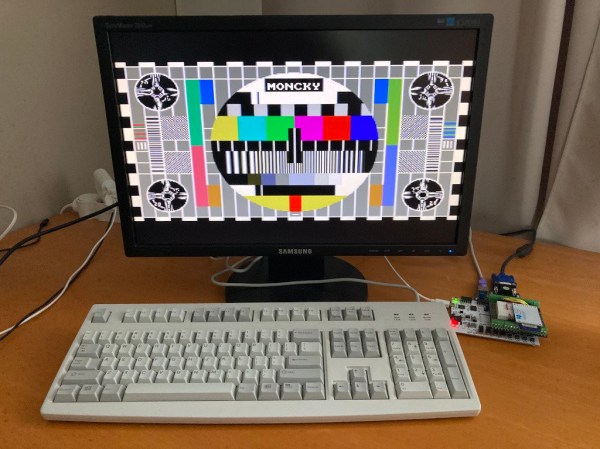
This project, called the Moncky project, is a step above the usual 8-bit computer builds as it is actually a 16-bit computer. It is built around an Arty Spartan-7 FPGA dev board running around 20 MHz and has access to 2 x 128 kB dual-port RAM for memory. To access the outside world there is a VGA output, PS/2 capability, SPI, and uses an SD card as a hard drive. This project really shines in the software, though, as the project creator [Kris Demuynck] builds everything from scratch in order to illustrate how everything works for educational purposes, and is currently working on implementing a C compiler to make programming the computer easier.

All of the project files, as well as all of the code, are available on the project’s GitHub page if you’d like to follow along or build on this homebrew 16-bit computer. It’s actually the third iteration of this computer, with the Moncky-1 and Moncky-2 being used to develop the more basic building blocks for this computer. While it’s not the first 16-bit computer we’ve seen implemented on an FPGA, it is one of the few that builds its own RISC instruction set and associated software rather than cloning a known existing processor. We’ve also seen some interesting x86 implementations on an FPGA as well.

Thanks to [koen-ieee] for the tip!

How The Gigatron TTL Microcomputer Works

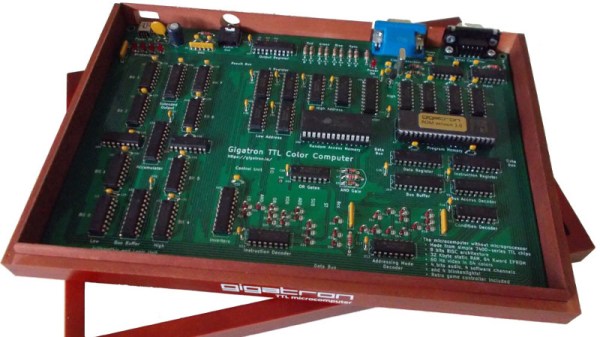
About a year ago when Hackaday and Tindie were at Maker Faire UK in Newcastle, we were shown an interesting retrocomputer by a member of York Hackspace. The Gigatron is a fully functional home computer of the type you might have owned in the early 1980s, but its special trick is that it does not contain a microprocessor. Instead of a 6502, Z80, or other integrated CPU it only has simple TTL chips, it doesn’t even contain the 74181 ALU-in-a-chip. You might thus expect it to have a PCB the size of a football pitch studded with countless chips, but it only occupies a modest footprint with 36 TTL chips, a RAM, and a ROM. Its RISC architecture provides the explanation, and its originator [Marcel van Kervinck] was recently good enough to point us to a video explaining its operation.

It was recorded at last year’s Hacker Hotel hacker camp in the Netherlands, and is delivered by the other half of the Gigatron team [Walter Belgers]. In it he provides a fascinating rundown of how a RISC computer works, and whether or not you have any interest in the Gigatron it is still worth a watch just for that. We hear about the design philosophy and the choice of a Harvard architecture, explained the difference between CISC and RISC, and we then settle down for a piece-by-piece disassembly of how the machine works. The format of an instruction is explained, then the detail of their 10-chip ALU.

The display differs from a typical home computer of the 1980s in that it has a full-color VGA output rather than the more usual NTSC or PAL. The hardware is simple enough as a set of 2-bit resistor DACs, but the tricks to leave enough processing time to run programs while also running the display are straight from the era. The sync interval is used to drive another DAC for audio, for example.

The result is one of those what-might-have-been moments, a glimpse into a world in which RISC architectures arrived at the consumer level years earlier than [Sophie Wilson]’s first ARM design for an Acorn Archimedes. There’s no reason that a machine like this one could not have been built in the late 1970s, but as we know the industry took an entirely different turn. It remains then the machine we wish we’d had in the early 1980s, but of course that doesn’t stop any of us having one now. You can buy a Gigatron of your very own, and once you’ve soldered all those through-hole chips you can run the example games or get to grips with some of the barest bare-metal RISC programming we’ve seen. We have to admit, we’re tempted!

Continue reading “How The Gigatron TTL Microcomputer Works”

OpenISA Launches Free RISC-V VEGAboard

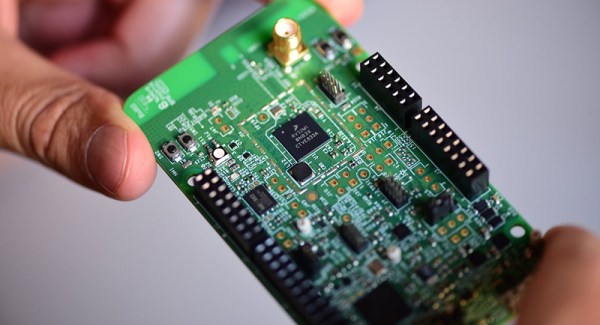
RISC architecture is gonna change everything, and I still can’t tell if we like that movie ironically or not. Nevertheless, RISC-V chips are coming onto the market, chipmakers seem really interested in not paying licensing fees, and new hard drives are shipping with RISC-V cores. The latest development in Open instruction sets chips comes from OpenISA. They’ve developed the VEGAboard, a dev board with two RISC-V chips and Arduino-style pin headers.

The VEGAboard comes loaded with an NXP chip which combines an ARM Cortex-M0 and Cortex-M4. So far, so good, but there are already dozens of boards that combine two ARM microcontrollers on a single development platform. The real trick is the RI5CY and Zero-RI5CY chips on the VEGAboard, a 4-stage RISC-V RV32IMCCXpulp CPU. This comes from the PULP platform, meant to be a small, low-power, but parallel platform for various processing needs. In short, with the VEGAboard, you’re not running a blink() sketch on the RISC-V microcontroller. You run the blink() sketch on the ARM microcontrollers, while using the RISC-V chip to read accelerometers and toggle pins. It’s a coprocessor, but it’s RISC-V.

Other features of the VEGAboard include 4MB of Flash, a light sensor, accelerometer, magnetometer, an RGB LED, OpenSDA serial debug adapter, an on-board BLE radio, and of course those wonky Arduino pin headers.

There are, or were, free VEGAboards available, but those are long gone. It’s still an interesting platform, though, and if you’d like to get your hands on one, production will resume shortly. Of course, if you need RISC-V right now, there are actual RISC-V Arduinos, a RISC-V with built-in neural networks, and SiFive will soon have a Linux-capable RISC-V multicore board. These are exciting times, and every day we’re seeing how RISC architecture is gonna change everything.

A Sub-$1000, Non-X86 Motherboard

If you’re building a computer, your options are nearly limitless. You can get a motherboard with red LEDs, with blue LEDs, green LEDs, or if you’re feeling spendy, RGB LEDs. You can get custom-milled heat spreaders in any shape you want, as long as it’s angular and screams ‘gamer’. If you want a motherboard that doesn’t use x86 — either AMD or Intel — you’re kind of out of luck. Either it doesn’t exist, or it’s going to cost a small fortune.

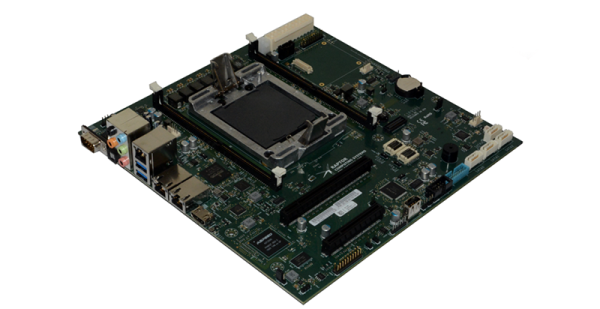
Raptor Engineering have just released a motherboard that isn’t x86 and doesn’t cost as much as a cheap car. The Blackbird mainboard is designed for an IBM Power9 CPU and it only costs $800. Add in a four-core CPU and the total cost comes out to about $1200. Add in some ECC RAM and you’re still under two grand. Building with a non-x86 CPU has never been cheaper. This is a significant change from earlier releases from Raptor Engineering, where just the motherboard cost $3700.

The Blackbird mainboard features dual DDR4 ECC DIMM slots, one PCI Express 4.0 x16 slot, one PCI Express 4.0 x8 slot, dual Gigabit Ethernet ports, 4 x SATA 3.0 ports, 4 x USB 3.0 ports, 1 x USB 2.0 port, and an HDMI display output.

The only reason you would build a Power9-based computer is simply to get around the black box that has become Intel and AMD CPUs. No one is really sure what’s going on in the Intel Management Engine, AMD has similar black boxes littered around. However, using a Power9 CPU has a secure boot mode and provided your computer is physically secure, you’re more or less assured you’re running your firmware and your kernel and your userspace apps. It’s security for the security-minded. RISC architecture is going to change everything.