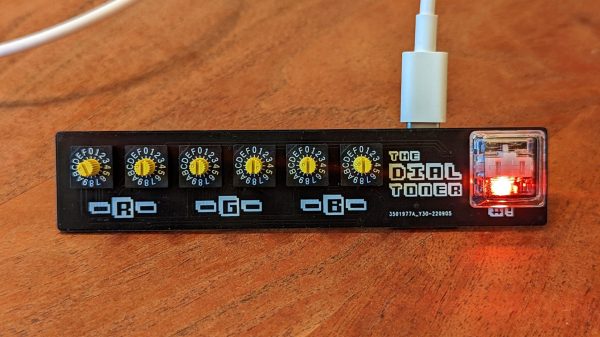
The Dial Toner has two dials for each color channel – Red, Green, and Blue. By turning the dials, one can choose a given color in the 8-bit RGB color space, and that color is then displayed on the device’s included RGB LED. Once selected, the button can be pressed to type the selected color’s hex code into a text box. The Dial Toner runs on a Xiao RP2040 microcontroller board, and is coded in CircuitPython.
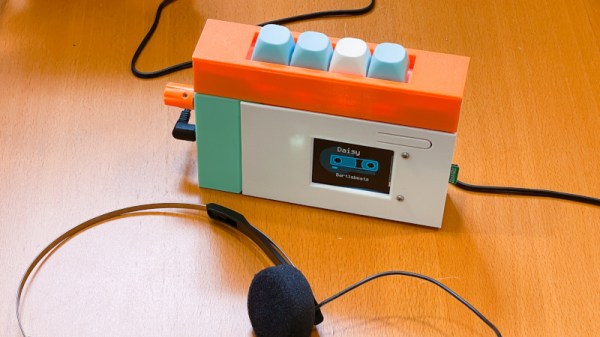
If you weren’t already well aware, the 90s are like, so hot right now, and that includes cassette tapes for some reason. (Even though we personally didn’t have a CD player until 1998, they were around as early as 1982.) But if you don’t dig the quality of cassettes, or if you’d just rather carry around more than 45-120 minutes worth of music, than [John Edgar Park]’s Walkmp3rson is definitely the build for you. That’s pronounced ‘Walkperson’, as in a 21st century MP3-based update of the classic Walkman.
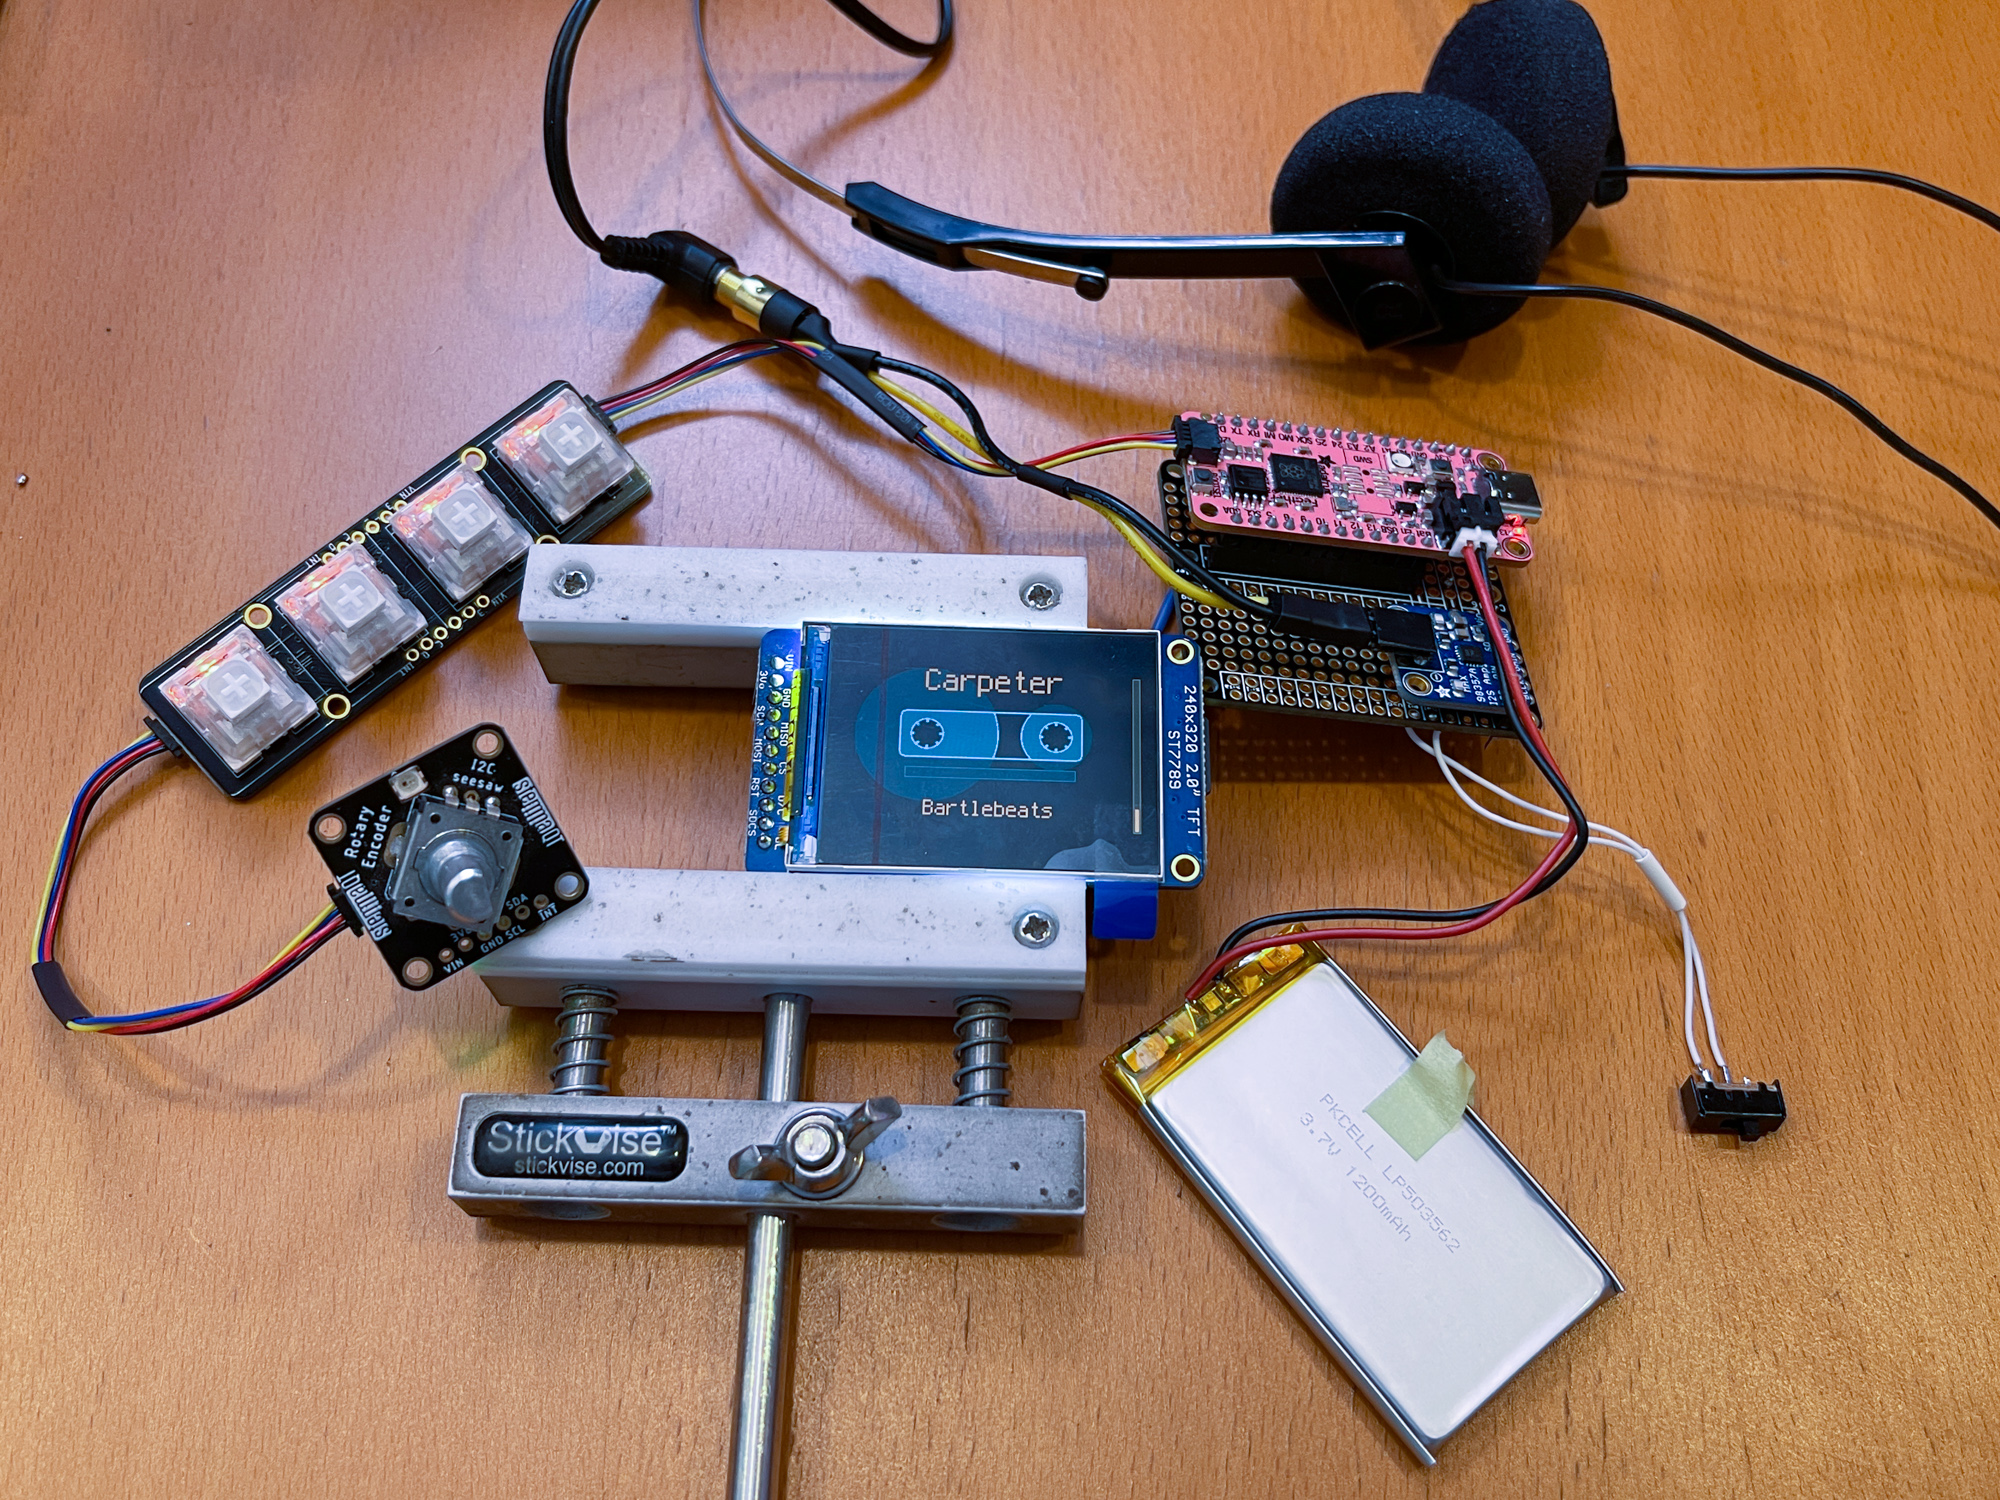
Inside this amazing 3D printed enclosure, you’ll find an Adafruit Feather RP2040 controlling the screen, handling input from the rotary encoder and those sweet mechanical keyswitches, and of course, playing audio files from SD cards through the amplifier breakout board. And no, this isn’t just another MP3 player — well, it kind of is, but the presentation really goes a long way here.
There are tons of retro-modern nods, like the cassette reel animation that plays on the TFT screen, the boxy enclosure, and the fact it involves physical media. Oh yes — you get to insert an SD card whenever you want to change albums/discographies/genres/whatever. In fact, this would be a great use of older, smaller SD cards. You could go all out and make tiny album art to slip inside those milky plastic cases. Check out the brief demo video after the break.
Looking to play your tunes on a microcontroller, but not a fan of the Walkman aesthetic? In June we covered a similar audio player powered by the ESP32 that does an uncanny impersonation of a portable tape deck that you might be interested in.
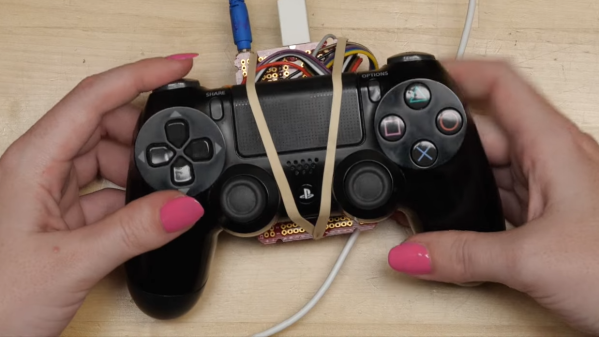
In the case of the PS4 controller, most of the buttons are of a membrane type, that talk to the main board inside via a series of contacts on a flex cable. Thus, [Becky] designed her PCB to interface with that to read most of the buttons. A breadboard and an LED came in handy to figure out which pads corresponded to which buttons on the controller. Replacement joysticks were sourced off Amazon to solder directly on to the replacement PCB.
[feralAI] and fellow GitHub contributors present for your viewing pleasure GP2040: an open source game pad firmware for RP2040-based hardware. The dual-core RP2040 is a good platform to use for gaming inputs, as there is plenty of CPU grunt to get sub-1 ms USB polling time, regardless of any other tasks the controller may be performing. Currently the firmware supports PC, Android, RPi, Nintendo Switch, PS3, PS4 (legacy mode), and the sweet MiSTer FPGA-based retro-gaming platform.
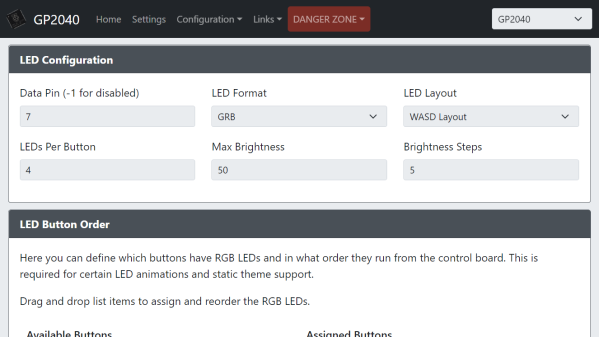
The firmware supports the older DirectInput API and the newer shiny (but rather restrictive) XInput API (no, it’s not the old X11 input extension with the same name) — as well as the usual controller features like SOCD cleaning, D-pad mapping, and RGB support for additional distractions. There is even support for those tiny OLED displays (SSD1306 and friends), although we can’t think of a use case for that at the moment. Configuration is particularly interesting, however, as it is based upon an embedded web application. This is where the pin mappings to your actual hardware are defined, as well as all that RGB bling, if you so desire.
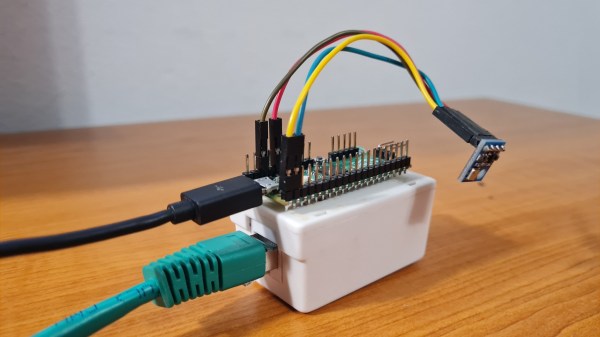
A few days ago we covered a project that brought Ethernet connectivity to the Raspberry Pi Pico using little more than some twisted pair and a RJ-45 connector. It was a neat trick, but not exactly ready for widespread adoption. Looking to improve on things a bit, [tvlad1234] has taken that project’s code and rewritten it into a friendly library you can use with any RP2040 board.
In case you missed it, the initial demo did 10BASE-T transmission by bit-banging with the PIO, and was able to send UDP messages to devices on the wired LAN. It was an impressive accomplishment, but its code didn’t make it easy to build your project around it. This new library makes UDP messaging as easy as a printf, offloading all non-PIO-managed Ethernet signal work onto the RP2040’s second CPU core. The library even generates a random MAC address out of your flash chip’s serial number!
As a demonstration of the new library, [tvlad1234] has put together a simple Ethernet-connected temperature monitor using the BMP085 or BMP180 sensor connect over I2C. If you feel like you could use an Ethernet transmit-only sensor in your life, browsing the source code would be a great start.
Whilst the Raspberry Pi RP2040 is quite a capable little chip, on the whole it’s nothing really special compared to the big brand offerings. But, the PIO peripheral is a bit special, and its inclusion was clearly a masterstroke of foresight, because it has bestowed the platform all kinds of capabilities that would be really hard to do any other way, especially for the price.
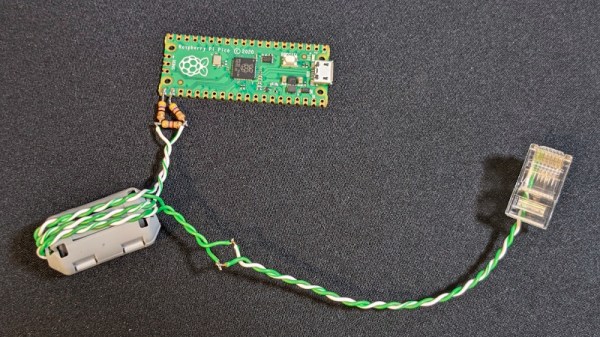
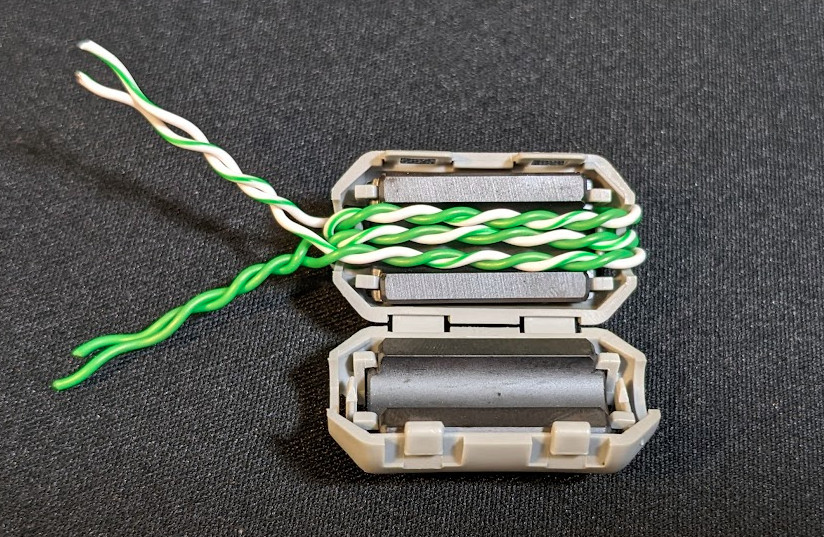
Our focus this time is on Ethernet, utilizing the PIO as a simple serialiser to push out a pre-formatted bitstream. [kingyo] so far has managed to implement the Pico-10BASE-T providing the bare minimum of UDP transmission (GitHub project) using only a handful of resistors as a proof of concept. For a safer implementation it is more usual to couple such a thing magnetically, and [kingyo] does show construction of a rudimentary pulse transformer, although off the shelf parts are obviously available for this. For the sake of completeness, it is also possible to capacitively couple Ethernet hardware (checkout this Micrel app note for starters) but it isn’t done all that much in practice.
Inside the expedient pulse transformer.
UDP is a simple Ethernet protocol for transferring application data. Being connection-less, payload data are simply formatted into a packet buffer up front. This is all fine, until you realize that the packets are pretty long and the bitrate can be quite high for a low-cost uC, which is why devices with dedicated Ethernet MAC functionality have a specific hardware serialiser-deserialiser (SERDES) block just for this function.
Like many small uC devices, the RP2040 does not have a MAC function built in, but it does have the PIO, and that can easily be programmed to perform the SERDES function in only a handful of lines of code, albeit only currently operating at 10 MBit/sec. This will cause some connectivity problems for modern switch hardware, as they will likely no longer support this low speed, but that’s easily solved by snagging some older switch hardware off eBay.
As for the UDP receive, that is promised for the future, but for getting data out of a remote device over a wired network, Pico-10BASE-T is a pretty good starting point. We’ve seen a few projects before that utilize the PIO to generate high speed signals, such as DVI, albeit with a heavy dose of overclocking needed. If you want a bit more of an intro to all things Pico, you could do worse than check out this video series we highlighted a while back.
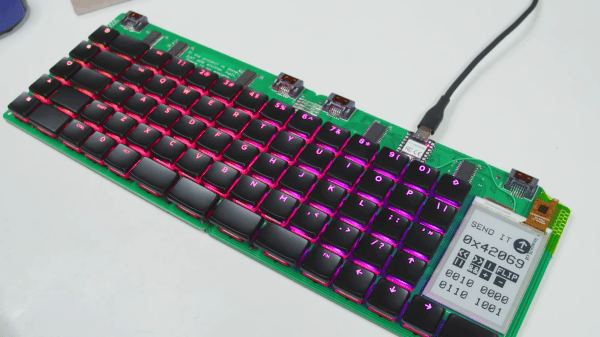
When designing anything with “hackable” in the punchline, scope creep is an integral part of the process. You end up trying to create something to potentially be an infinite number of things for an infinite number of users. [Zack Freedman] is going really deep down the rabbit hole with his MiRage keyboard and has been documenting the progress in his usual entertaining style, with some cautionary notes included.
The most fascinating tale from this come about as a result of adding RGB LEDs beneath the keys, while still allowing everything to function when the keyboard is split in two. Thanks to an IO expander chip in one side of the board, a standard TRRS audio cable is enough to link both sides together. But the addition of addressable LEDs meant more lines were required.
[Zack] thought he had found a solution in the form of SATA cables, but it turns out all SATA cables internally connect pins 1,3, and 7, making them useless for this application. He realized he had no choice but to add a second microcontroller to the “dumb” side of the keyboard and return to I2C over a TRRS cable. However, the RP2040-based Seeed XIAO’s I2C absolutely refused to play along. After a fortnight of frustrating debugging, it turns out there was a bug in the pin definitions. Fortunately, this also revealed that the XIAO had an undocumented secondary I2C interface, which he plans to configure as a peripheral to make the keyboard almost infinitely expandable with additional keys.
An earlier version of the MiRage featured tactile OLED displays, but it turns out the thin panes of glass don’t handle repeated flexing well, so they had to be scrapped. In their place came a touchscreen E-paper display, but now this seems to be evolving into a pluggable module for any input device that your heart desires, including possibly a haptic SmartKnob. Another major update are PCB footprints that support both CHOC and MX switches.
It all started with the MiRage V1 keyboard intended to for use in an updated version of [Zack]’s cyberdeck. After realizing how many people were interested in the keyboard but not the cyberdeck, he shifted focus to refining the MiRage.