Teaching A Mini-Tesla To Steer Itself

At the risk of stating the obvious, even when you’ve got unlimited resources and access to the best engineering minds, self-driving cars are hard. Building a multi-ton guided missile that can handle the chaotic environment of rush-hour traffic without killing someone is a challenge, to say the least. So if you’re looking to get into the autonomous car game, perhaps it’s best to start small.

If [Austin Blake]’s fun-sized Tesla go-kart looks familiar, it’s probably because we covered the Teskart back when he whipped up this little demon of an EV from a Radio Flyer toy. Adding self-driving to the kart is a natural next step, so [Austin] set off on a journey into machine learning to make it happen. Having settled on behavioral cloning, which trains a model to replicate a behavior by showing it examples of the behavior, he built a bolt-on frame to hold a steering servo made from an electric wheelchair motor, some drive electronics, and a webcam attached to a laptop. Ten or so human-piloted laps around a walking path at a park resulted in a 48,000-image training set, along with the steering wheel angle at each point.

The first go-around wasn’t so great, with the Teskart seemingly bent on going off the track. [Austin] retooled by adding two more webcams, to get a little parallax data and hopefully improve the training data. After a bug fix, the improved model really seemed to do the trick, with the Teskart pretty much keeping in its lane around the track, no matter how fast [Austin] pushed it. Check out the video below to see the Teskart in action.

It’s important to note that this isn’t even close to “Full Self-Driving.” The only thing being controlled is the steering angle; [Austin] is controlling the throttle himself and generally acting as the safety driver should the car veer off course, which it tends to do at one particular junction. But it’s a great first step, and we’re looking forward to further development.

Continue reading “Teaching A Mini-Tesla To Steer Itself”

Hackaday Prize 2023: Tilting Mechanical Panels Make A Beautiful Display

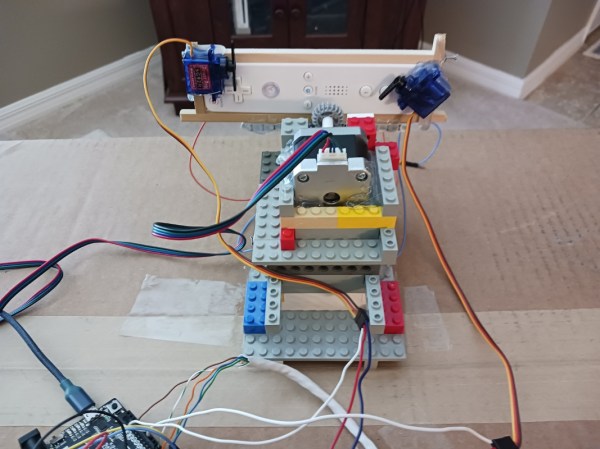
Mechanical displays use a variety of different methods to represent data with physical objects, and [AIRPOCKET]’s Mechanical Display aims to be a platform anyone can use. Each “pixel” in this display is a panel of some kind, and different effects can be had by moving individual panels to different angles. Not only can images be represented, but the patterns of the movements themselves can be beautiful as well.

The panels are an important part of how the display presents, so the design makes them easy to change out.

These sorts of displays are fertile ground for artistic expression (one memorable implementation of this basic idea was the wooden mirror, which used varnished tiles of wood) but anyone looking to use the concept has usually been on their own when it comes to implementation.

The idea [AIRPOCKET] has is to make this kind of installation easier to implement. This method uses economical mini RC servos and 3D-printed pieces to create modular segments that can be assembled into whatever configuration one may need.

The material of the panels matters, too. Just below the page break, you can see a large unit with each “pixel” consisting of a mirrored square that reflects daylight. There’s also a video of an earlier prototype that uses some ridged two-color pieces to create a simple 4×4 three-level greyscale display.

There are a lot of possibilities if [AIRPOCKET] can make this sort of display more easily accessible, and that makes it a contender in the 2023 Hackaday Prize.

Continue reading “Hackaday Prize 2023: Tilting Mechanical Panels Make A Beautiful Display”

Robotic Fox Is Part Dog, Part Cat — Just Like The Real Thing

Foxes are cat software running on dog hardware, or so they say. And [Will Cogley] seems to have taken that to heart with this 3D-printed robotic fox, which borrows heavily from projects like Boston Dynamics Spot robodog. True, the analogy breaks down a bit when you include MIT’s Cheetah on the inspiration list, but you get the point.

Very much a work in progress — [Will]’s RoboFox lacks both a head and a tail, which he aims to add at some point — there are some interesting design elements on display here. Whereas commercial quadruped robots tend to use expensive harmonic drives for the legs, [Will] chose simpler, cheaper hobby servos for his fox’s running gear. Each leg has three of them — one each for the upper and lower leg, and another that moves the whole leg in and out relative to the body. The dual-servo design for the leg is particularly interesting — one servo drives the upper leg directly, while the other servo drives the lower leg through a gear drive and a captive bearing arrangement connected to a parallelogram linkage. The result is a quite compact assembly that still has twelve degrees of freedom, and isn’t anywhere near as “floppy” as you might expect from something driven by hobby servos.

The video below shows off the design details as well as some of the fox’s construction, including some weirdly anatomically correct poses while it’s on its back. The fox is still getting its legs — you can see a few times when the servos get the jitters, and the umbilical is clearly a hindrance for such a lightweight robot. But [Will] has made a great start here, and we’re keen to see RoboFox progress. Although we’re not sure about giving the future head animatronic eyes.

Continue reading “Robotic Fox Is Part Dog, Part Cat — Just Like The Real Thing”

Making Music By Probing Magnetite Crystals

Well, noises anyway. [Dmitry Morozov] and [Alexandra Gavrilova] present an interesting electronics-based art installation, which probes a large chunk of crystalline magnetite, using a pair of servo-mounted probes, ‘measuring’ the surface conductivity and generating some sound and visuals.

It appears to have only one degree of freedom per probe, so we’re not so sure all that much of the surface gets probed per run, but however it works it produces some interesting, almost random results. The premise is that the point-to-point surface resistivity is unpredictable due to the chaotically formed crystals all jumbled up, but somehow uses these measured data to generate some waveshapes vaguely reminiscent of the resistivity profile of the sample, the output of which is then fed into a sound synthesis application and pumped out of a speaker. It certainly looks fun.

From a constructional perspective, hardware is based around a LattePanda fed samples by an ADS1115 ADC, which presumably is also responsible for driving the LCD monitor and the sound system. An Arduino is also wedged in there perhaps for servo-driving duty, maybe also as part of the signal chain from the probes, but that is just a guess on our part. The software uses the VVVV (Visual Live-programming suite) and the Pure Data environment.

We haven’t seen magnetite used for this type of application before, we tend to see it as a source of Iron for DIY knifemaking, as a medium to help separate DNA or just to make nanoparticles, for erm, reasons.

$60 Robot Arm Is Compact

Thanks to 3D printing and inexpensive controllers, a robot arm doesn’t need to break the bank anymore. Case in point? [Build Some Stuff] did a good-looking compact arm with servos for under $60. The arm uses an interesting control mechanism, too.

Instead of the traditional joystick, the arm has a miniature arm with potentiometers at each joint instead of motors. By moving the model arm to different positions, the main arm will mimic your motions. It is similar to old control systems using a synchro (sometimes called a selsyn), but uses potentiometers and servo motors.

Continue reading “$60 Robot Arm Is Compact”

A milled PCB next to a woman wearing a dress that includes it

Elegant Evening Dress Sports Servo-Actuated Flowers

There’s been plenty of research into “smart fabrics”, and we’ve seen several projects involving items of clothing with electronics integrated inside. These typically include sensors and simple actuators like LEDS, but there’s no reason you can’t integrate moving electromechanical systems as well. [Rehana Al-Soltane] did just that: she made an elegant evening dress with flowers that open and close on command.

It took [Rehana] a bit of experimentation to figure out a floral design that opens and closes smoothly without crumpling the fabric or requiring excessive force to actuate. She finally settled on a plastic sheet sandwiched between two layers of fabric, with pieces of fishing line attached that pull the edges inward. The lines are guided through a tube down the back of the dress, where a servo pulls or releases them.

The mechanical flower can be operated by touch — [Rehana] made one of the other flowers conductive by embedding copper tape between its petals and connected it to the capacitive touch sensor interface of an Atmel microcontroller. The micro is sitting on a custom PCB that’s worn on the hip, with wires going to the servo at the back. You can see how the system operates in the video embedded below.

The dress is [Rehana]’s final project for the famous “How To Make (almost) Anything” course at MIT, and required a wide variety of skills: the cable guide was 3D printed, the flower petals were laser cut, the PCB was milled, and the end product was sewn together. [Rehana] has a knack for making electronics-infused clothes and accessories, including the flexible PCB crown that she’s wearing in the image above. Continue reading “Elegant Evening Dress Sports Servo-Actuated Flowers”

3D-Printed Servo Motor Has 360 Degrees Of Rotation

Hobby servos are nifty and useful for a wide range of projects. There’s nothing stopping you from building your own servos though, and you can even give them nifty features like 360-degree rotation In fact, that’s exactly what [Aaed Musa] did!

The servo relies on 3D printed gears in a 3D printed housing. The design makes prodigious use of threaded inserts to hold everything together nice and tight. A DC motor is charged with driving the assembly, as with any regular servo motor. However, in the place of a potentiometer, this design instead uses an AS5600 magnetic rotary position sensor to read the servo’s angle, via a magnet mounted in the servo’s gear. An Arduino is used to determine the servo’s current position versus the desired position, and it turns the motor accordingly with a BTS7960 motor driver.

The result is a sizeable and capable servo with an easily-customizable output, given it’s all 3D printed. If you’d rather just mod some servos instead, we’ve covered some great work in that area, too. Video after the break.

Continue reading “3D-Printed Servo Motor Has 360 Degrees Of Rotation”