Standing Desk Uses Pneumatics To Do The Job

Most standing desks on the market use electric motors or hand cranks to raise and lower the deck. However, [Matthias Wandel] found a Kloud standing desk that used an altogether different set up. He set about figuring out how it worked in the old-fashioned way—by pulling it apart.

The Kloud desk relies on pneumatics rather than electrical actuators to move up and down. Inside the desk sits a small tank that can be pressurized with a hand-cranked mechanism. A lever can then be used to release pressure from this tank into a pair of pneumatic cylinders that drive the top of the desk upwards. The two cylinders are kept moving in sync by a tensioned metal ribbon that ties the two sides together. The mechanism is not unlike a gas lift chair—holding the lever and pushing down lets the desk move back down. Once he’s explained the basic mechanism, [Matthias] gets into the good stuff—pulling apart the leg actuator mechanism to show us what’s going on inside in greater detail.

If you’ve ever thought about building your own standing desk, this might be a video worth watching. We’ve featured some other great pneumatics projects before, too. Video after the break.

Continue reading “Standing Desk Uses Pneumatics To Do The Job”

The Emperor’s New Computer

You walk into a home office and see an attractive standing desk that appears bare. Where’s the computer? Well, if it is [DIY Perk]’s office, the desk is the computer. Like a transformer robot, the desk transforms into a good-looking PC.

He starts with a commercial desk and creates a replacement desktop out of some aluminum sheets and extrusions. The motion uses some V-slot profiles and linear rails. The monitor and keyboard shelf pop up on invisible hinges. When closed, there’s no trace of a computer.

Continue reading “The Emperor’s New Computer”

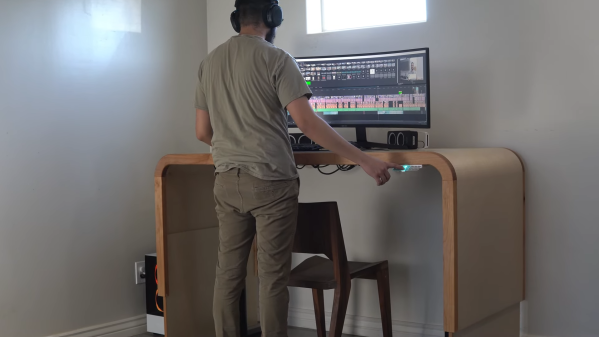
Standing Desk With A Clever Flair

Standing desks (also known as sit-stand desks) are somewhat polarizing. The height is adjustable, but the idea is that you move between sitting and standing while you work. Hundreds of manufacturers are out there, but they’re all the same. Two metal legs that extend and one or more motors to move the legs up and down. [JAR Made] tried to make something slightly different for their standing desk with an extending curved surface.

The build started with some gorgeous alder that was milled into square with a track saw and a planer — no jointer was required. However, he wanted long boards and was debating how to butt join the pieces together and decided on pocket holes with dowels to try and clamp the boards together while the glue dried. The resulting product was one that [JAR Made] was unhappy with. He pivoted on his feet by switching Baltic birch plywood for the main desk surface. Which was bent using a kerf-cutting technique (though just using a track saw rather than a CNC bit).

Here is where you can see him learn from his earlier mistakes. He routed a half lap in the plywood for the butt joint to give it more strength and devised a clever clamping mechanism using CA glue and painter’s tape to get good clamping pressure. The alder from earlier came in use to serve as a front edge for the plywood and a groove to hold the sliding piece of plywood that extends and retracts as the desk goes up and down.

Regular old standing desk legs screw into the underside of the desk and allow it to move up and down. Overall, it’s a wonderful build of a gorgeous desk. We love seeing people make mistakes and then pivot and learn from them. Perhaps the next step is to automate the desk to move on its own.

Continue reading “Standing Desk With A Clever Flair”

Raspberry Pi Powered Standing Desk Rises To New Heights

Like many office workers, [David Kong] found himself the lucky recipient of a motorized sit-stand desk. Also like most office workers with such a desk, he found himself mostly sitting. Reminders on his phone did little to change habits and [David] resolved to automate his desk to rise on a schedule.

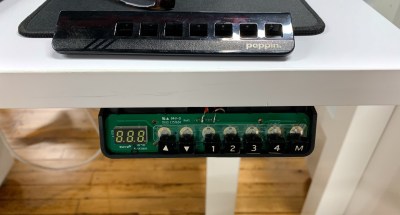
the control board for a poppin sit stand desk

Taking off the front panel of the control box required a few screws and [David] was delighted to find some testing pins right on the PCB.By connecting the right pins together, he could simulate any button being pressed. A Toshiba TLP222A solid-state relay made it simple to connect the pins together, the next step was triggering the relay on some sort of timer.

Speaking of timers, the oft-lauded 555 timer was considered. However, the length of time desired wasn’t as well suited for the 555, and the appeal of just tweaking a file to adjust the interval was tempting. Going to the other end of the spectrum, [David] had a Raspberry Pi zero laying around he had been meaning to play with.

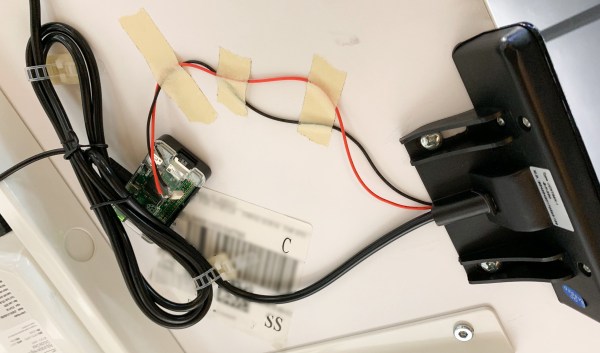
After soldering the relay to pin 17 and writing a quick 10 line python script that is executed on startup, [David] had a working solution that could be taped to the underside of the desk, out of sight. Rather than being on a fixed timer, the desk raises every 45 to 60 minutes. The impact on his life has been wonderful, which was the goal of this particular project. It’s been a few months and he hasn’t had to tweak or fix anything. Is a whole 64-bit multicore processor a bit of an overkill for toggling a pin every hour or so? Yes. But we can’t really fault him for reaching for what was already lying around. The results speak for themselves.

Perhaps this would be something you would incorporate when you’re building your own standing desk?

A Standing Desk On The Cheap

A programmer forced to work from home during the pandemic, [MrAkpla] was having back pains from sitting in front of the computer all day. He considered buying a standing desk, but all the various options didn’t fit with either his desk or his budget. Not to be deterred, he devised one of the simplest standing desk implementations that we’ve seen. It clearly works for him, because he’s been using it for one year now with great success. [MrAkpla] espouses three main benefits of his approach:

  • Cheap as heck
  • Five minute set up time
  • Uses your existing desk

These goals were accomplished. You can see in the video below that transition from sitting to standing is indeed as quick as he claims, is clearly inexpensive, and indeed it doesn’t require any modifications to his desk or furniture.

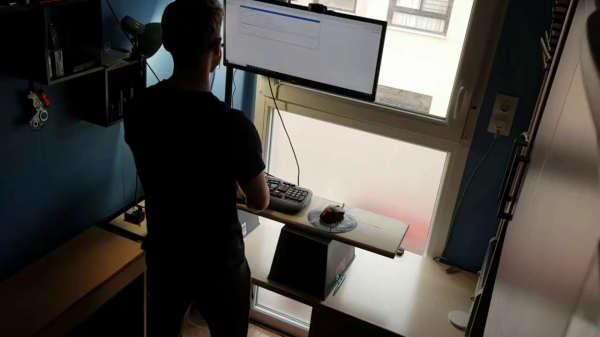
This design centers on a having an 80 cm long monitor arm, which is quite a range of adjustment. He’s using a monitor arm pole mount from UK manufacturer Duronic. Although they are having delivery problems these days because of Brexit issues, [MrAkpla] was able to get one delivered from existing inventory outside of the UK.

Admittedly, this is a crude design — in effect two trash bins and a board. But even if this doesn’t fit well with your office decor, its a great way to try out the concept of a standing desk without the up-front investment. By the way, [MrAkpla] is on the lookout for similar monitor mounting poles from non-UK manufacturers. If you have any recommendations, put them in the comments below. If you’re interested in a DIY standing desk that is on the opposite side of the complexity spectrum, check out this beauty that we covered back in the pre-pandemic era.

Continue reading “A Standing Desk On The Cheap”

Yell At Your Desk To Get Up In The Morning

Standing desks are great conversation starters in the office – whether you like it or not. How do you know someone’s got a standing desk? Don’t worry, they’ll tell you. Standing desks have their benefits, but for maximum flexibility, many people choose a desk that can raise and lower depending on their needs. [Wassim] had just such a desk, but found pushing the buttons too 20th century for his tastes. Naturally, Google Assistant integration was the key here.

[Wassim] started out intending to capture and then spoof the desk controller’s signals to the motors, before realising it was likely easier to simply spoof button presses instead. This was achieved through a handful of NPN transistors and an Onion Omega2+ microcontroller board. Then it was a simple case of coding the controller to press the various buttons in response to HTTP requests received over WiFi. Google Assistant integration was then handled with IFTTT, though [Wassim] also discusses the possibility of implementing the full Smart Home API.

It’s entertaining to watch [Wassim] issue commands and have the desk slowly rise in response. Of course, there are other approaches, like this sneaky use of PVC to hack the office furniture.

https://medium.com/@wassimchegham/hey-google-set-my-desk-to-standing-mode-b21dcc40d4b5

Motorizing An IKEA SKARSTA Table

We’ve been told that standing at a desk is good for you, but unless you’re some kind of highly advanced automaton you’re going to have to sit down eventually no matter what all those lifestyle magazines say. That’s where desks like the IKEA SKARSTA come in; they use a crank on the front to raise and lower the desk to whatever height your rapidly aging corporeal form is still capable of maintaining. All the health benefits of a standing desk, without that stinging sense of defeat when you later discover you hate it.
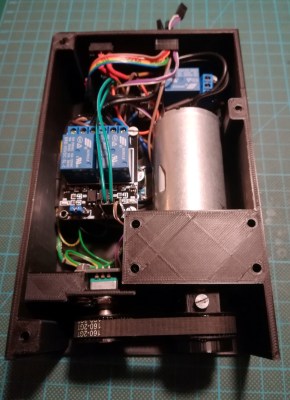
But who wants to turn a crank with their hand in 2019? Certainly not [iLLiac4], who’s spent the last few months working in conjunction with [Martin Mihálek] to add some very impressive features to IKEA’s adjustable table. Replacing the hand crank with a motorized system which can do the raising and lifting was only part of it, the project also includes a slick control panel with a digital display that shows the current table height and even allows the user to set and recall specific positions. The project is still in active development and has a few kinks to work out, but it looks exceptionally promising if you’re looking to get a very capable adjustable desk without breaking the bank.

The heart of the project is a 3D printable device which uses a low-RPM DC gear motor to turn the hex shaft where the crank would normally go. A rotary encoder is linked to the shaft of the motor by way of printed GT2 pulleys and a short length of belt, which gives the system positional information and avoids the complexity of adding limit switches to the table itself.

For controlling the motor the user is given the option between using relays or an H-Bridge PWM driver board, but in either event an Arduino Nano will be running the show. In addition to controlling the motor and reading the output of the rotary encoder, the Arduino also handles the front panel controls. This consists of a TM1637 four digit LED display originally intended for clocks, as well as six momentary contact tactile switches complete with 3D printed caps. The front panel’s simple user interface not only allows for setting and recalling three preset desk heights, but can even be used to perform the calibration routine without having to go in and hack the source code to change minimum and maximum positions.

We’ve seen all manner of hacks and modifications dealing with IKEA products, from a shelving unit converted into a vivarium to a table doing double duty as a cheap plate reverb. Whether you’re looking for meatballs or some hacking inspiration, IKEA seems to be the place to go.