3D Printed GIFs For Stop Motion Memes

Lithophanes are nothing new, with examples going back to the 1800s. But they’ve become popular again thanks to the ease of which these pieces of artwork can be 3D printed. While the Internet would be more than happy to see somebody press a 3D image of their cat into a thin piece of translucent porcelain ready to have a light shone through it, that’s quite a bit harder than just firing up the Monoprice.

But since the machine is doing all the work for you, why stop at one? That’s precisely the sort of thinking that lead [The Mad Maker] to recreate animated GIFs with stop motion photography and a stack of printed lithophanes. Now all your favorite reaction memes can make the leap to the physical world…and then go right back into the computer.

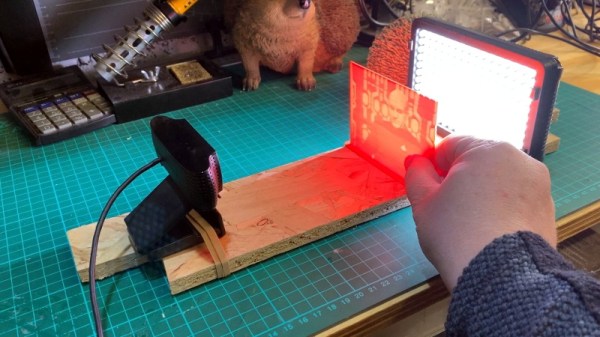
The method here is pretty simple: [The Mad Maker] disassembles his favorite GIF to get the individual frame images, converts each one of those into a lithophane STL via an online tool, prints it out, photographs it, and then stitches all those photographs back into a new GIF. Given the incredibly time consuming nature of this process you’ll want to limit it to short animations, and even then, probably do only every 2nd or 3rd frame to preserve your sanity.

In the video after the break you can see the entire process, as well as check out the final result. While there weren’t really any technical hurdles to overcome in this project, we did like seeing how [The Mad Maker] experimented to find the ideal position for the backlight and camera. The wooden frame he came up with to hold everything in position should make subsequent meme conversions a lot easier, now he just needs to add a little color. Continue reading “3D Printed GIFs For Stop Motion Memes”

CNC Etch-A-Sketch: Stop Motion Is Logical Next Step

It happens to everyone. You get your hands on an Etch-A-Sketch for the first time, and armed with the knowledge of how it works, you’re sure you can draw things other than rectangles and staircases. And then you find out the awful truth: you are not as precise as you think you are, and if you’re [QuintBUILDS], the circles you try to draw look like lemons, potatoes, or microbes.

Okay, yes, this definitely isn’t the first CNC-ified Etch-A-Sketch we’ve seen, but it just might be the coolest one. It’s certainly the most kid-friendly, anyway.

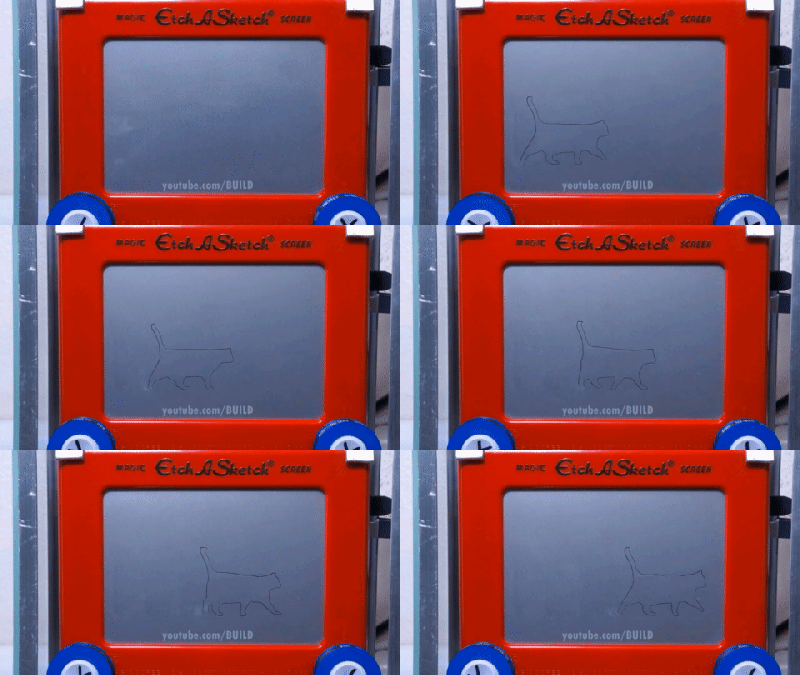
Most importantly, you can still pick it up and shake it to clear the screen, a feature sorely lacking in many of the auto-sketchers we scratch about. And if you’re not fully satisfied by this hack, be sure to check out the stop-motion video after the break that turns this baby into a touch-screen video player for Flatlanders.

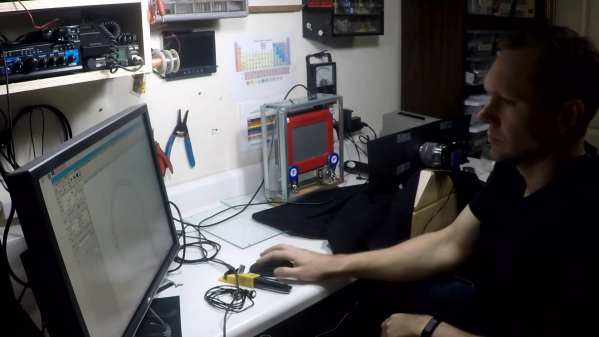
Turn it over and you’ll find a Raspberry Pi 3 and a CNC hat. The knobs are belt-driven from a pair of NEMA-17 size stepper motors that interface to the knobs with tight-fitting pulleys. Power comes from four 18650s, and is metered by a battery management board that provides both overcharge and drain protection. At some point in the future, [QuintBUILDS] plans to move to a battery pack, because the cell holder is electrically unstable.

We love the welded frame and acrylic enclosure because they make the thing sturdy and portable. Also, we’re suckers for see-through enclosures. They’re clearly superior if you want to do what [QuintBUILDS] did and take it to an elementary school science fair to show the kids just how cool science can be if you stick with it.

If you don’t think motorized Etch-A-Sketches can be useful, maybe you just haven’t seen this clock build yet.

Continue reading “CNC Etch-A-Sketch: Stop Motion Is Logical Next Step”

The Very Slow Movie Player Does It With E-Ink

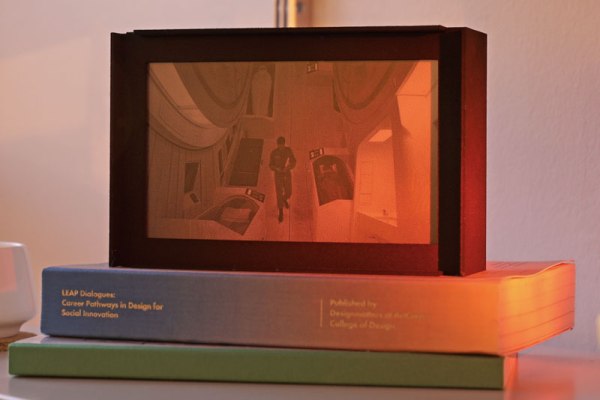
Most displays are looking to play things faster. We’ve got movies at 60 frames per second, and gaming displays that run at 144 fps. But what about moving in the other direction? [Bryan Boyer] wanted to try this out, so he built the VSMP, or Very Slow Movie Player. It’s a neat device that plays back a movie at about 24 fph (frames per hour) on an e-ink display to demonstrate something that [Bryan] calls Slow Seeing, which, he says “helps you see yourself against the smear of time.” A traditional epic-length movie is now going to run you greater than 8,000 hours of viewing.

Artistic considerations aside, it’s an interesting device from a technical point of view. [Bryan] built it from a 7.4-inch e-ink display from Pervasive Displays. The controller is connected to a Raspberry Pi Zero, which is running a Python script to convert a frame of the movie file into a dithered file, then send it to the display. Because the Pi Zero isn’t a very fast computer, this takes some time, and thus the slow speed of the VSMP. Originally, [Bryan] had set it up to run as fast as the system could manage, which was about 25 seconds per frame, or about 2 frames per minute. He decided to slow it down a bit further to the more attractive multiple of 24 frames per hour to contrast with the 24 frames per second of the original movie. He did this by using a CRON job that kicks of the conversion script once every 2.5 minutes and increments the frame counter. All of this is topped off with a nice 3D-printed case that has a lovely interference pattern to make a rather neat and intriguing project.

Perhaps the best part of this is see a time-lapse of the VSMP — life moves quickly around it while 2001: A Space Odyssey plays at normal speed.

Continue reading “The Very Slow Movie Player Does It With E-Ink”

Billy Whiskers: animatronic puppet

Animatronic Puppet Takes Cues From Animation Software

Lip syncing for computer animated characters has long been simplified. You draw a set of lip shapes for vowels and other sounds your character makes and let the computer interpolate how to go from one shape to the next. But with physical, real world puppets, all those movements have to be done manually, frame-by-frame. Or do they?

Billy Whiskers: animatronic puppet

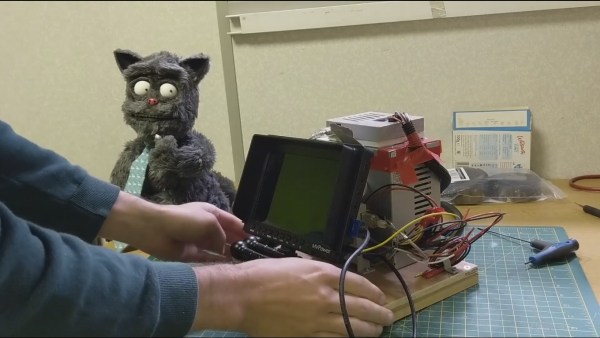
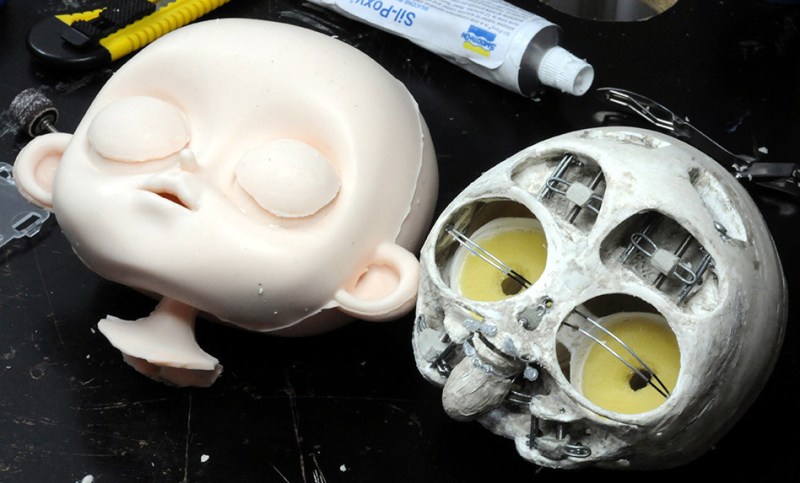
Stop motion animator and maker/hacker [James Wilkinson] is working on a project involving a real-world furry cat character called Billy Whiskers and decided that Billy’s lips would be moved one frame at a time using servo motors under computer control while [James] moves the rest of the body manually.

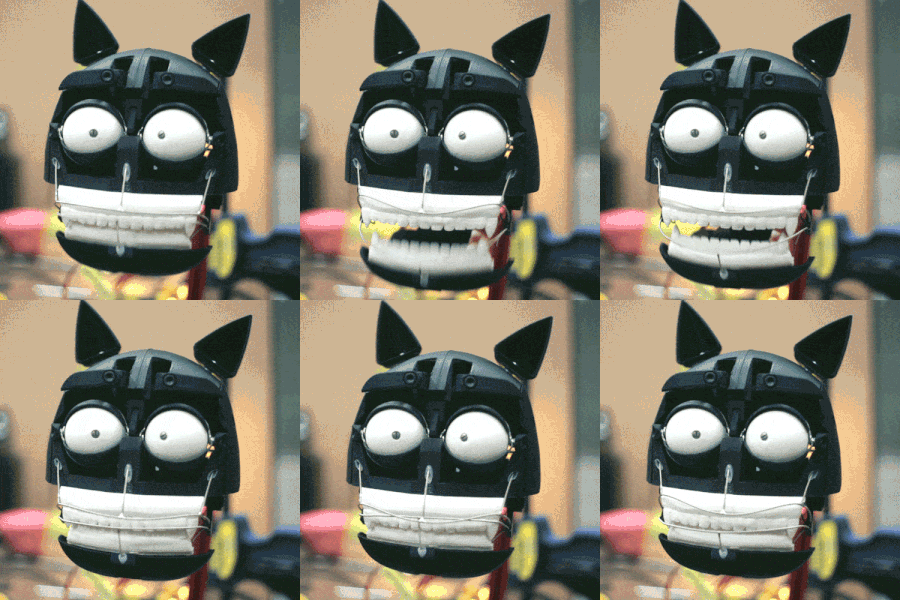
He toyed around with a number of approaches for making the lip mechanism before coming up with one that worked the way he wanted. The lips are shaped using guitar wire soldered to other wires going to servos further back in the head. Altogether there are four servos for the lips and one more for the jaw. There isn’t much sideways movement but it does enough and lets the brain fill in the rest.

On the software side, he borrows heavily from the tools used for lip syncing computer-drawn characters. He created virtual versions of the five servo motors in Adobe Animate and manipulates them to define the different lip shapes. Animate then does the interpolation between the different shapes, producing the servo positions needed for each frame. He uses an AS3 script to send those positions off to an Arduino. An Arduino sketch then uses the Firmata library to receive the positions and move the servos. The result is entirely convincing as you can see in the trailer below. We’ve also included a video which summarizes the iterations he went through to get to the finished Billy Whiskers or just check out his detailed website.

[Jame’s] work shows that there many ways to do stop motion animation, perhaps a part of what makes it so much fun. One of those ways is to 3D print a separate object for each character shape. Another is to make paper cutouts and move them around, which is what [Terry Gilliam] did for the Monty Python movies. And then there’s what many of us did when we first got our hands on a camera, move random objects around on our parent’s kitchen table and shoot them one frame at a time.

Continue reading “Animatronic Puppet Takes Cues From Animation Software”

Handmade Robot Brings Stop Motion To Life

Stop motion animation is often called a lost art, as doing it (or at least, doing it well) is incredibly difficult and time consuming. Every detail on the screen, no matter how minute, has to be placed by human hands hundreds of times so that it looks smooth when played back at normal speed. The unique look of stop motion is desirable enough that it still does get produced, but it’s far less common than hand drawn or even computer animation.

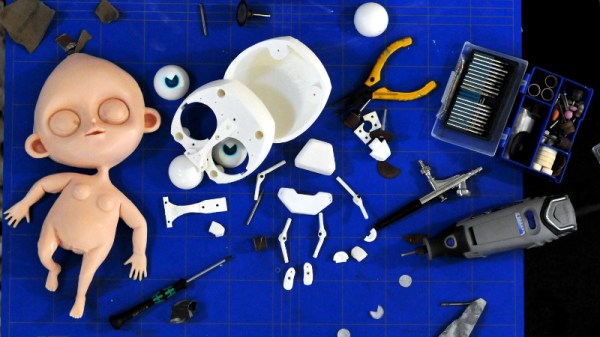
If you ever wanted to know just how much work goes into producing even a few minutes of stop motion animation, look no farther than the fascinating work of [Special Krio]. He not only documented the incredible attention to detail required to produce high quality animation with this method, but also the creation of his custom robotic character.

Characters in stop motion animation often have multiple interchangeable heads to enable switching between different expressions. But with his robotic character, [Special Krio] only has to worry about the environments, and allow his mechanized star do the “acting”. This saves time, which can be used for things such as making 45 individual resin “drops” to animate pouring a cup of tea (seriously, go look).

To build his character, [Special Krio] first modeled her out of terracotta to get the exact look he wanted. He then used a DIY 3D laser scanner to create a digital model, which in turn he used to help design internal structures and components which he 3D printed on an Ultimaker. The terracotta original was used once again when it was time to make molds for the character’s skin, which was done with RTV rubber. Then it was just the small matter of painting all the details and making her clothes. All told, the few minutes of video after the break took years to produce.

This isn’t the first time we’ve seen 3D printing used to create stop motion animation, but the final product here is really in a league of its own.

[Thanks to Antonio for the tip.]

Continue reading “Handmade Robot Brings Stop Motion To Life”

3D Printing A Stop Motion Animation

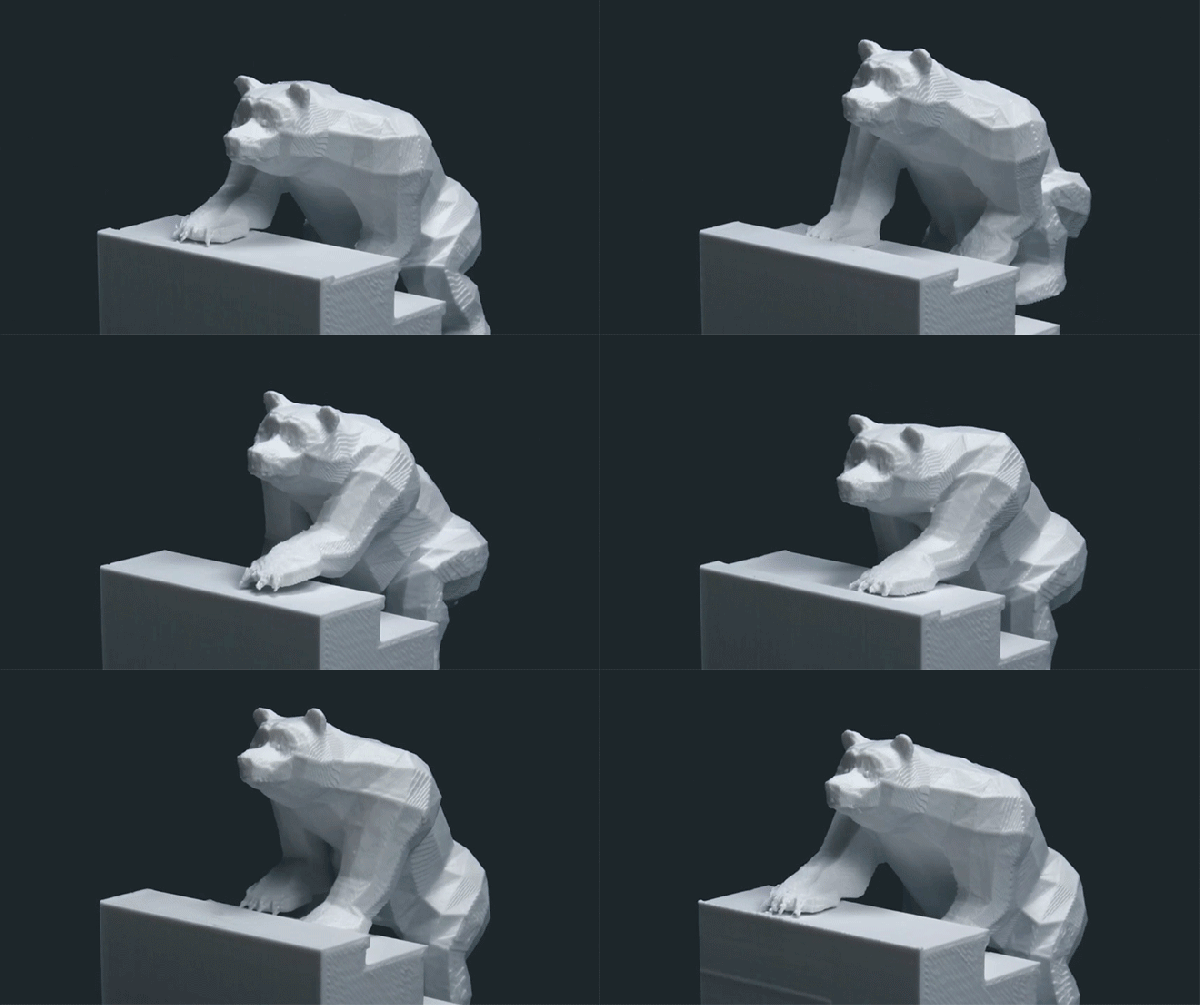
How much access do you have to a 3D printer? What would you do if you had weeks of time on your hands and a couple spools of filament lying around? Perhaps you would make a two second stop-motion animation called Bears on Stairs.

An in-house development by London’s DBLG — a creative design studio — shows a smooth animation of a bear — well — climbing stairs, which at first glance appears animated. In reality, 50 printed sculptures each show an instance of the bear’s looping ascent. The entire process took four weeks of printing, sculpture trimming, and the special diligence that comes with making a stop-motion film.

Continue reading “3D Printing A Stop Motion Animation”

Stop Motion Water Droplets

logo

The folks at Physalia studio were asked by a company called IdN to produce a little bit of video with a logo. After tossing a few ideas around, they hit upon the concept of projecting the IdN logo inside a falling water droplet. CGI would never get this idea right, so the finished product is the result of stop-motion animation created inside several thousand falling drops of water.

Taking a picture of a falling water droplet was relatively easy; a small drip, a laser pointer and photodiode, and a flash trigger were all that was needed to freeze a drop of water in time. The impressive part of the build is a motion control system for the camera. This system moves the camera along the vertical axis very slowly, capturing one water droplet at a time.

Behind the droplet is a an animation that’s seemingly inspired by a Rorschach test, ending on the IdN logo. The frames for these animations were printed out and placed inside the test chamber/studio upside down to account for the optical effects of a sphere of water.

The end result is a product of over 20,000 pictures taken, all edited down into a single 30-second shot. An amazing amount of work for such a short video but as you can see in the videos below, it’s well worth the effort.

Continue reading “Stop Motion Water Droplets”