JTAGulator Finds Debug Interfaces

jtagulator

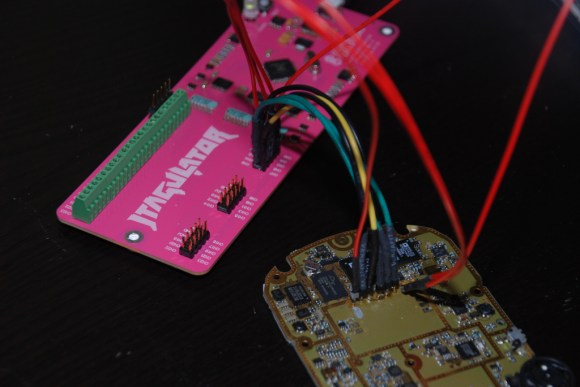
[Joe Grand] has come up with a tool which we think will be useful to anyone trying to hack a physical device: The JTAGulator. We touched on the JTAGulator briefly during our DEF CON coverage, but it really deserves a more in-depth feature. The JTAGulator is a way to discover On Chip Debug (OCD) interfaces on unfamiliar hardware.

Open any cell phone, router, or just about any moderately complex device today, and you’ll find test points. Quite often at least a few of these test points are the common JTAG / IEEE 1149.1 interface.

JTAG interfaces have 5 basic pins: TDI (Test Data In), TDO (Test Data Out), TCK (Test Clock), and TMS (Test Mode Select), /TRST (Test Reset) (optional).

If you’re looking at a PCB with many test points, which ones are the JTAG pins? Also which test points are which signals? Sometimes the PCB manufacturer will give clues on the silk screen. Other times you’re on your own. [Joe] designed the JTAGulator to help find these pins.
Continue reading “JTAGulator Finds Debug Interfaces”

Giving The Nexus 4 A Serial Port

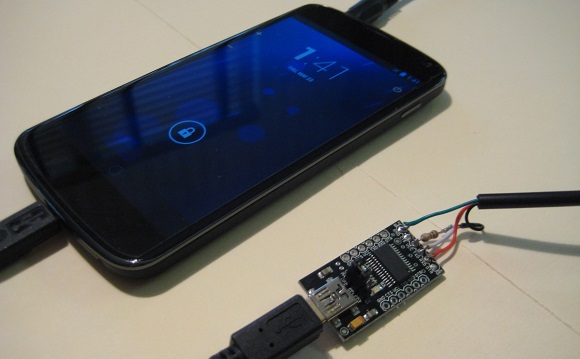
Having a serial port on any Linux box is always useful, but with the tiny computers we’re carrying around in our pockets now, that isn’t always an option. Some of the more advanced phones out there break out a UART on their USB OTG port, but the designers of the Nexus 4 decided to do things differently. They chose to put the Nexus 4’s serial port on the mic and headphone input, and [Ryan] and [Josh] figured out how to access this port.

Basically, the Nexus 4 has a tiny bit of circuitry attached to the microphone input. If the Nexus detects more than 2.8 Volts on the mic, it switches over to a hardware UART, allowing everything from an Arduino to an old dumb terminal to access the port.

The guys used a USB to serial FTDI board wired up to a 3.5 mm jack with a few resistors to enable the hardware UART on their phone. With a small enclosure, they had a reasonably inexpensive way to enable a hardware serial port on a mobile device with GPS, cellular, a camera, and a whole bunch of other sensors that any portable project would love.

EDIT: An anonymous little bird told us this: “You should add a note to the Nexus 4 serial cable post that TX and RX need to be 1.8V.  If you use 3.3V USB cables, you will likely eventually fry something.  FTDI makes 1.8V IO cables that work – you just need to make the trigger voltage for the mic line.” Take that for what you will.

Rooting Your AT&T U-verse Modem

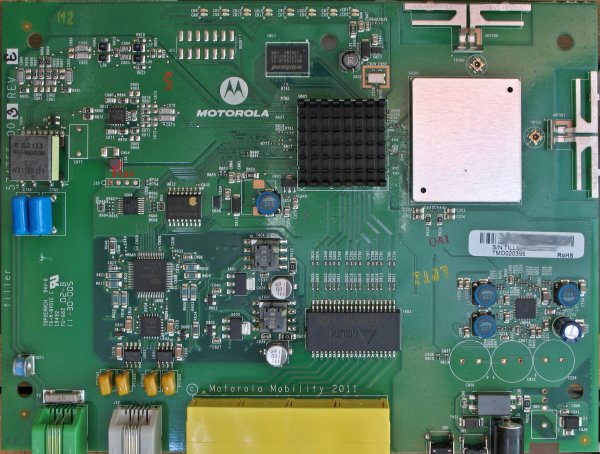
Unhappy with the performance of his U-verse modem [Jordan] decided to dig in and see if a bit of hacking could improve the situation. Motorola makes this exclusively for AT&T and there are no other modems on the market which can used instead. Luckily he was able to fix almost everything that was causing him grief. This can be done in one of two ways. The first is a hardware hack that gains access to a shell though the UART. The second is a method of rooting the device from its stock web interface.

We think the biggest improvement gained by hacking this router is true bridge mode. The hardware is more than capable of behaving this way but AT&T has disabled the feature with no option for an unmodified device to use it. By enabling it the modem does what a modem is supposed to do: translate between WAN and LAN. This allows routing to be handled by a router (novel idea huh?).

Giving The MSP430 A GUI

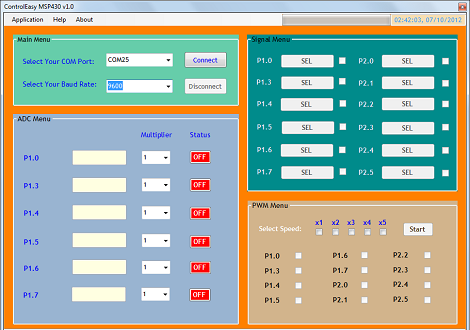
Sometimes you need to toggle or read a few pins on a microcontroller for a project so simple (or so temporary) that coding some firmware is a rather large investment of time. [Jaspreet] had the same problem – wanting to read values and toggle pins without writing any code – so he came up with a rather clever solution to control an MSP430 through a serial connection.

[Jaspreet] calls his project ControlEasy, and it does exactly as advertised: it provides a software interface to control ADC inputs, PWM outputs, and the state of output pins via a desktop computer. ControlEasy does this with a matching piece of code running on any MSP430 with a hardware UART (like the TI Launchpad) sending and receiving data to the computer.

Right now ControlEasy can read analog values, generate PWM output, and set individual pins high and low. [Jaspreet] plans on expanding his software to allow control of LCDs and I2C and SPI devices.

In the video after the break you can see [Jaspreet] fiddling around with some pins on his LaunchPad via the GUI. The software is also available for download if you’d like to try it out, but unfortunately it’s a Windows-only build at this point.

Continue reading “Giving The MSP430 A GUI”

Getting A Console And Quake II Running On A Raspberry Pi

Those Raspberry Pi boards are flying into the mailboxes of tinkerers all around the globe, so our tip line is currently awash in a deluge of Raspi hacks. Here’s two that came in over the weekend:

First up is [reefab]’s port of Quake II for the Raspberry Pi. The build is based of Yamagi Quake II and is mostly playable. The Quake III port for the Raspberry Pi is old hat, but we’re happy to relive the pulse-pounding action of Quake II any day.

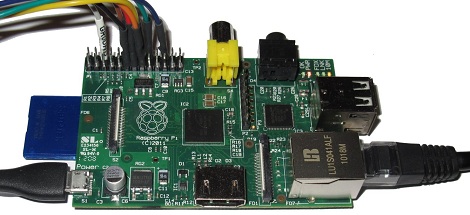
Next up is [Joonas]’ take on getting a serial console up and running with the Raspi. The Raspberry Pi has a UART serial console on its 26-pin header, but you can’t just connect those pins to a serial port. To shift the +/- 12V down to the 3.3 Volts the Raspi can understand, [Joonas] used a MAX3232 – the 3.3 Volt version of everyone’s favorite RS-232 transceiver. With a breadboard and a couple of caps, it’s easy to connect your Raspi to a serial console. Neat.

Controlling Raspberry Pi Expansion Pins With A Web Interface

For the lucky few who have a Raspberry Pi board in their hands, you can now use the GPIO pins as a web interface (German, google translation). [Chris] is turning this magical board is turning a small device that can play 1080p video into something that can blink LEDs via the web.

The build started with an example of driving GPIO pins under Linux. [Chris] cobbled together a bit of PHP and Javascript on the Raspberry pi. Whenever he goes to the website hosted on the Pi, he’s greeted with the status and direction of a couple of expansion IO pins.

On a semi-related note, [Tony] is building a GPIO MIDI interface for his Pi. Yes, he could just get a USB to MIDI adapter and call it a day, but this is a far more professional looking solution to all the MIDI goodness the RasPi will deliver. If you’ve got any info on other RasPi breakout boards you’ve seen, send them in on the tip line.

Vintage VT100 Terminal Computing…with A Beaglebone

decbox

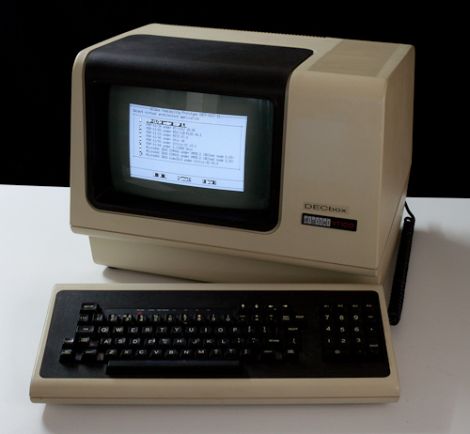
A cool little project came our way, which we thought might be of interest to some of you vintage computer buffs. [Joerg Hoppe] wrote in to share a DEC VT100 terminal he resurrected in a novel fashion.

His “DECBox” system was created with a Beaglebone, which he uses to run a wide array of PDP11/VAX terminal emulators, thanks to the SIMH project. [Joerg] constructed an expansion shield for the Beaglebone that provides several UART connections, enabling him to connect it to his DEC terminal over a serial interface. Since he added several serial plugs to the Beaglebone, he can even run multiple emulator installations in parallel on different terminals without too much trouble.

[Joerg’s] efforts are mainly for a vintage computer display he is constructing, but setting up such a system of your own should be no problem. If you happen to have one (or more) of these boxes sitting around collecting dust, this would be an easy way to get them all up and running without bulky external hardware, since the Beaglebone tucks nicely into the rear expansion slot on a VT100.

Be sure to check out his site for more details on how his DECBox software package works as well as for more pictures of vintage terminal goodness.