The Cambridge Z88 Lives! (As A USB Keyboard)

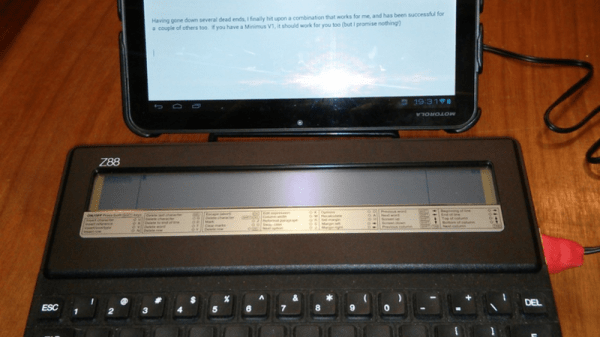
What did [Clive Sinclair] do next? After his line of home computers including the iconic ZX Spectrum hit the buffers and was sold to Amstrad, that is. No longer in the home computer business, he released a portable computer for the business market. The Cambridge Z88 had a Z80 at its heart, a decent keyboard, a text-only LCD display, and ran for an impressively long time on a set of AA alkaline cells. It made a handy portable word-processor, or a serial terminal thanks to its rare-for-the-time RS232 port. And it’s that port that [Spencer Owen] made use of his Z88 in a modern setting, using it as a USB keyboard.

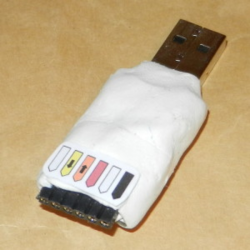
It’s a few years old, so he used a Minimus AVR microcontroller board to provide a serial-to-USB HID keyboard interface, and to keep things tidy he’s made a poor man’s enclosure for it using Sugru. It’s not quite an amazing hardware hack, but we’re featuring it simply for its use of a Z88. Retro computers used as keyboards are a common theme, but a Z88 is a particularly eclectic choice.

If you’re not British you may only know the name [Sinclair] through Brits on the Internet waxing lyrical about their ZX Spectrum computers, but in fact the man behind them is a serial electronics entrepreneur whose career has continued since the 1960s and has touched fields as diverse as portable television and bicycles aside from the computers he is best known for. Often his products took technology to the limit of practicality, but they were and continue to be the ones to watch. If [Clive Sinclair] is working in a field his products may not always hit the right note when released, but you can guarantee that you’ll be buying the same thing from the big boys within a few years. The Z88 is a classic Sinclair product, a little before its time in 1988 and pushing the technology a little too far, but delivering a truly portable and capable computer with a meaningful battery life a couple of decades before you’d find the same attributes from all but a few other niche manufacturers.

Not had enough USB HID devices? How about a Morse key? And if [Spencer] rings a bell, he’s the originator of the RC2014 retrocomputer we reviewed last year.

Hackaday Prize Entry: HID Dial

Microsoft has introduced a few interesting bits of hardware recently, and the most drool worthy by far is the Microsoft Surface Dial. What is this magical input device that will revolutionize creative work on a computer? Basically, it’s a Griffin PowerMate — a rotary encoder and button — an interface that really hasn’t changed in a decade and a half.

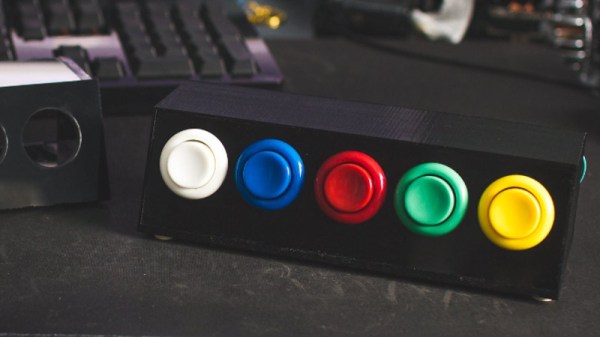
[K.C. Lee] figures a device this simple would make for a great Hackaday Prize entry, so he built a USB HID multimedia dial. It’s a rotary encoder and a button. This one lights up, though, making this a gamer USB HID multimedia dial.

The electronics for this build are based around the STM8S003, an extraordinarily cheap microcontroller that will work well enough in this application. The mechanical part of this build is a little more interesting; [K.C.] says not everyone has access to fancy CNC or 3D printing equipment, so he built this model out of bits of plastic, metal, and superglue. This enclosure is literally an old superglue bottle cap, an empty dental floss spool, and bits of metal. It works, and took less time to build than it would take to design in a CAD program.

Right now, [K.C.] is working through some USB issues with the STM8 microcontroller. Once those issues are behind him, he’ll have a very cool and very useful input device sitting on his desk. It might look like parts waiting for the recycling bin, but it will be at least as useful as the fancy Microsoft version.

Custom Gaming Keypad Developed With PSoC And Fusion 360

There was a time when building something yourself probably meant it didn’t look very much like a commercial product. That’s not always a bad thing. We’ve seen many custom builds that are nearly works of art. We’ve also seen plenty of builds that are–ahem–let’s say were “hacker chic”.

[AlexanderBrevig] decided to take on a project using a PSoC development board he picked up. In particular, he wanted to build a custom game keypad. He prototyped a number of switches with the board and got the firmware working so that the device looks like a USB HID keyboard.

Continue reading “Custom Gaming Keypad Developed With PSoC And Fusion 360”

Bootstrapping Motion Input With Cheap Components

Motion control is a Holy Grail of input technology. Who doesn’t want an interface that they can control with simple and natural movements? But making this feel intuitive to the user, and making it work robustly are huge hills to climb. Leap Motion has done an excellent job creating just such a sensor, but what about bootstrapping your own? It’s a fun hack, and it will give you much greater appreciation for the currently available hardware.

Let’s get one thing straight: This device isn’t going to perform like a Leap controller. Sure the idea is the same. Wave your hands and control your PC. However, the Leap is a pretty sophisticated device and we are going to use a SONAR (or is it really SODAR?) device that costs a couple of bucks. On the plus side, it is very customizable, requires absolutely no software on the computer side, and is a good example of using SONAR and sending keyboard commands from an Arduino Leonardo to a PC. Along the way, I had to deal with the low quality of the sensor data and figure out how to extend the Arduino to send keys it doesn’t know about by default.

The Plan

The plan is to take an inexpensive SONAR module (the HC-SR04) and an Arduino Leonardo and use it to perform some simple tasks by mimicking keyboard input from the user. The Leonardo is a key element because it is one of the Arduinos that can impersonate a USB keyboard (or mouse) easily. The Due, Zero, and Micro can also do the trick using the Arduino library.

I wanted to determine how many gestures I could really determine from the HC-SR04 and then do different things depending on the gesture. My first attempt was just to have the Arduino detect a few fingers or a hand over the sensor and adjust the volume based on moving your hand up or down. What I didn’t know is that the default Arduino library doesn’t send multimedia keys! More on that later.

Continue reading “Bootstrapping Motion Input With Cheap Components”

DIY OLED Smart Watch

OLED DIY Smart Watch

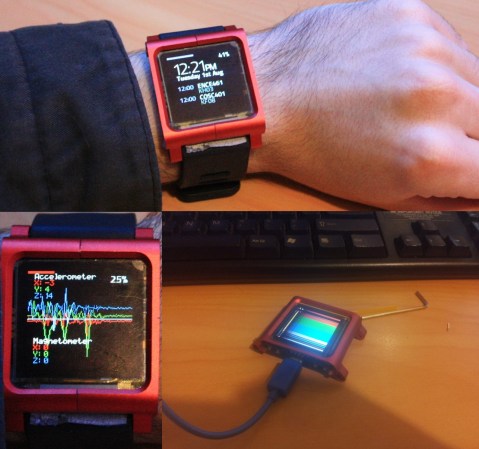
What is better than making your own smart watch? Making one with an OLED display. This is exactly what [Jared] set out to do with his DIY OLED smart watch, which combines an impressive build with some pretty cool hardware.

When building a DIY smart watch, getting the hardware right is arguably the hardest part. After a few iterations, [Jared’s] OLED smart watch is all packaged up and looks great! The firmware for his watch can communicate with the PC via USB HID (requiring no drivers), contains a “watch face” for telling time, includes an integrated calendar, and support for an accelerometer. His post also includes all of the firmware and goes into some build details. With the recent popularity of smart watches and wearable electronics, we really love seeing functional DIY versions. This is just the beginning. In the future, [Jared] plans on adding Bluetooth Low Energy (BLE), a magnetometer, a smart sleep based alarm clock, and more! So be sure to look at his two older posts and keep an eye on this project as it unfolds. It is a very promising smart watch!

With Android L including support for smart watches (in the near future), it would be amazing to see DIY watches (such as this one) modified to run the new mobile OS. How great would it be to have an open hardware platform running such a powerful (open source-ish) OS? the possibilities are endless!

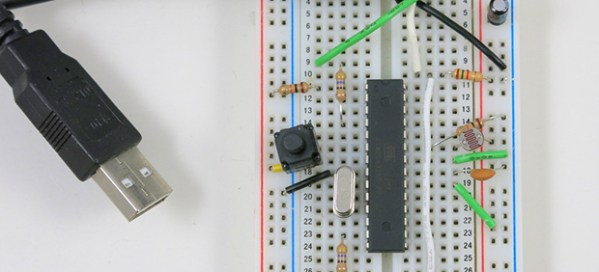
Serial USB For Any AVR Microcontroller

If you’re using an AVR microcontroller and you’d like to add USB to a project, there are a lot of options out there for you. Both LUFA and V-USB add some USB functionality to just about every AVR micro, but if you’d like a native serial port, your only options are to look towards the USB-compatible Atmel micros.

[Ray] looked at the options for adding a USB serial port and didn’t like what he saw; seemingly, this was an impossible task without a second, more capable microcontroller. Then he had an idea: if the goal is only to transfer data back and forth between a computer and a microcontroller, why not write an HID-class USB serial port?

[Ray] based his project on The V-USB library and created a new HID descriptor to transfer data between a micro and a computer. While it won’t work with a proper terminal such as Putty, [Ray] managed to whip up a serial monitor program in Processing that’s compatible with Windows, Linux and OS X.

In the video below, you can see [Ray] using an ATmega328p with a standard V-USB setup. He’s transferring analog values from a photoresistor as a proof of concept, but just about everything that would work with a normal serial port will work with [Ray]’s library.

Continue reading “Serial USB For Any AVR Microcontroller”

Extracting Data With USB HID

sd_adaptor

High security workstations have some pretty peculiar ways of securing data. One of these is disabling any USB flash drives that may find their way into a system’s USB port. Security is a cat and mouse game, so of course there’s a way around these measures. [d3ad0ne] came up with a way of dumping files onto an SD card by using the USB HID protocol.

We’ve seen this sort of thing before where a microcontroller carries an executable to extract data. Previously, the best method was to blink the Caps Lock LED on a keyboard, sending one bit at a time to a micocontroller. [d3ad0ne]’s build exploits the USB HID protocol, but instead of 1 bit per second, he’s getting about 10kBps.

To extract data from a system, [ d3ad0ne] connects a Teensy microcontroller to the USB port. After opening up Notepad, [ d3ad0ne] mashes the Caps Lock key to force the Teensy to type out a script that can be made into an executable. This executable is a bare-bones application that can send any file back over the USB cable to the Teensy where it’s stored on an SD card. Short of filling the USB ports in a workstation with epoxy, there’s really no way to prevent secure files from leaking out of a computer.