ESP32 BTE Keyboard

Wired To Wireless: ESP32 Gives Your USB Keyboard Bluetooth

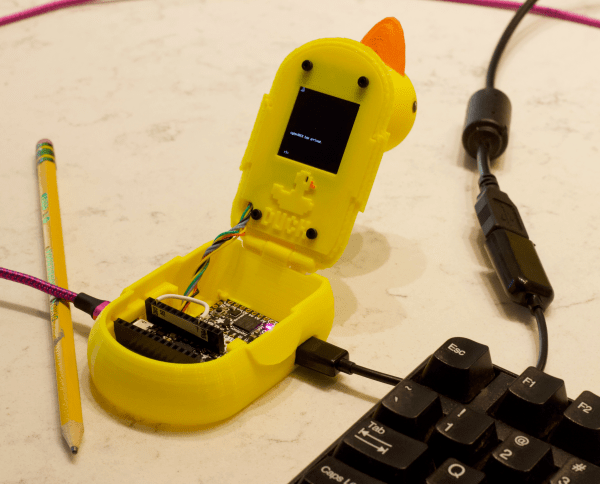
Few things rival the usability and speed of a full-sized keyboard for text input. For decades, though, keyboards were mostly wired, which can limit where you use your favorite one. To address this, [KoStard]’s latest project uses an ESP32 to bridge a USB keyboard to BLE devices.

The ESP32-S3 packs a ton of fantastic functionality into its small size and low price—including USB-OTG support, which is key here. Taking advantage of this, [KoStard] programmed an ESP32-S3 to host a keyboard over its USB port while connecting via BLE to devices like cellphones.

There are some slick tricks baked in, too: you can pair with up to three devices and switch between them using a key combo. Some of you might be wondering how you can just plug a microcontroller into a keyboard and have it work. The truth is, it doesn’t without extra hardware. Both the keyboard and ESP32-S3 need power. The simplest fix is a powered USB hub: it can be battery-powered for a truly mobile setup, or use a wired 5V supply so you never have to charge batteries.

We love seeing a simple, affordable microcontroller extend the usefulness of gear you already have. Let us know in the comments about other hacks you’ve used to connect keyboards to devices never designed for them.

Continue reading “Wired To Wireless: ESP32 Gives Your USB Keyboard Bluetooth”

Graphing Calculator Gets USB-C Upgrade

Unlike Texas Instruments, whose graphing calculators have famously not made technological improvements in decades despite keeping the same price tag, HP has made a few more modern graphing calculators in the last few years. One of which is the HP Prime which boasts hardware from the mid-2010s including an ARM processor, a color screen, and rechargeable lithium battery. But despite this updated hardware it’s still using micro-USB for data and charging. [David] wanted to fix that by giving this calculator a USB-C port.

The first steps were disassembling the calculator case and removing the micro-USB port. The PCB is glued to the LCD screen which isn’t ideal, but he was able to work on it with everything attached. The parts are small enough to need a microscope, and with a hot air station he was quickly able to remove the USB port. His replacements from a generic online retailer were able to be soldered without much effort, but there was one major complication. The new USB-C ports didn’t account for the “On The Go” mode supported by micro-USB and were shorting a pin to ground which put the calculator into “host” mode instead of acting as a device. But using the microscope and cutting a trace on the PCB disabled this mode permanently and got the calculator working properly.

As far as modernizing calculators go, it seems like the HP Prime checks a lot of boxes, with the major downside that the LCD screen and more powerful processor means that the battery needs to be charged more often than the old TI calculators. Rather than carry a dongle around everywhere, [David] found this to be a much more efficient change to his trusty HP. If you’re still stuck using TI calculators, though, there are a few ways to modernize those as well like this build which adds a lithium battery or this one which ports a few Game Boy games to the platform.

A photo of the various parts for this MSLA 3D printer

Build A 2K Resolution MSLA 3D Resin Printer For Cheap

Have an old Android device collecting dust somewhere that you’d like to put to better use? [Electronoobs] shows us how to make a Masked Stereolithography Apparatus (MSLA) printer for cheap using screens salvaged from old Android phones or tablets.

[Electronoobs] wanted to revisit his earlier printer with all the benefits of hindsight, and this is the result. The tricky bit, which is covered in depth in the video below the break, is slicing up the model into graphics for each layer, so that these layers can be rendered by the LCD for each layer during the print.

The next tricky bit, once your layer graphics are in hand, is getting them to the device. This build does that by installing a custom Android app which connects to a web app hosted on the ESP32 microcontroller controlling the print, and the app has a backchannel via a USB OTG adapter installed in the device. [Electronoobs] notes that there are different and potentially better ways by which this full-duplex communication can be achieved, but he is happy to have something that works.

If you’re interested in resin printer tech, be sure to check out Continuous Printing On LCD Resin Printer: No More Wasted Time On Peeling? Is It Possible? and Resin Printer Temperature Mods And Continuous IPA Filtration.

CyberDÛCK Quacks Like A Cyberdeck

Over the last year or so, we’ve seen an explosion in the popularity of cyberdecks — those highly portable and occasionally wearable computers that would make William Gibson proud. A lot of the cyberdecks we see are based on NUCs or the Raspberry Pi and are essentially post-apocalyptic DIY laptops. But what if you want to play with microcontrollers on the go? Do you really need traditional computing power?

If you build [kmatch98]’s adorable cyberDÛCK, the answer is no. This duck can edit and run CircuitPython files anywhere without a separate computer, as long as you have some kind of USB keyboard. It has a text editor for writing Python scripts the regular way as well as a REPL for running commands on the fly.

One of the biggest hurdles in portable microcontrollering is getting HID access so you can communicate with a keyboard. Flip open cyberDÛCK and you’ll find two ItsyBitsy M4s — one being used as the USB host, and the other controls the display and is meant to be programmed. To get the keyboard input across, [kmatch98] adapted a MicroPython editor to take input from UART. Waddle past the break to check out the sprite demo, and stick around to see [kmatch98] discuss the duck in detail.

We understand if you can’t wait to make one of these yourself. In the meantime, did you know you can code CircuitPython directly from your phone?

Continue reading “CyberDÛCK Quacks Like A Cyberdeck”

Reverse Engineered Media Controller From Car Is Best Friends With Android

The CAN bus is a rich vein to mine for a hacker: allowing the electronic elements of most current vehicles to be re-purposed and controlled with ease. [MikrocontrollerProjekte] has reverse engineered a CAN bus media and navigation controller and connected it to an STM32F746G-Discovery board. The STM32 is in turn connected to an Android phone, and allows the media controller to trigger a large number of functions on the phone, including music playback, maps, and general Android navigation.

When reverse engineering the controller, [MikrocontrollerProjekte] employed a variety of approaches. A small amount of information was found online, some fuzzing was done with random CAN bus IDs and messages, as well as some data logging with the device inside the car to identify message data to the relevant IDs on the bus.

The STM32F746G-Discovery board acts as a Human Interface Device (HID), emulating a mouse and keyboard connected to the Android phone via USB OTG. The LCD screen shows the output of the keystrokes and touchpad area. We’re not sure how useful the mouse-emulation would be, given that the phone has a touchscreen, but the media functions work really well, and would also make a really snazzy music controller for a PC.

We’ve covered plenty of other cool CAN bus hacks, like reverse-engineering this Peugeot 207, or this general purpose CAN sniffer.

Continue reading “Reverse Engineered Media Controller From Car Is Best Friends With Android”

Flash And Debug ESP8266 Boards On Android

Have an ESP8266 development board such as the NodeMCU or Wemos D1? You’re currently reading Hackaday, so probably. Got an Android device kicking around? Also seems fairly likely. In that case, you should check out ESP8266 Loader by [Bluino Electronics]. This recently released application lets you not only flash new binaries to any ESP8266 board using the FTDI, PL2303, CH34X and CP210X USB chipsets, but also offers a serial monitor for debugging on the go.

You’ll need a USB OTG cable to get your ESP board jacked in to your Android device, but you don’t need root or even to fiddle with the development settings. Here at the Hackaday R&D Dungeon we had somewhat mixed success getting a random selection of Android devices to work fully; all of the ones tried could at least open the serial monitor and read what a pre-programmed ESP was saying, but not all of them could successfully program a board.

Even on the devices where programming worked, it was slow. Just a basic LED blinking Sketch took long enough to write to our test Wemos D1 Mini that we contemplated getting a snack. But still, it shows a lot of promise for managing devices in the field, especially if you don’t have over the air update enabled in your code.

We especially liked that ESP8266 Loader helpfully downloaded a bunch of example binaries, many of which could be of practical use. There are programs for toggling the different GPIO pins on the board, creating Wi-Fi access points, and even a basic web server. With these in hand, you could actually do some testing and diagnostic work right from your mobile device.

This isn’t the first time we’ve seen an ESP8266 team up with a mobile device, but generally speaking, the magic is done over WiFi or Bluetooth.

Hot Air Surgery Revives A Cheap Windows Tablet

[Jason Gin] recently wrote in to tell us about his adventures replacing the eMMC storage chip on a cheap Windows tablet, and we have to say, it’s an impressive amount of work for a device which apparently only cost him $15. Surely much better pieces of hardware have been tossed in the trash for less serious failures than what ailed his DigiLand DL801W tablet. We’d love to see the lengths this guy would go to restore something a bit higher up the food chain.

As any good hacker knows, you can’t fix the problem until you understand it. So the first step [Jason] took was to conduct some troubleshooting. The tablet would only boot to the EFI shell, which didn’t do him much good since there was no on-screen keyboard to interact with it. But he had the idea of trying to connect a USB keyboard via an OTG adapter, and sure enough that got him in. Once he was able to enter commands into the EFI shell, he attempted to read from a few different sectors of the eMMC drive, only to get the same nonsense repeating data. So far, not looking good.

But before he fully committed to replacing the eMMC drive, he wanted a second opinion. Using the same USB OTG adapter, he was able to boot the tablet into a Windows 10 environment, and from there got access to some drive diagnostic tools. The software reported that not only was the drive reporting to be half the appropriate size, but that writing to the chip was impossible.

With the fate of the tablet’s Foresee NCEMBS99-16G eMMC chip now confirmed, [Jason] decided it was time to operate. After pulling the tablet apart and masking off the PCB with Kapton tape to protect it from the heat, he slowly went in with his hot air rework station to remove the failed chip. But rather than put another low-end chip in its place, he used this opportunity to replace it with a Samsung KLMBG4GEND-B031. Not only does this chip have twice the capacity of the original, it should be noticeably faster.

With the new Samsung eMMC chip installed, [Jason] put the tablet back together and was able to successfully install Windows 10 onto it. Another piece of tech saved from the big landfill in the sky.

If the casual confidence of this particular repair wasn’t enough of a clue, this isn’t the first time he’s showed some unruly eMMC chips who’s boss.