USB-C Power Supply Pushes Almost 2 KW

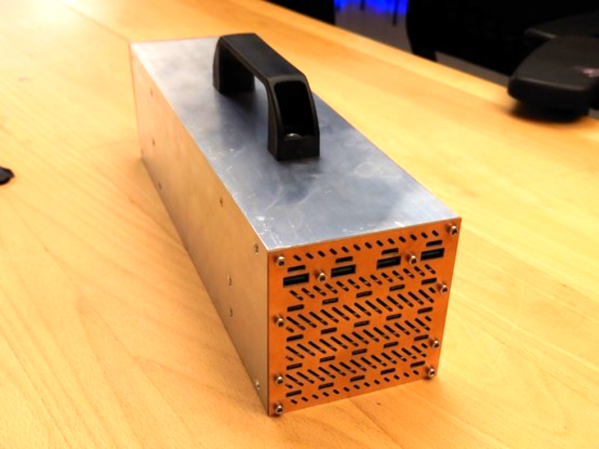
When the USB standard was first revealed, a few peripherals here and there adopted it but it was far from the “universal” standard implied by its name. It was slow, had limited ability to power anything, and its plug-and-play capability was spotty at best. The modern USB standard, on the other hand, has everything its predecessors lacked including extremely high data transfer rates and the ability to support sending or receiving a tremendous amount of power. [LeoDJ] is taking that latter capability to the extreme, with this USB-C power supply that can deliver 1.7 kW of power.

The project was inspired by the discovery of an inexpensive USB-PD (power delivery) module which is capable of delivering either 100W or 65W. After extensive testing, to see if the modules were following the USB standard and how they handled heat, [LeoDJ] grabbed 20 of the 65W modules and another four of the 100W modules and assembled them all into an array, held together in a metal chassis that also functions as a heat sink. The modules receive their DC power from two server power supplies wired together in series.

There was some troubleshooting, including soldering difficulty and a short circuit, but with all the kinks ironed out this power supply can deliver nearly 2 kW to an array of USB-capable devices and, according to the amount of thermal testing done, can supply that power nearly indefinitely. It’s an over-the-top power supply with a small niche of uses, but to see it built is satisfying nonetheless. For more information on all of the perks of working with USB-C, check out this tell-all we published last year.

A Compact SMD Reflow Hotplate Powered By USB-PD

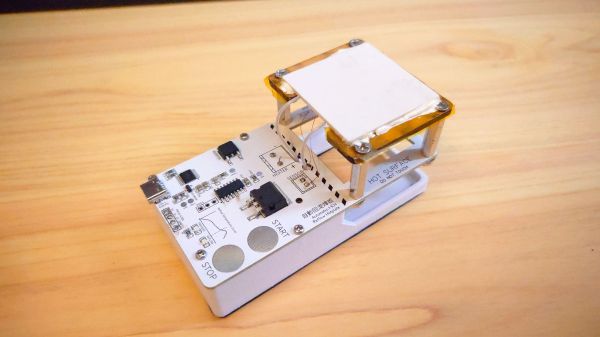
When it comes to home-lab reflow work, there are a lot of ways to get the job done. The easiest thing to do perhaps is to slap a PID controller on an old toaster oven and call it a day. But if your bench space is limited, you might want to put this compact reflow hotplate to work for you.

There are a lot of nice features in [Toby Chui]’s build, not least of which is the heating element. Many DIY reflow hotplates use a PCB heater, where long, thin traces in the board are used as resistive heating elements. This seems like a great idea, but as [Toby] explains in the project video below, even high-temperature FR4 substrate isn’t rated for the kinds of temperatures needed for some reflow profiles. His search for alternatives led him to metal ceramic heaters (MCH), which are commonly found in medical and laboratory applications. The MCH he chose was rated for 20 VDC at 50 watts — perfect for powering with USB-PD.

The heater sits above the main PCB on a Kapton-wrapped MDF frame with a thermistor to close the loop. While it’s not the biggest work surface we’ve seen, it’s a good size for small projects. The microcontroller is a CH552, which we’ve talked about before; aside from that and the IP2721 PD trigger chip needed to get the full 60 watts out of the USB-PD supply, there’s not much else on the main board.

This looks like a nice design, and [Toby] has made all the design files available if you’d like to give it a crack. Of course, you might want to freshen up on USB-PD before diving in, in which case we recommend [Arya]’s USB-PD primer.

Continue reading “A Compact SMD Reflow Hotplate Powered By USB-PD”

USB-C Power For Ham Radio

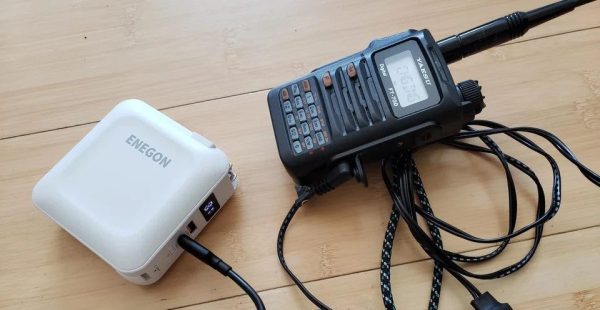
Even though manufacturers of handheld ham radios have been busy adding all sorts of bells and whistles into their portable offerings, for some reason, many of them lack a modern USB-C port. In the same vein, while some have USB for programming or otherwise communicating between the radio and a computer, very few can use USB for power. Instead , they rely on barrel jacks or antiquated charging cradles. If you’d like to modernize your handheld radio’s power source, take a look at what [jephthai] did to his Yaesu.

In the past, USB ports could be simply soldered onto a wire and used to power basically anything that took 5 VDC. But the radio in question needs 12 volts, so the key was to find a USB-C cable with the built-in electronics to negotiate the right amount of power from USB-PD devices. For this one, [jephthai] cut the barrel connector off his radio’s power supply and spliced in some Anderson power pole connectors so he could use either the standard radio charger or one spliced onto this special cable.

With this fairly simple modification out of the way, it’s possible to power the handheld radio for long outings with the proper USB battery bank on hand. For plenty of situations this is much preferable to toting around a 12 V battery, which was the method of choice for powering things like QRP rigs when operating off-grid.

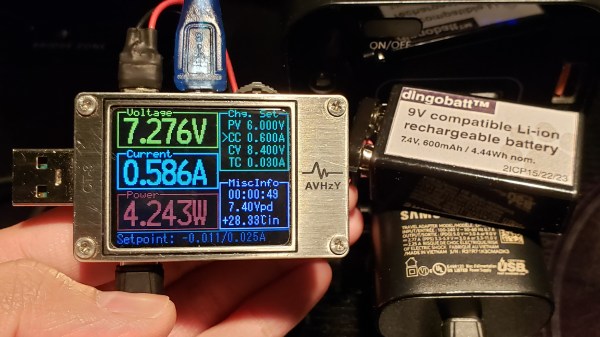
Showing a USB-C tester running the DingoCharge script, charging a battery pack at 7V. To the right is a battery pack being charged, and a USB-C charger doing the charging.

Use USB-C Chargers To Top Up Li-Ion Packs With This Hack

In USB-C Power Delivery (PD) standard, the PPS (Programmable Power Supply) mode is an optional mode that lets you request a non-standard voltage from a charger, with the ability to set a current limit of your choice, too. Having learned this, [Jason] from [Rip It Apart] decided to investigate — could this feature be used for charging Li-Ion battery packs, which need the voltage and current to vary in a specific way throughout the charging process? Turns out, the answer is a resounding “yes”, and thanks to a USB-C tester that’s programmable using Lua scripts, [Jason] shows us how we can use a PPS-capable USB-C charger for topping up our Li-Ion battery packs, in a project named DingoCharge.

The wonderful write-up answers every question you have, starting with a safety disclaimer, and going through everything you might want to know. The GitHub repo hosts not only code but also full installation and usage instructions.

DingoCharge handles more than just Li-Ion batteries — this ought to work with LiFePO4 and lithium titanate batteries, too.  [Jason] has been working on Ni-MH and lead-acid support. You can even connect an analog output thermal sensor and have the tester limit the charge process depending on the temperature, showing just how fully-featured a solution the DingoCharge project is.

The amount of effort put into polishing this project is impressive, and now it’s out there for us to take advantage of; all you need is a PPS-capable PSU and a supported USB-C tester. If your charger’s PPS is limited by 11V, as many are, you’ll only be able to fully charge 2S packs with it – that said, this is a marked improvement over many Li-Ion solutions we’ve seen. Don’t have a Li-Ion pack? Build one out of smartphone cells! Make sure your pack has a balancing circuit, of course, since this charger can’t provide any, and all will be good. Still looking to get into Li-Ion batteries? We have a three-part guide, from basics to mechanics and electronics!

DIY USB Charging The Right Way

Since the widespread adoption of USB 1.1 in the 90s, USB has become the de facto standard for connecting most peripherals to our everyday computers. The latest revision of the technology has been USB 4, which pushes the data rate capabilities to 40 Gbit/s. This amount of throughput is mindblowing compared to the USB 1.x speeds which were three to four orders of magnitude slower in comparison. But data speeds haven’t been the only thing changing with the USB specifications. The amount of power handling they can do has increased by orders of magnitude as well, as this DIY USB charger demonstrates by delivering around 200 W to multiple devices at once.

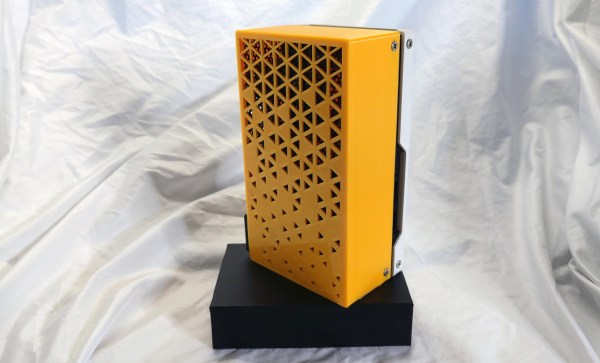
The build comes to us from [tobychui] who not only needed USB rapid charging for his devices while on-the-go but also wanted to build the rapid charger himself and for the charger to come in a small form factor while still using silicon components instead of more modern gallium nitride solutions. The solution he came up with was to use a 24 V DC power supply coupled with two regulator modules meant for solar panel installations to deliver a staggering amount of power to several devices at once. The charger is still relatively small, and cost around $30 US dollars to make.

Part of what makes builds like this possible is the USB Power Delivery (PD) standard, which has enabled all kinds of electronics to switch to USB for their power needs rather than getting their power from dedicated, proprietary, and/or low-quality power bricks or wall warts. In fact, you can even use this technology to do things like charge lithium batteries.

Continue reading “DIY USB Charging The Right Way”

Powering Up With USB: Untangling The USB Power Delivery Standards

Powering external devices directly from a PC’s I/O ports has been a thing long before USB was even a twinkle in an engineer’s eye. Some of us may remember the all too common PS/2 pass-through leads that’d tap into the 275 mA that is available via these ports. When USB was first released, it initially provided a maximum of 500 mA which USB 3.0 increased to 900 mA.

For the longest time, this provided power was meant only to provide a way for peripherals like keyboards, mice and similar trivial devices to be powered rather than require each of these to come with its own power adapter. As the number of  computer-connected gadgets increased USB would become the primary way to not only power small devices directly, but to also charge battery-powered devices and ultimately deliver power more generally.

Which brings us to the USB Power Delivery (USB-PD) protocol. Confusingly, USB-PD encompasses a number of different standards, ranging from fixed voltage charging to Programmable Power Supply and Adjustable Voltage Supply. What are the exact differences between these modes, and how does one go about using them? Continue reading “Powering Up With USB: Untangling The USB Power Delivery Standards”

Google-Inspired USB-PD Sniffer For The DIY Crowd

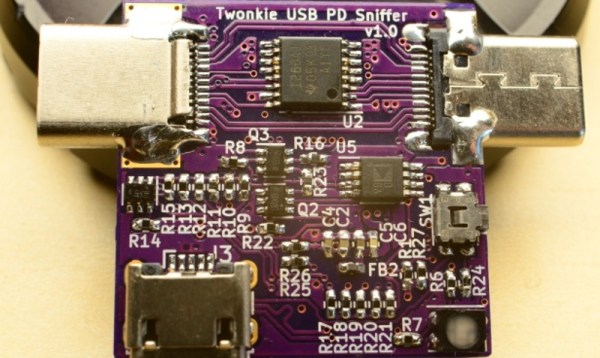
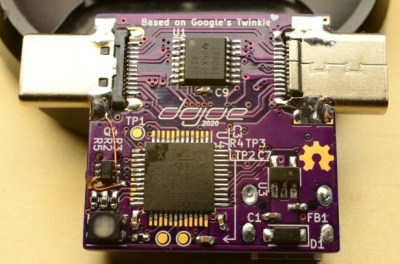
If you want to hack around with the communication protocol that USB Power Delivery devices use to negotiate their power requirements with the upstream source, a tool like Google’s Twinkie really helps. With it you can sniff data off the line, analyze it, and even inject your own packets. Luckily for us, the search giant made the device open source so we can all have one of our own.

Unfortunately, as [dojoe] found out, the Twinkie isn’t particularly well suited for small-scale hobbyist manufacturing. So he came up with a revised design he calls Twonkie that replaces the six layer PCB with a much more reasonable four layer version that can be manufactured cheaply by OSHPark, and swaps out the BGA components with QFP alternatives you can hand solder.

That said, it’s still likely to be a challenging build for the home gamer. There’s quite a few 0402 passives on there, and while those are doable with an iron, it can certainly be tricky. To take some pressure off, [dojoe] says he tried to optimize the board layout as much as possible for hand assembly. He was even able to avoid needing hot air by straddling the PCB with USB-C mounts intended for vertical applications.

Given the current chip shortage, [dojoe] says the biggest problem might actually getting your hands on the STM32F072CB microcontroller at the Twonkie’s core. To that end, the board supports TQFP44 and QFN44 footprints, and you can even use a STM32F072C8 at the cost of some functionality. With a bit of luck, hopefully you can find a chip that will work in the parts bin.