You’re going to like [Ivan’s] write-up for this LED computer status monitor. Of course he didn’t just show-and-tell the final product — if he had you’d be reading this in a Links post. But he also didn’t just detail how he put the thing together. Nope, he shared pictures and details of every iteration that got him here.
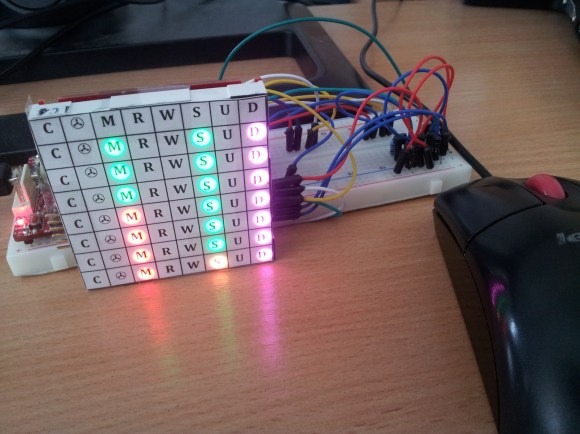
It started off with a tachometer. Yeah, that analog display you put on the dashboard of your car which reads out RPM. He wanted to make it into a USB device which would read out his CPU load. But that’s an awful lot of work when it can only display one thing at a time. So he decided to add an 8×8 LED module which would display the load for each individual core of his CPU. It looks great next to the illuminated tachometer. From there he added resolution by transitioning to an RGB module, which ended up sucking him into a coding project to extend the data pushed to his embedded hardware. In the end his ReCoMonB (Real Computer Monitoring Block) displays CPU load, RAM usage, several aspects of HDD activity, as well as the network up and down traffic.
We think he’s probably squeezed all that he can from this little display. Time to upgrade to a TFT LCD.
Continue reading “LED Module Used To Display Load, Traffic, And Status Data For Your PC”