DIY Electricity And Internet For Burning Man

bmPowerInet

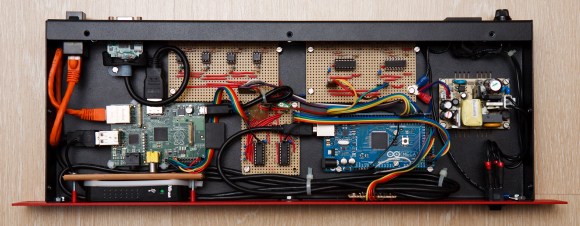
Despite this being [Kenneth Finnegan’s] first Burning Man, the guy came prepared and stayed connected by setting up a beefy electricity supply and a faint yet functional internet connection. If you saw [Kenneth’s] Burning Man slideshow, you know that the desert is but a mild deterrent against power, water, and even temporary runways.

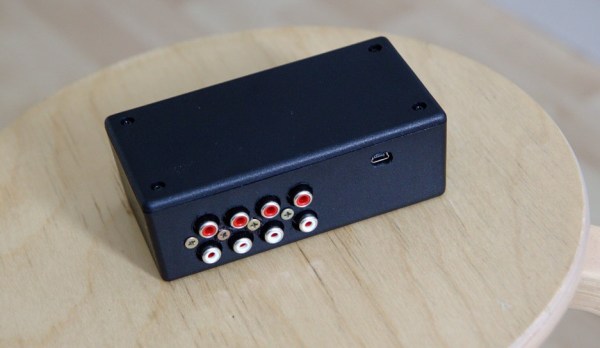
He borrowed a 20V 100W solar panel from Cal Poly and picked up a bargain-price TSMT-20A solar charge controller off eBay. The controller babysits the batteries by preventing both overcharging and over-discharging. The batteries—two Trojan-105 220Ah 6V behemoths—came limping out of a scissor lift on their last legs of life: a high internal resistance ruled out large current draws. Fortunately, the power demands were low, as the majority of devices were 12VDC or USB. [Kenneth] also had conveniently built this USB power strip earlier in the year, which he brought along to step down to 5VDC for USB charging.

Internet in the desert, however, was less reliable. A small team provides a microwave link from civilization every summer, which is shared via open access points in 3 different camps. [Kenneth] pointed his Ubiquiti NanoStation at the nearest one, which provided a host of inconvenient quirks and top speeds of 2-20kBps: enough, at least, to check emails.

Building A Small Keypad For Strategy Games

A month ago [Andreas] started playing Starcraft 2 again. As he was not comfortable with the default hotkeys on a normal keyboard, [Andreas] decided to build his own.

He started by salvaging keys from an old keyboard he had lying around, then 3D printed the case you see in the picture above to fit them. The keyboard electrical design is a simple matrix and it appears that he etched the PCB himself. To provide the required USB connectivity, the Atmega8U2 was chosen. It comes with a pre-programmed USB bootloader that [Andreas] chose to activate when the left key is pressed at the system startup. The HID class was implemented using the LUFA-USB Framework and the final product is definitely good looking.

All the files required to duplicate his design can be found here. You can also checkout another starcraft keyboard and an ergonomic keyboard that we previously featured.

Solar Power For Your Bike

After the headlight on his bike died, [Patrick] decided this was the best time to hack the remains and solve a few problems: namely a constantly drained battery from accidentally forgetting to turn the light off. He opted for a solar solution, as he already had both an Adafruit solar lithium charger and a Seeed Li-po Rider. [Patrick] picks the Adafruit board for its extra safety features like temperature sensing to prevent the cell from overheating.

The build uses 9 eBay-sourced 2V mini solar panels attached neatly on the bike’s mudflaps. Three groups of 3 panels in series provide the needed 6V into the Adafruit lithium board which safely charges a spare 900mAh Nokia phone battery from the junk drawer. [Patrick] admits this solar setup may be overkill. He decided to include a USB jack to keep his phone charged for some Google maps navigation. The Adafruit board does not step up to 5V, however, so [Patrick] tacks on a Mintyboost kit to kick the Lipo’s output up high enough to charge the phone.

Solar’s not the only alternative way to power your bike’s lights. Check out the RattleGen from earlier this year if you missed it.

Building A ‘high-end’ USB Audio DAC

As [Jan-Erik] had already built a simple USB connected Digital-to-Analog Converter (DAC), he decided to make the high-end version of it.

The prototype you see in the picture above is based on:

  • the PCM2707C from Texas Instruments which takes care of the USB communication and outputs I2S audio data
  • the PCM1794A, a 132dB SNR 24-bit 192kHz DAC which receives I2S protocol
  • the OPA4134, a high performance audio operational amplifier

The on-board +3.3V and -5V voltages are generated by inductor-less power supplies. As [Jan-Erik] mentions in his write-up, the ‘high-end’ was put between single quotes because the PCB is single sided and uses through hole passive components. The board was designed using Kicad, etched by himself and put in a machined enclosure. All the production files can be downloaded from his website so you may produce it within a day.

Fix A Keyboard’s Firmware With Trial, Error, And I2C

eepromKeyboardFlash

If the media shortcut keys on your keyboard don’t function correctly due to outdated firmware, the manufacturer may recommend you ship it to them for an update. [Alvaro] didn’t care to wait that long, so he cracked it open and taught himself how to mod the EEPROM. The result is a well-documented breakdown of sorting out the keyboard’s guts. Inside he finds a USB hub, which he ignores, and the keyboard controller chip, which he attacks. Two data sheets and a schematic later, [Alvaro] breaks out the logic analyzer to compare physical key presses to the keypad codes they output.

He dumps the entire EEPROM and follows up with a quick flash via I2C to change the “next song” key to instead output the letter “a”. That seems to work, so [Alvaro] combs through an HID USB usage table for some codes and has to guess which ones will properly control Spotify. He converts the media keys from “scan next” and “scan previous” to “rewind” and “fast forward.” Problem solved.

[Alvaro] had zero knowledge of keyboards prior to opening this one up. If you aren’t already taking things apart to see how they function and how to fix them, hopefully his success will persuade you to explore and learn about those “black boxes” in your home. And, if you’ve never used I2C before—or think it might be the name of a boy band—head over to [Kevin’s] tutorial on bitbanging I2C by hand.

The RPC: A Stand-alone MIDI Workstation

raspiMidiRPC

Not just another pretty enclosure, this shiny little red box is [Lauri’s] stand-alone MIDI workstation. The build uses an Arduino Mega 2560 to handle the MIDI inputs and outputs. It communicates via serial with a Raspberry Pi that acts as a sequencer and oversees all user interactions. The Pi’s SD card offers convenient storage for your work, though we wish it was easily ejectable from the front of the box and not trapped under the hood. [Lauri’s] RPC also squeezes in the necessary USB hub for the RasPi and an HDMI-to-VGA converter. As an all-in-one solution, this is a sleek little box that–once paired with some software for arpeggiators, chord harmonies, and scales–will be a handy MIDI sequencer with robust control ready to be conveniently mounted on your rack.

Now all you’ll need is something to plug in. Why not check out the custom MIDI recorder we featured last week, or the organ-to-MIDI keyboard conversion for inspiration.

[Thanks Teemu]

USB Adapter For An Old VT100 Keyboard

VT100

Ah, the VT100, the first dumb terminal that was controlled with a microprocessor. This ancient beast from the late 70s is quite unlike the terminals you’d find from even five years after its vintage – the keyboard connects via a TRS quarter-inch jack – the electronic and code design of this terminal is a bit weird. [Seth] was up to the challenge of making this mechanical keyboard work as a standard USB device, so he created his own USB adapter.

On the little quarter-inch to USB adapter, [Seth] included an HD 6402 UART to talk to the keyboard, along with a Teensy dev board and a few bits of circuits stolen from DEC engineers. The protocol between the keyboard and terminal is a little weird – first the terminal sets a bit in a status word, then the keyboard scans all the key rows and columns in sequence before telling the terminal it’s done. Yes, this gives the VT100 full n-key rollover, but it’s just weird compared to even an IBM Model M keyboard that’s just a few years younger.

[Seth] finally completed his circuit and wired it up on a perfboard. Everything works just as it should, although a little key remapping was done to keep this keyboard adapter useful for Mac and Windows computers. It’s a wonderful bit of kit, and any insight we can get into the old DEC engineers is a wonderful read in any event.

Vidias below.

Continue reading “USB Adapter For An Old VT100 Keyboard”