ATtiny85 Mouse Jiggler Lets You Take A Break

The good news is that more and more people are working from home these days. The bad news is that some of the more draconian employers out there aren’t too happy about it, to the point of using spyware software to keep tabs on their workers. Better make that bathroom break quick — Big Brother is watching!

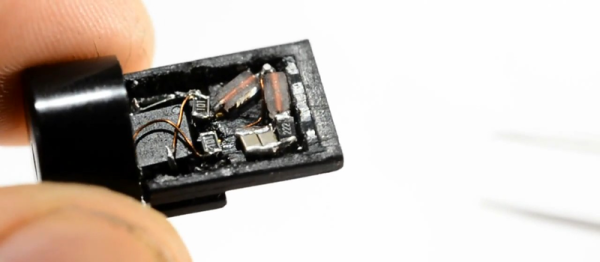
One simple way to combat such efforts is a mouse jiggler, which does…well it does exactly what it sounds like. If you find yourself in need of such a device, the WorkerMouse from [Zane Bauman] is a simple open source design that can be put together with just a handful of components.
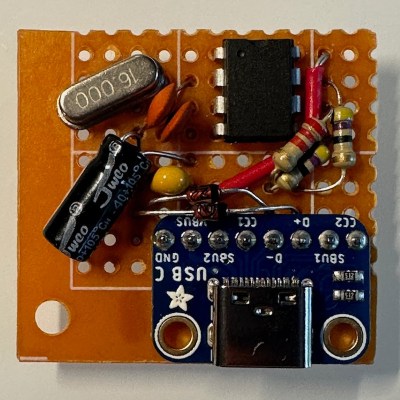
The WorkerMouse is designed to be assembled using through-hole parts on a scrap of perfboard, but you could certainly swap them out for their SMD variants if that’s what you have on hand. The circuit is largely made up out of passive components anyway, except for the ATtiny85 that’s running the show.

[Zane] decided to embrace modernity and couple the circuit with a USB-C breakout board, but naturally you could outfit it with whatever USB flavor you want so long as you’ve got a cable that will let you plug it into your computer.

The project’s C source code uses V-USB to connect to the computer and act as a USB Human Interface Device (HID). From there, it generates random speed and position data for a virtual mouse, and dumps it out every few seconds. The end result is a cursor that leaps around the screen whenever the WorkerMouse is plugged in, which should be enough to show you online while you step away from the computer. As an added bonus, [Zane] has put together a nice looking 3D printable enclosure for the board. After all, the thing is likely going to be sitting on your desk, might as well have it look professional.

If you’ve got the time to get a PCB made, you might also be interested in the MAUS we covered last year, which also keeps the ATtiny85 working so you don’t have to.

Spooky USB Baby Types Out Messages From Beyond

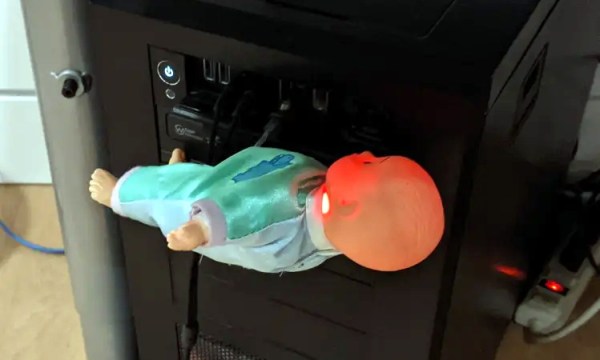
You might think it’s a bit early for us to be running Halloween hacks, but don’t worry. While this microcontroller-equipped doll that mimics a USB keyboard to type out messages in the creepiest way possible might seem like a gag gift you’d get after attending somebody’s bone-chilling holiday bash, creator [Jonathan] actually put it together for a friend’s wedding. So not only is it an interesting piece of hacked together hardware, but it’s also a great reminder about the importance of having a wedding registry.

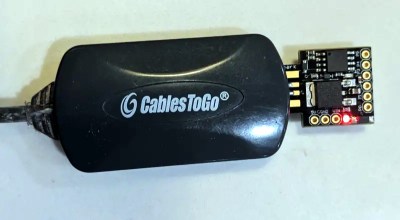
Even if this seems like a rather unusual wedding gift from an outsider’s perspective (for the record, pranks involving this “haunted doll” have been a running gag between them since their school days), we can’t help but be impressed with the way [Jonathan] implemented it. An ATtiny85-powered Digispark is hidden inside the doll, along with a simple USB 2.0 hub that supposedly eases some teething issues the diminutive development board has with newer USB 3.0 ports. Through the use of V-USB, this lets the baby type out messages once plugged into the recipient’s computer.

Soldering the Digispark to a cheap USB hub keeps newer computers happy.

Now he could have just stopped there, but [Jonathan] wanted this to be an interactive experience. Specifically, he wanted the baby to present the newlyweds with a personally test of sorts, and that meant taking user input. He came up with the clever user interface demonstrated in the video below, which responds to changes in the system’s “Caps Lock” state.

This platform-agnostic solution lets the user navigate the doll’s menu system by tapping a single key, although the Chromebook users out there will have to break out the Alt key to play along. It’s a neat trick for getting two-way communication going between a MCU and a computer without any client-side software, and worth filing away mentally for future non-haunted projects. It’s also worth checking out the effort [Jonathan] put into optimizing everything to fit into the chip’s paltry 6012 bytes of flash.

Incidentally, this is a good a time as any to remind readers that our Halloween Hackfest contest is live right now and taking entries until October 11th. If you’ve got any cursed bar mitzvah gifts you’ve been putting the finishing touches on, we’d love to see them.

Continue reading “Spooky USB Baby Types Out Messages From Beyond”

Quick And Dirty MIDI Interface With USBASP

[Robson Couto] recently found himself in need of MIDI interface for a project he was working on, but didn’t want to buy one just to use it once; we’ve all been there. Being the creative fellow that he is, he decided to come up with something that not only used the parts he had on-hand but could be completed in one afternoon. Truly a hacker after our own hearts.

Searching around online, he found documentation for using an ATtiny microcontroller as a MIDI interface using V-USB. He figured it shouldn’t be too difficult to adapt that project to run on one of the many USBASP programmers he had laying around, and got to work updating the code.

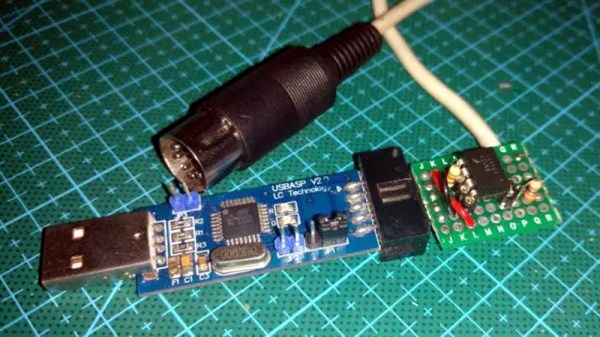
Originally written for the ATtiny2313, [Robson] first had to change around the pin configuration so it would work on the ATmega8 in the USBASP, and also updated the USB-V implementation to the latest version. With the code updated, he programmed one of the USBASP adapters with a second one by connecting them together and putting a jumper on the J2 header.

He had the software sorted, but there was still a bit of hardware work to do. To provide isolation for the MIDI device, he put together a small circuit utilizing a 6N137 optoisolator and a couple of passive components on a piece of perf board. It’s not pretty, but it does fit right into the programming connector on the USBASP. He could have fired up his PCB CNC but thought it was a bit overkill for such a simple board.

[Robson] notes that he hasn’t implemented MIDI output with his adapter, but that the code and the chip are perfectly capable of it if you need it for your project. Finding the schematic to hook up to the programmer’s TX pin is left as an exercise for the reader.

If you don’t have a USBASP in the parts bin, we’ve seen a very similar trick done with an Arduino clone in the past.

Interfacing A Retro Controller Using The USBASP

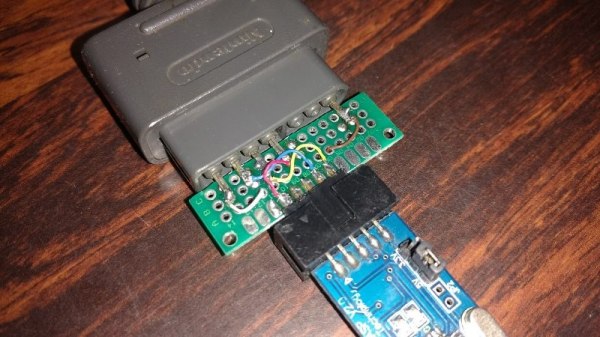
An ISP dongle is a very common piece of equipment on a maker’s bench. However, its potential as a hackable device is generally overlooked. The USBASP has an ATmeg8L at its heart and [Robson] decided that this humble USB device could be used as an interface between his PC and a SNES Joypad.

A SNES controller required three pins to communicate with a host: clock, data and latch. In his hack, [Robson]  connects the controller to the ISP interface using a small DIY adaptor and programs the AVR using the V-USB library. V-USB is a software USB library for small microcontrollers and comes in pretty handy in this instance.

[Robson] does a pretty good job of documenting the entire process of creating the interface which includes the USB HID code as well as the SNES joypad serial protocol. His hack works on both Windows and Linux alike and the code is available on GitHub for download.

Simple implementation like this project are a great starting point for anyone looking to dip their toes in the DIY USB device pool. Veterans may find a complete DIY joystick more up their alley and will be inspired by some plastic techniques as well.

Smallest MIDI Synth, Again!

Not content with fitting a tiny square-wave MIDI synthesizer into a MIDI plug, [Mitxela] went on to cram a similar noisemaker into a USB plug itself.

Besides being physically small, the code is small too, as well as the budget. It uses V-USB for the USB library running on an ATtiny85, and a couple of passive parts. His firmware (apparently) takes in MIDI notes and spits out square waves.
Continue reading “Smallest MIDI Synth, Again!”

Dirt-Cheap USB Arduino Hack From The Past

Mass production is a wonderful thing. Prices fall, and hobby hackers get cheap gear. The mind then wanders towards what can be done with it. So it’s little wonder that someone like [Aaron Christophel] would try to repurpose those sub-$3 AVR programmers that are all over eBay (translated poorly out of German here, but demonstrated in the video embedded below).

[Aaron] didn’t have to do much, really. The only trick is that you’ll first need to re-flash the existing ISP firmware with one that lets you upload code to the device itself over USB. If you don’t have an Arduino on hand to re-flash, buy at least two of the cheap programmers — one to program the other ones. Once you’ve done that, you have essentially an Arduino with limited pinout and two onboard LEDs, but in a nice small form-factor and with built-in USB. [Aaron] even provides an Arduino boards.txt file to make it all work smoothly within the IDE.

Continue reading “Dirt-Cheap USB Arduino Hack From The Past”

Converting A GameCube Controller To USB

The GameCube controller is a favorite among the console enthusiasts new and old, and with Nintendo’s recent release of the Smash Bros. edition of this controller, this is a controller that has been in production for a very, very long time. [Garrett] likes using the GameCube controller on his PC, but this requires either a bulky USB adapter, or an off-brand GameCube ‘style’ controller that leaves something to be desired. Instead of compromising, [Garrett] turned his GameCube controller into a native USB device with a custom PCB and a bit of programming.

First, the hardware. [Garrett] turned to the ATtiny84. This chip is the big brother of the ubiquitous 8-pin ATtiny85. The design of the circuit board is just under a square inch and includes connections for the USB differential pairs, 5V, signal, and ground coming from the controller board.

The software stack includes the micronucleus bootloader for USB firmware updates and V-USB to handle the USB protocol. There are even a few additions inspired by [Garrett]’s earlier shinewave controller mod. This controller mod turns the GameCube controller into a glowing hot mess certain to distract your competitors while playing Super Smash Bros. It’s a great mod, and since [Garrett] kept the board easily solderable, it’s something that can be easily retrofitted into any GameCube controller.