[Adam Conway] wanted to store files in the cloud. However, if you haven’t noticed, unlimited free storage is hard to find. We aren’t sure if he wants to use the tool he built seriously, but he decided that if he could encode data in a video format, he could store his files on YouTube. Does it work? It does, and you can find the code on GitHub.
Of course, the efficiency isn’t very good. A 7 K image, for example, yielded a 9-megabyte video. If we were going to store files on YouTube, we’d encrypt them, too, making it even worse.
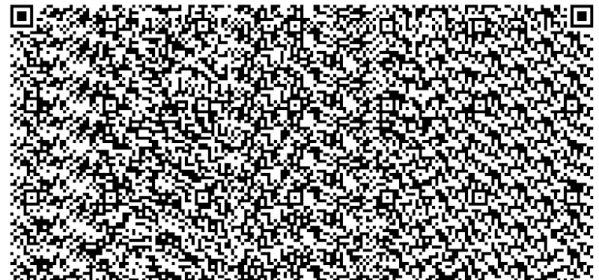
The first attempt was to break the file into pieces and encode them as QR codes. Makes sense, but it didn’t work out. To get enough data into each frame, the modules (think pixels) in the QR code were small. Combined with video compression, the system was unreliable.
Simplicity rules. Each frame is 1920×1080 and uses a black pixel as a one and a white pixel as a zero. In theory, this gives about 259 kbytes per frame. However, to help avoid problems decoding due to video compression, the real bits use a 5×5 pixel block, so that means you get about 10 kbytes of data per frame.
The code isn’t perfect. It can add things to the end of a file, for example, but that would be easy to fix. The protocol could use error correction and compression. You might even build encryption into it or store more data — old school cassette-style — using the audio channel. Still, as a proof of concept, it is pretty neat.
This might sound like a new idea, but people way back in the early home computer days could back up data to VCRs. This isn’t even the first time we’ve seen it done with YouTube.