Custom Hydraulic Cylinders From Off-the-Shelf Components

When your project needs power, you might need to turn to hydraulics. There is a lot of mystery about fluid power, but there is also a huge supply chain devoted to getting you the parts you need to power your project. Off-the-shelf components may not fit your application though, in which case it might be handy to know how to build your own custom hydraulic cylinders.

While it’s true that custom cylinder builds are pretty common, it’s still interesting to see the process [MakeItExtreme] used. Starting with an off-the-shelf piston and gland, this double-acting cylinder build is a pretty straightforward exercise in machining. The cylinder is threaded at the rod end and a cap is welded onto the piston end. Threaded bosses for fittings are welded on, the business end of the rod is threaded, and everything is assembled. The cylinder turned out to be pretty powerful as the video below shows.

As a product of the prolific team at [MakeItExtreme], we can tell this cylinder is destined for another even more interesting build. It’s hard to guess where this one will end up, but we’ll bet it ends up in another tool in their shop. Maybe it end up powering a beefed-up version of their recent roll bender.

Continue reading “Custom Hydraulic Cylinders From Off-the-Shelf Components”

Have Chainsaw, Will Travel

What’s the worst thing that could happen if you strapped a chainsaw motor to a tricycle? Turns out the worst that happened to [ThisDustin] and his friends is that it turned out hilariously awesome.

This aptly-named ‘chainsawtrike’ isn’t much in the way of comfort, so a pair of foot pegs had to be welded onto the front forks, along with a mount for the chainsaw motor. The rear axle had to be replaced with 5/8″ keyed stock, trimmed to fit the trike wheel and secured with keyed hubs. [ThisDustin] and crew also needed an intermediate sprocket to act as a reduction gear.

After a test that saw the chain jump off the sprockets and working out a few kinks — like the ability to turn — the chainsawtrike  can haul around its rider at a pretty decent clip. Check out the video of it in action after the break.

Continue reading “Have Chainsaw, Will Travel”

The Mother Of All Belt Grinders

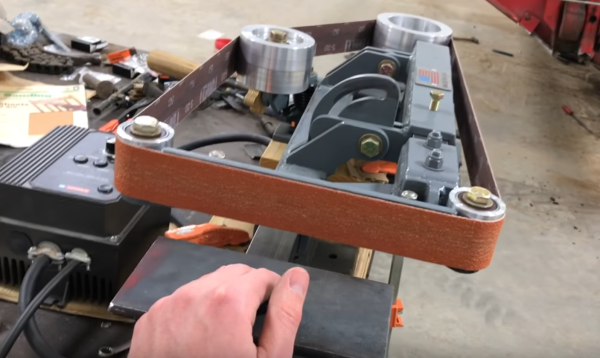
It seems like everyone is building belt grinders these days. You might think [Jeremy Schmidt] is just hoping on the bandwagon, but you’d be wrong. He took a full two years to design the perfect belt grinder for his needs. Now he’s built his perfect beast, and we must say, it’s quite impressive!

[Jeremy] had seen grinders which can tilt, but most of them tilt the entire machine, including the table. He designed his machine with an independent table. This means the belt can be placed at any angle, while the table remains flat. He’s achieved some really interesting finishes with a course grind on a 45-degree angle to the workpiece.

No build is without its problems. In [Jeremy’s] case it was building the box which acts as a receiver for the machine and the tables. Regular square tube stock wasn’t quite rigid enough, so bar stock was the way to go. The first attempt at building the box resulted in a warped tube, due to the stresses of welding. [Jeremy] was more careful the second time, moving from section to section of the four welds. This kept the heat from building up, and the box stayed straight.

The final result is an incredibly rigid machine which definitely will withstand anything that [Jeremy] can throw at it.

If you want to see more belt grinders at work, check out [Bob]’s treadmill belt grinder, or [Mike’s] conversion.

Continue reading “The Mother Of All Belt Grinders”

Building A Metalworking Vise, Layer By Layer

Machine shop wisdom says the lathe is the king of machine tools. We ascribe to that belief, although the common aphorism that the lathe is the only tool that can make copies of itself seems a bit of a stretch. But in the shadow of the almighty lathe is a tool without which even the simplest projects would be vastly more difficult: the lowly vise. Trouble is, finding a good vise can be a tall order. So why not take matters into your own hands and build this very sturdy vise from scratch?

Most commercially available vises are made from a couple of large castings, but as complete as [MakeItExtreme]’s metalworking shop has become, casting molten iron is not a tool in their kit — yet. So they turned back to what they know and welded up the body and jaw of the vise from mild steel. The video below shows the long sessions of welding and grinding that bring the body and the jaw into being, in the process consuming miles of MIG wire. The main screw is cut from stainless steel and threaded with the correct Acme form for such a high load application, especially given the mechanical advantage the long handle provides. The jaws have dovetails for replaceable inserts, too, which is a nice touch that’s hard to find on commercial units.

Vises on Hackaday tend to the lighter duty varieties, such as a 3D-printed vise, the Stickvise for PCBs, or even a fancied-up woodworking vise. It’s nice to see a heavy metal build for a change.

Continue reading “Building A Metalworking Vise, Layer By Layer”

Electric Arc Furnace Closes The Loop

When we think of an Electric Arc Furnace (EAF), the image that comes to mind is one of a huge machine devouring megawatts of electricity while turning recycled metal into liquid. [Gregory Hildstrom] did some work to shrink one of those machines down to a practical home version. [Greg] is building on work done by [Grant Thompson], aka “The King of Random” and AvE. Industrial EAFs are computer controlled devices, carefully lowering a consumable carbon electrode into the steel melt. This machine brings those features to the home gamer.

[Greg] started by TIG welding up an aluminum frame. There isn’t a whole lot of force on the Z-axis of the arc furnace, so he used a stepper and lead screw arrangement similar to those used in 3D printers. An Adafruit stepper motor shield sits on an Arduino Uno to control the beast. The Arduino reads the voltage across the arc and adjusts the electrode height accordingly.

The arc behind this arc furnace comes from a 240 volt welder. That’s where [Greg] ran into some trouble. Welders are rated by their duty cycle. Duty cycle is the percentage of time they can continuously weld during a ten minute period. A 30% duty cycle welder can only weld for three minutes before needing seven minutes of cooling time. An electric arc furnace requires a 100% duty cycle welder, as melting a few pounds of steel takes time. [Greg] went through a few different welder models before he found one which could handle the stress.

In the end [Greg] was able to melt and boil a few pounds of steel before the main 240 V breaker on his house overheated and popped. The arc furnace might be asking a bit much of household grade electrical equipment.

Continue reading “Electric Arc Furnace Closes The Loop”

3D Printed Bicycle From Stainless Steel!

You wouldn’t 3D print a car, would you? That’d simply be impractical. However, if you’re a team of students attending the Delft University of Technology (TU Delft) in the Netherlands, you might be inclined to 3D print a stainless steel bicycle instead.

The TU Delft team collaborated with MX3D, a company that uses an articulated industrial robot arm with a welder for an effector, welding and building the Arc Bicycle, glob by molten glob. Printed in chunks, this process allows the practical construction of larger objects that are able to withstand the stresses and forces of everyday use. Weighing around 20kg, you might not want to spend much time carrying it up to an apartment anytime soon, so stick to the cobblestone streets — the Arc Bicycle can take it.

Continue reading “3D Printed Bicycle From Stainless Steel!”

Fun With Fire: Oxy-Acetylene Basics

If generations of Hollywood heist films have taught us anything, it’s that knocking off a bank vault is pretty easy. It usually starts with a guy and a stethoscope, but that never works, so the bad guys break out the cutting torch and burn their way in. But knowing how to harness that raw power means you’ve got to learn the basics of oxy-acetylene, and [This Old Tony]’s new video will get your life of crime off on the right foot.

In another well-produced video, [Tony] goes into quite a bit of detail on the mysteries of oxygen and acetylene and how to handle them without blowing yourself up. He starts with a tour of the equipment, including an interesting look at the internals of an acetylene tank — turns out the gas is stored dissolved in acetone in a porous matrix inside the tank. Working up the hoses, he covers the all-important flashback arrestors, the different styles of torches, and even the stoichiometry of hydrocarbon combustion and how adjusting the oxygen flow results in different flame types for different jobs. He shows how oxy-acetylene welding can be the poor man’s TIG, and finally satisfies that destructive urge by slicing through a piece of 3/8″ steel in under six seconds.

We’ve always wanted a decent oxy-acetylene rig, and [Tony] has convinced us that this is yet another must-have for the shop. There’s just so much you can do with them, not least of which is unsticking corroded fasteners. But if a blue wrench is out of your price range and you still want to stick metal together, you’ll want to learn how to braze aluminum with a propane torch.

Continue reading “Fun With Fire: Oxy-Acetylene Basics”