Maurice Brings Immersive Audio Recording To The Masses

Immersive audio is the new hotness in the recording world. Once upon a time, mono was good enough. Then someone realized humans have two ears, and everyone wanted stereo. For most of us, that’s where it stopped, but audio connoisseurs kept going into increasingly baroque surround-sound setups — ending in Immersive Audio, audio that is meant to fully reproduce the three-dimensional soundscape of the world around us. [DJJules] is one of those audio connoisseurs, and to share the joy of immersive audio recording with the rest of us, he’s developed Maurice, a compact, low-cost immersive microphone.

Maurice is technically speaking, a symmetrical ORTF3D microphone array. OTRF is not a descriptive acronym; it stands for Office de Radiodiffusion Télévision Française, the fine people who developed this type of microphone for stereo use. The typical stereo ORTF setup requires two cardioid microphones and angles them 110 degrees apart at a distance of 17 cm. Maurice arrays four such pairs, all oriented vertically and facing 90 degrees from one another for fully immersive, 8-channel sound. All of those microphones are thus arrayed to capture sound omnidirectionally, and give good separation between the channels for later reproduction. The mountings are all 3D printed, and [DJJules] kindly provides STLs.
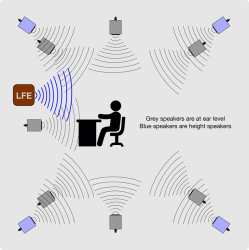
This is the speaker setup you need to get full use of Maurice’s recordings. Now let’s see Paul Allen’s speakers.

Recording eight audio channels simultaneously is not trivial for the uninitiated, but fortunately, [DJJules] includes a how-to in his post. We particularly like his tip to use resistor color coding to identify the XLR cables for different microphone channels. Playback, too, requires special setup and processing. [DJJules] talks about listening on his 7.1.4 stereo setup, which you can find in a companion post. That’s a lot of speakers, as you might imagine.

There are high-end headphones that claim to reproduce an immersive sound field as well, but we can’t help but wonder if you’d miss the “true” experience without head tracking. Even with regular department-store headphones, the demo recordings linked via the Instructable sound great, but that probably just reflects the quality of the individual microphones.

Audio can be a make-or-break addition to VR experiences, so that would seem to be an ideal use case for this sort of technology. Maurice isn’t the only way to get there; we previously focused on [DJJules]’s ambisonic microphone, which is another way to reproduce a soundscape. What do you think, is this “immersive audio” the new frontier of Hi-Fi, or do we call it a stereo for a reason? Discuss in the comments!

Magnetic Power Cable Makes Mobility Scooter Much Better

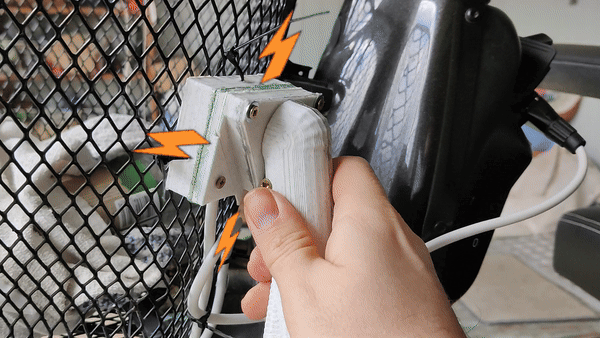
Sometimes, you have to wonder what major manufacturers of assistive tech are thinking when they design their products. [Niklas Frost]’s father has MS and uses an electric mobility scooter to get around. It’s a good solution to a terrible problem, except it stops short of the most important part — the charging scheme. Because of the aforementioned mobility issues, [Niklas]’s father can’t plug and unplug it without assistance. So much for independence.

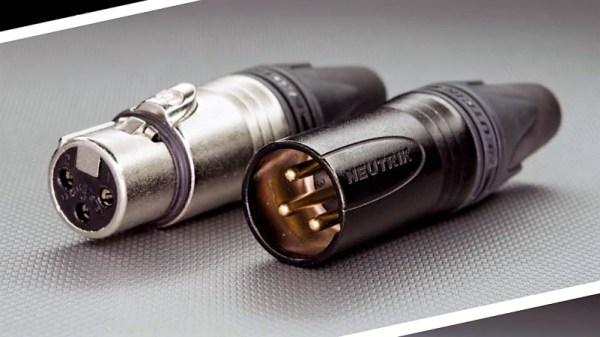
And so [Niklas] gave it some thought and came up with an incredibly easy way that Dad can charge his scooter. It’s even non-intrusive — all it took was a handful of off-the-shelf components and some 3D printed parts to make what’s essentially an extension cord between the charger and the scooter. Really, there’s nothing more to it than three 10 A magnetic connectors, an XLR female port, an XLR male connector, and some very helpful plastic.

Something interesting to note: [Niklas] spent a year or so tinkering with a robot that could drive the plug over to the charger and plug it in. A book on the subject made him destroy that robot, however, when he realized that he was being driven more by cool technologies than solving the problem at hand. Within a few days of changing course, [Niklas]’ dad was charging his own scooter.

Now, if [Niklas] wants to see about making the scooter move a whole lot faster, we have just the thing.

Ferrules And 3D Prints Revive Classic Microphone

Contrary to what our readers may think, we Hackaday writers aren’t exactly hacking layabouts. True, we spend a great deal of time combing through a vast corpus of material to bring you the best from all quadrants of the hacking galaxy, but we do manage to find a few minutes here and there to dip into the shop for a quick hack or two.

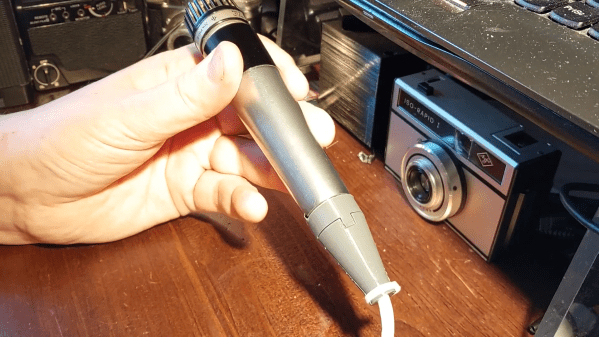
Our own [Jenny List] proves that with this quick and easy vintage microphone revival. The mic in question is a Shure Unidyne III, a cardioid pattern dynamic microphone that has been made in the millions since the 1950s. She’s got a couple of these old classics that have been sidelined thanks to their obsolete Amphenol MC3M connectors. The connectors look a little like the now-standard XLR balanced connector, but the pin spacing and pattern are just a touch different.

Luckily, the female sockets in the connector are just the right size to accept one of the crimp-on ferrules [Jenny] had on hand with a snug grip. These were crimped to a length of Cat 5 cable (don’t judge) to complete the wiring, but that left things looking a bit ratty. Some quick OpenSCAD work and a little PLA resulted in a two-piece shell that provides strain relief and protection for the field-expedient connections. It’s not [Roger Daltry] secure, mind you, but as you can see in the video below the break it’s not bad — nothing a few dozen yards of gaffer’s tape couldn’t fix. Come to it, looks like The Who were using the same microphones. Small world.

Continue reading “Ferrules And 3D Prints Revive Classic Microphone”

A 3D-printed DIY ambisonic microphone

Ambi-Alice Goes Down The Rabbit Hole Of Ambisonic Microphones

Theoretically, ambisonic microphones allow you to perfectly encode the soundscape around you and recreate it from the focal point of any direction. To do this, you need at least four microphone capsules and some math. Ambisonic microphones have been around for 50 years, but [DJJules] wanted to bring ease of use to these tools and push them into the open source fold.

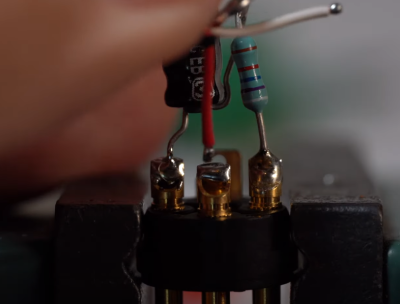
Soldering a 3.3uF capacitor and a 100k-ohm resistor inside each XLR plug.As you’ll see in the video below, there were a few iterations before this one. Everything changed for the better when [DJJules] found out about TSB25905 capsules. These are electret condenser mics with 1″ diaphragms and built-in EMI/RFI-suppressing capacitors. Another big help was deciding to color code everything from the XLR cable boots to the cable sleeves to the electrical tape that’s protecting each of the P48 resistor-capacitor pairs inside the XLR plugs.

[DJJules]’ buddy [Tom] designed and printed a single piece that holds the four capsules in a perfect tetrahedral array, and an elegant two-piece basket that protects the mics and provides a base for a one of those furry windscreens. The mics and the basket are separated with four silicone plugs designed for quadcopters that provide both isolation and vibration dampening.

If you want to make one of these yourself, [DJJules] has STLs for both a normal microphone stand and another for GoPro mounts. Check out the build video after the break and the sound demos on Instructables.

No need for a rich soundscape? Build a USB microphone instead, or if that’s too cold and modern, whittle up a wooden a ribbon mic.

Continue reading “Ambi-Alice Goes Down The Rabbit Hole Of Ambisonic Microphones”

Homebrew Binaural Microphone Lets You Listen Like A Human

We humans may not have superpowers, but the sensor suite we have is still pretty impressive. We have binocular vision that autofocuses and can detect a single photon, skin studded with sensors for touch, heat, and pain, and a sense of smell that can detect chemicals down to the parts per trillion range. Our sense of hearing is pretty powerful, too, allowing us to not only hear sounds over a 140 dB range, but also to locate its source with a fair degree of precision, thanks to the pair of ears on our heads.

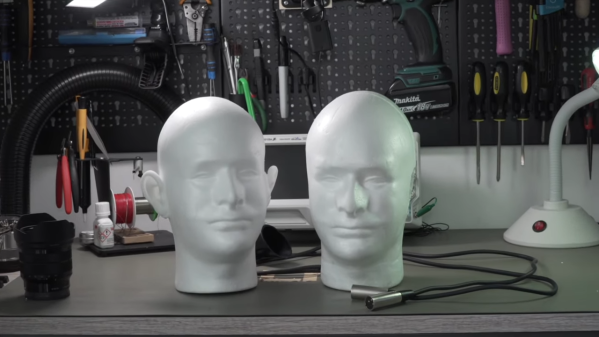
Recreating that binaural audio capture ability is the idea behind this homebrew 3D microphone. Commercially available dummy head microphones are firmly out of the price range of [LeoMakes] and most mortals, so his was built on a budget from a foam mannequin head and precast silicone rubber ears, which you can buy off the shelf, because of course you can.

Attached to the sides of the foam head once it got the [Van Gogh] treatment, the ears funnel sound to tiny electret cartridge microphones. [Leo] learned the hard way that these little capsule mics can’t use the 48-volt phantom power that’s traditionally pumped up the cable to studio microphones; he fixed that problem with a resistor in parallel with the mic leads. A filtering capacitor, an RC network between the cold line and ground on the balanced audio line, and a shield cleverly fashioned from desoldering braid took care of the RF noise problem.

The video after the break shows the build and test results, which are pretty convincing with headphones on. If you want to build your own but need to learn more about balanced audio and phantom power, we’ve got a short primer on the topic that might help.

Continue reading “Homebrew Binaural Microphone Lets You Listen Like A Human”

THAT Preamp

It is easy to cobble together projects these days. ICs make it simple and microcontrollers even easier. However, we always respect a project that really goes from concept to finished product and that’s what we liked about [Curt Yengst’s] “THAT” Thing microphone preamp.

In part 1 of his post about it, he talks about the basic ideas including the chips from THAT — a small but high-end audio chipmaker — he uses. The first chip is a low-noise audio preamp and the other is a balanced line driver.

In part 2, we get to see [Curt] go from breadboard testing to PCB fabrication all the way to the finished rack-mounted device with a good looking front panel. It worked, but like all designers, [Curt] was already thinking about the next version.

Continue reading “THAT Preamp”

The Hot And Cold Of Balanced Audio

A few summers of my misspent youth found me working at an outdoor concert venue on the local crew. The local crew helps the show’s technicians — don’t call them roadies; they hate that — put up the show. You unpack the trucks, put up the lights, fly the sound system, help run the show, and put it all back in the trucks at the end. It was grueling work, but a lot of fun, and I got to meet people with names like “Mister Dog Vomit.”

One of the things I most remember about the load-in process was running the snakes. The snakes are fat bundles of cables, one for audio and one for lighting, that run from the stage to the consoles out in the house. The bigger the snakes, the bigger the show. It always impressed me that the audio snake, something like 50 yards long, was able to carry all those low-level signals without picking up interference from the AC thrumming through the lighting snake running right alongside it, while my stereo at home would pick up hum from the three-foot long RCA cable between the turntable and the preamp.

I asked one of the audio techs about that during one show, and he held up the end of the snake where all the cables break out into separate connectors. The chunky silver plugs clinked together as he gave his two-word answer before going back to patching in the console: “Balanced audio.”

Continue reading “The Hot And Cold Of Balanced Audio”