Motorized Coil Tunes Your Ham Antenna On A Budget

When it comes to amateur radio, one size definitely does not fit all. That’s especially true with antennas, which need to be just the right size for the band you’re working, lest Very Bad Things happen to your expensive radio. That presents a problem for the ham who wants the option to work whichever band is active, and doubly so if portable operation is desired.

Of course, there are commercial solutions to this problem, but they tend to be expensive. Luckily [Øystein (LB8IJ)] seems to have found a way around that with this low-cost homebrew motorized antenna coil, which is compatible with the Yaesu Automatic Tuning Antenna System. ATAS is supported by several Yaesu transceivers, including the FT-891 which [Øystein] favors for field operations. ATAS sends signals up the feedline to a compatible antenna, which then moves a wiper along a coil to change the electrical length of the antenna, allowing it to resonate on the radio’s current frequency.

The video below details [Øystein]’s implementation of an ATAS-compatible tuning coil, mainly focusing on the mechanical and electrical aspects of the coil itself, which takes up most of the room inside a 50-mm diameter PVC tube. The bore of the air-core coil has a channel that guides a wiper, which moves along the length of the coil thanks to a motor-driven lead screw. [Øystein] put a lot of work into the wiper, to make it both mechanically and electrically robust. He also provides limit switches to make sure the mechanism isn’t over-driven.

There’s not much detail yet on how the control signals are detected, but a future video on that subject is promised. We’re looking forward to that, but in the meantime, the second video below shows [Øystein] using the tuner in the field, with great results.

Continue reading “Motorized Coil Tunes Your Ham Antenna On A Budget”

Design Review: USB-C PD Input For Yaesu FRG7700

Today is another board from a friend, [treble], who wants to convert a Yaesu FRG7700 radio to USB-C PD power. It’s yet another review that I’ve done privately, and then realized I’ve made more than enough changes to it, to the point that others could learn from this review quite a bit. With our hacker’s consent, I’m now sharing these things with you all, so that we can improve our boards further and further.

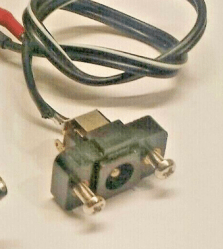
This board’s idea is thought-out and executed well – it replaces a bespoke barrel jack assembly, and is mechanically designed to fit the screw holes and the free space inside the chassis. For USB-PD, it uses a CH32V003 coupled with FUSB302 – I definitely did help pick the latter! For mechanical reasons, this board is split into two parts – one has the USB-C port, whereas the other has the MCU and the PD PHY.
In short, this board is a PD trigger. Unlike the usual PD triggers, however, this one is fully configurable, since it has a 32-bit MCU with good software support, plus, the PD PHY is also well known and easily controllable. So, if you want special behavior like charger-power-dependent profile selection for powering a static resistance load, you can implement it easily – or, say, you can do PPS for variable voltage or even lithium ion battery charging! With a bit of extra code, you could even do EPR (28 V = 140 W power) with this board, instantly making it into a pretty advanced PD trigger, beyond the ones available on the market.

Also, the board has some PCB art, and a very handy filter to get some of the USB-C charger noise out. Let’s take a look at all of these!

Current Flow Improvements

Continue reading “Design Review: USB-C PD Input For Yaesu FRG7700”

USB-C Power For Ham Radio

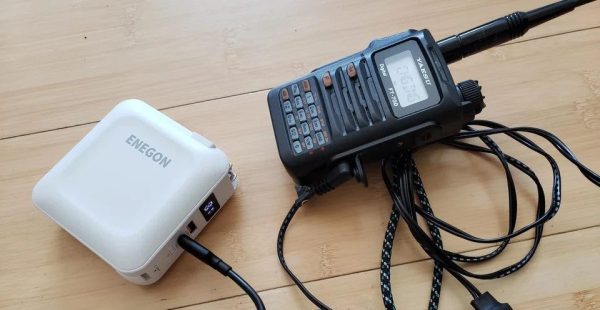
Even though manufacturers of handheld ham radios have been busy adding all sorts of bells and whistles into their portable offerings, for some reason, many of them lack a modern USB-C port. In the same vein, while some have USB for programming or otherwise communicating between the radio and a computer, very few can use USB for power. Instead , they rely on barrel jacks or antiquated charging cradles. If you’d like to modernize your handheld radio’s power source, take a look at what [jephthai] did to his Yaesu.

In the past, USB ports could be simply soldered onto a wire and used to power basically anything that took 5 VDC. But the radio in question needs 12 volts, so the key was to find a USB-C cable with the built-in electronics to negotiate the right amount of power from USB-PD devices. For this one, [jephthai] cut the barrel connector off his radio’s power supply and spliced in some Anderson power pole connectors so he could use either the standard radio charger or one spliced onto this special cable.

With this fairly simple modification out of the way, it’s possible to power the handheld radio for long outings with the proper USB battery bank on hand. For plenty of situations this is much preferable to toting around a 12 V battery, which was the method of choice for powering things like QRP rigs when operating off-grid.

Fail Of The Week: Flipped Cable Leads To Fried Radio

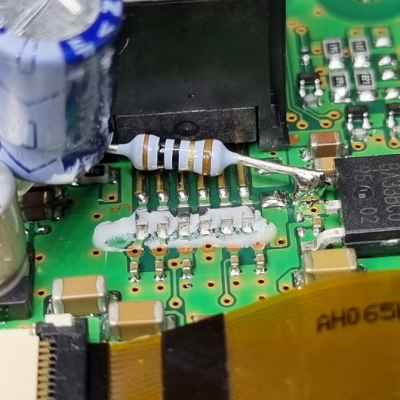
[Doug]’s newly-installed Yaesu FT-891 mobile transceiver failed to power up despite a careful installation, and it turns out to have ultimately been caused by a reversed cable. There’s a happy ending, however. Since the only real casualties were a blown resettable fuse and a badly-burned resistor that damaged the PCB, [Doug] was able to effect a repair. Things could have been worse, but they also could have been better. Damage could have been prevented entirely with some better design, which [Doug] explains during his analysis of what went wrong.

The destroyed SMT resistor and pads were easily replaced with a through-hole version, thanks to the schematics.

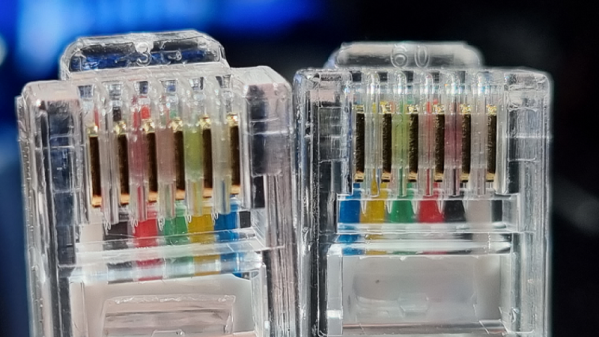
The main problem was that the generic RJ12 cable that [Doug] used to connect radio components had its connections reversed. This would not be a problem if it was used to connect a landline telephone to the wall, but it was a big problem when used to connect the radio components together. According to the radio schematics, the two center wires carry +13 V and GND, which meant that a reversed cable delivered power with reversed polarity; never an optimal outcome.

Once the reversed power arrived at the other end, [Doug] discovered something else. Diodes whose job would be to protect against reverse polarity were marked DO NOT INSTALL, probably to shave a few cents off the bill of materials. As a result, the full 13 V was soaked up by a 1/8 W surface mount resistor which smoldered and burned until a fuse eventually blew, but not before the resistor and pads were destroyed. Thankfully, things cleaned up well and after replacing the necessary parts and swapping for a correct cable, things powered up normally and the mobile radio was good to go.

Curious for a bit more details about mobile radio installations? Check out our own Dan Maloney’s rundown on installing a discontinued (but perfectly serviceable) Yaesu FT-8900R.

Auxiliary Display Makes Ham Radio Field Operations Easier

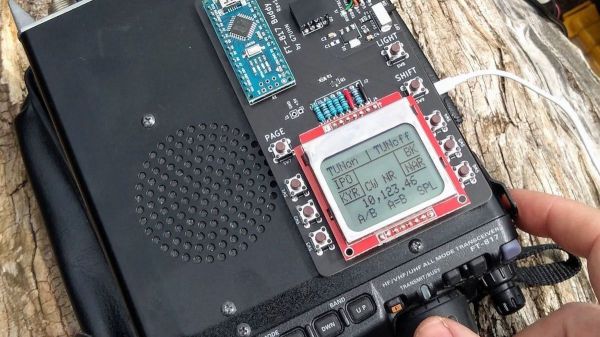
As popular as the venerable Yaesu FT-817 transceiver might be with amateur radio operators, it’s not without its flaws, particularly in the user interface department. [Andy (G7UHN)] is painfully familiar with these flaws, so he designed this auxiliary display and control panel for the FT-817 to make operating it a little easier.

There are a ton of ways to enjoy ham radio, but one of the more popular ways is to bust out of the shack and operate in the great outdoors. From the seashore to mountain peaks, hams love giving their rigs some fresh air and sunshine. The battery-powered, multimode, all-band FT-817 is great for these jaunts, but to fit as much radio into a small package as they did, Yaesu engineers had to compromise on the controls. Rather than bristling with buttons, many of the most-used features of the radio are buried within menus that require multiple clicks and twists to access.

[Andy]’s solution is a PCB bearing an Arduino Nano, an LCD screen, and a whole bunch of actual buttons. The board sits on top of the case and talks to the radio over a 8-pin mini-DIN cable using both documented and undocumented  CAT, or Computer Aided Transceiver commands. The LCD displays the current status of various features and the buttons provide easy access to changing them, essentially by sending keystrokes to the radio.

Hats off to [Andy] for tackling this project. The only other FT-817 hack we’ve seen before was useful but far simpler, and didn’t require KiCad, which [Andy] had to teach himself for this one.

Raspberry Pi Takes Control Of Ham Radio

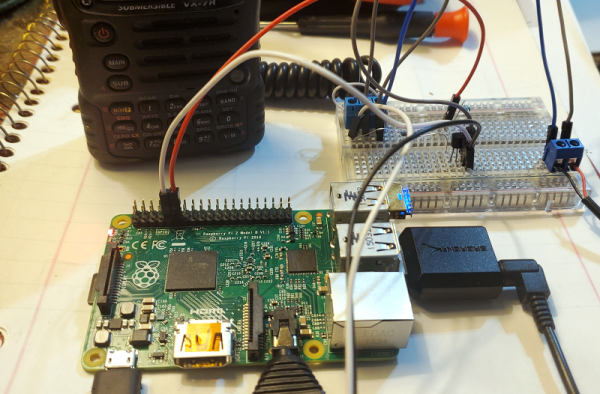
Today’s ham radio gear often has a facility for remote control, but they most often talk to a computer, not the operator. Hambone, on the other hand, acts like a ham radio robot, decoding TouchTone digits and taking action — for example, keying the radio and reading off the weather — in response to the commands received.

The code is in Python and uses numpy’s fast Fourier transform to identify digits. We’d be interested to test the performance of that compared to doing a Goertzel to specifically probe for the 8 digit tones: there are four row tones and four column tones. On the other hand, the FFT is handy and clearly works fast enough for this application.

Continue reading “Raspberry Pi Takes Control Of Ham Radio”

The $50 Ham: Going Mobile

So far in this series, everything we’ve covered has been geared around the cheapest and easiest possible means of getting on the air: getting your Technician license, buying your first low-end portable transceiver, and checking in on the local repeater nets. That’s all good stuff, and chances are you can actually take all three of those steps and still have change left over from your $50 bill. Like I said, amateur radio doesn’t have to be expensive to be fun.

But at some point, every new ham is going to yearn for that first “real” rig, something with a little more oomph in terms of power, and perhaps with a few more features. For many Technicians, the obvious choice is a mobile rig, something that can be used to chat with fellow hams on the way to work, or to pass the time while on long road trips. Whatever your motivation is, once you buy a radio, you have to install it, and therein lie challenges galore, both electrical and mechanical.

I recently took the plunge on a mobile rig, and while the radio and antenna were an order of magnitude more expensive than $50, the process of installing it was pretty cheap. But it’s not the price of the thing that’s important in this series; rather, it’s to show that ham radio is all about doing it yourself, even when that means tearing your car apart from the inside out and rebuilding it around a radio.

Continue reading “The $50 Ham: Going Mobile”