Review: WAINLUX K8, A Diode Laser That’s Ready To Work

Rarely a week goes by that some company doesn’t offer to send us their latest and greatest laser. You know the type — couple of aluminum extrusions, Class 4 diode flopping around in the breeze, and no enclosure to speak of unless you count the cardboard box they shipped it in. In other words, an accident waiting to happen. Such gracious invitations get sent to the trash without a second thought.

Now don’t get me wrong, I have no doubt that the average Hackaday reader would be able to render such a contraption (relatively) safe for use around the shop. Build a box around it, bolt on a powerful enough fan to suck the smoke out through the window, and you’ve turned a liability into a legitimate tool. But the fact remains that we simply can’t put our stamp on something that is designed with such a blatant disregard for basic safety principles.
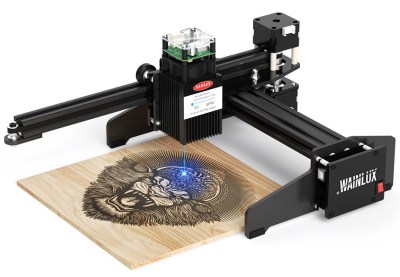
The earlier WAINLUX JL4 — lucky rabbit foot not included.

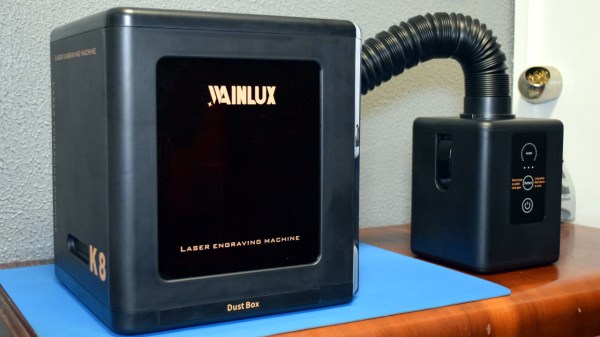
That being the case, a recent email from WAINLUX nearly met the same fate as all those other invitations. But even at a glance it was clear that this new machine they wanted to send out, the K8, was very different from others we’d seen. Different even from what the company themselves have put out to this point. This model was fully enclosed, had a built-in ventilation fan, an optional air filter “sidecar”, and yes, it would even turn off the laser if you opened the door while it was in operation. After reading through the promotional material they sent over, I had to admit, I was intrigued.

It seemed like I wasn’t the only one either; it was only a matter of days before the Kickstarter for the WAINLUX K8 rocketed to six figures. At the time of this writing, the total raised stands at just under $230,000 USD. There’s clearly a demand for this sort of desktop laser, the simplicity of using a diode over a laser tube is already appealing, but one that you could actually use in a home with kids or pets would be a game changer for many people.

But would the reality live up to the hype? I’ve spent the last couple of weeks putting a pre-production WAINLUX K8 through its paces, so let’s take a look and see if WAINLUX has a winner on their hands.

Continue reading “Review: WAINLUX K8, A Diode Laser That’s Ready To Work”

Op-Amp Challenge: Interactive Analog LED Wave Array

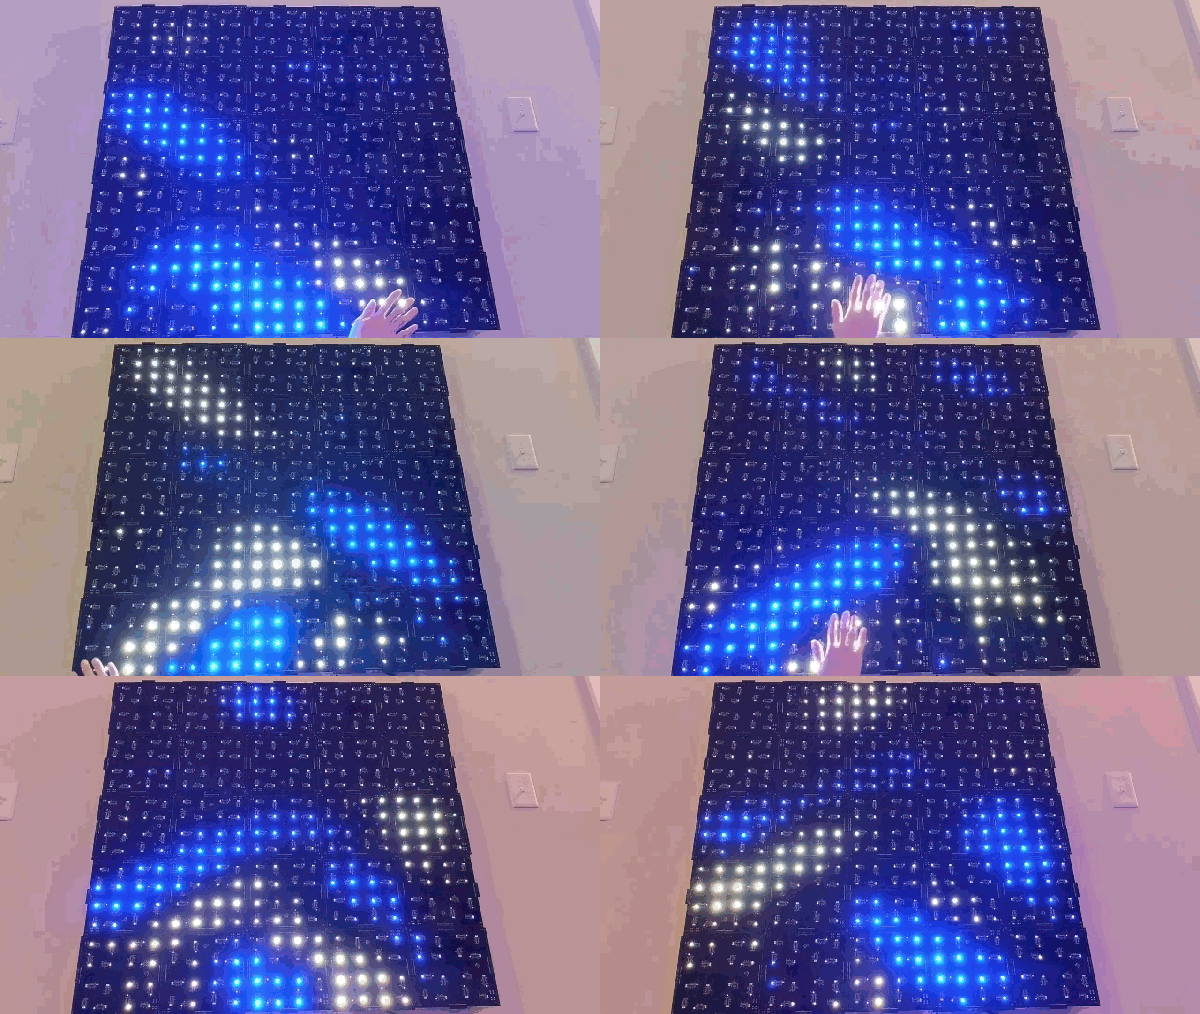
A while back, [Chris Lu] was studying how analog circuits, specifically op-amps can be used to perform mathematical operations and wondered if they could be persuaded to solve differential equations, such as the wave equation. After sitting on the idea for a few years, it was time to make it a reality, and the result is an entry into the Op-Amp Challenge.

Unlike many similar interactive LED matrix displays that are digital in nature (because it’s a lot easier), this design is pure analog, using many, many op-amps. A custom PCB houses a 4×4 array of compute units, each with a blue and white LED indicating the sign and magnitude of the local signal.

The local input signal is provided by an IR photodiode, AC coupled to only respond to change, with every other circuit sharing a sensor to keep it simple. Each circuit is connected to its immediate neighbors on the PCB, and off the PCB via board-to-board connectors. This simple scheme makes this easily scalable if desired in the future.

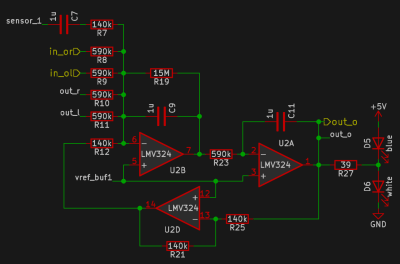
[Chris] does a great job of breaking down the math involved, which makes this project a neat illustration of how op-amp circuits can implement complex mathematical problems in an easy-to-understand process. Even more op-amps are pressed into service for generating the split-rail voltage reference and for amplifying the weak photodiode signals, but the computation circuit is the star of the show.

We like analog computing a fair bit around these parts. Here’s a little something we were previously drooling over.

Continue reading “Op-Amp Challenge: Interactive Analog LED Wave Array”

Laser Scanning Microscope Built With Blu-ray Parts

Laser scanning microscopes are useful for all kinds of tiny investigations. As it turns out, you can build one using parts salvaged from a Blu-ray player, as demonstrated by [Doctor Volt].

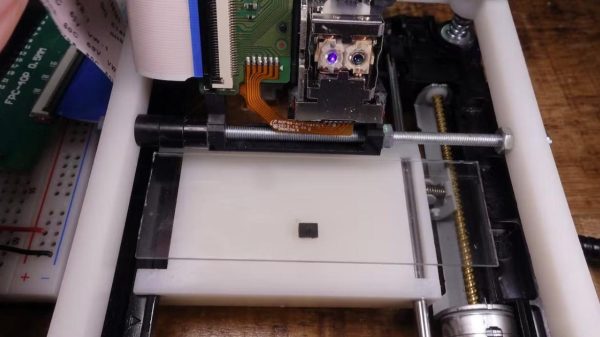
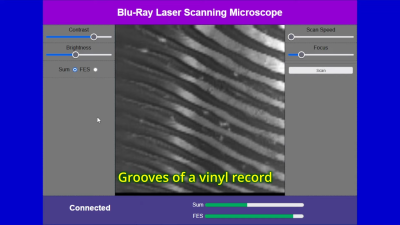
The trick is repurposing the optical pickup unit that is typically used to read optical discs. In particular, the build relies on the photodiodes that are usually used to compute focus error when tracking a disc. To turn this into a laser scanning microscope, the optical pickup is fitted to a 3D printed assembly that can slew it linearly for imaging purposes.
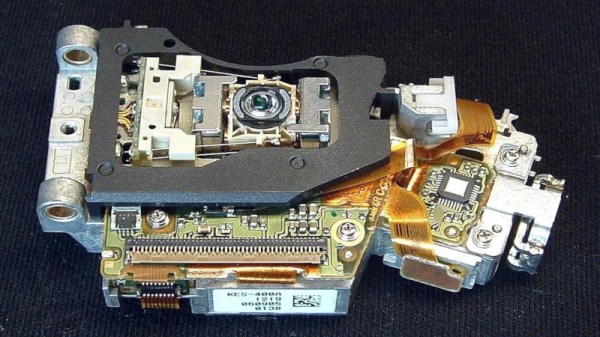
Meanwhile, the Blu-ray player’s hardware is repurposed to create a sample tray that slews on the orthogonal axis for full X-Y control. An ESP32 is then charged with running motion control and the laser. It also captures signals from the photodiodes and sends them to a computer for collation and display.

[Doctor Volt] demonstrates the microscope by imaging a small fabric fragment. The scanned area covers less than 1 mm x 1 mm, with a resolution of 127 x 127, though this could be improved with finer pitch on the slew mechanisms.

While it’s hardly what we’d call a beginner’s project, this technique still looks a lot more approachable than building your own scanning electron microscope.

Continue reading “Laser Scanning Microscope Built With Blu-ray Parts”

Quick Hacks: Countersinking Screw Heads With 3D Laser Engraving

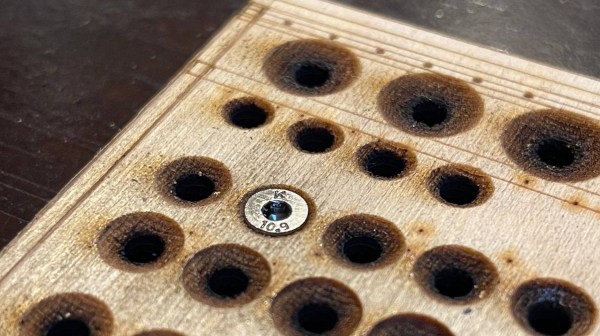
Here’s a fun quick hack from [Timo Birnschein] about using the 3D laser engraving (or ‘stamp’ engraving) mode of certain laser cutter toolchains to create a handy countersink shape in a laser-cut and engraved workpiece. Since [Timo] uses a small laser cutter to cut out and mark project boards for their electronics builds, having an extra messy, manual countersinking operation with subsequent clean-up seemed like a waste of time and effort, if the cutter could be persuaded to do it for them.

Designs are prepared in Inkscape, with an additional ‘3D engraving’ layer holding the extra processing step. [Timo] used the Inkscape feathering tools to create a circular grayscale gradient, leading up to the central cut hole (cuts are in a separate layer) which was then fed into Visicut in order to drive the GRBL-based machine, However, you could do it with practically any toolchain that supports laser power control during a rastering operation. The results look perfectly fine for regions of the workpiece not on show, at least, but if you’re only interested in the idea from a functional point of view, then we reckon this is another great trick for the big bag of laser hacks.

There have been a great number of laser cutting hacks here over the years, since these tools are so darn useful. The snapmaker machine can be a 3D printer, a CNC cutter and a laser cutter all in one, albeit not too perfect at any of those tasks, but the idea is nice. If you own a perfectly fine 3D printer, but fancy a spot of laser engraving (and you have good eye protection!), then you could just strap a 5W blue diode laser to it and get your fix.

Tearing Down A PS3 Blu Ray Drive

Optical drives are somewhat passe in 2019, with most laptops and desktops no longer shipping with the hardware installed. The power of the cloud has begun to eliminate the need for physical media, but that doesn’t mean the technology is any less marvellous. [Leslie Wright] and [Samuel Goldwater] took a deep dive into what makes the PS3’s optical drive tick, back in the heyday of the Blu Ray era.

The teardown starts by examining the layout of the assembly, and the parts involved. This is followed by a deep dive into an exploration of the triple-laser diode itself, There are tips on how to safely extract the delicate parts, which are highly sensitive to electrostatic discharge, as well as exhaustive specifications and measurements of performance. There’s even a break down of the optical package, too, including a patent search to shed more light on the complicated inner workings of the hardware.

And if this lures you to dig deeper into Sam’s Laser FAQ, prepare to spend the rest of the week.

We’ve seen other optical teardowns before, too – like this look inside a stereo microscope. It’s quite technical stuff, and may fly over the heads over the optically inexperienced. However, for those in the know, it’s a great look at the technology used in a mass-produced console.

Hackaday Links Column Banner

Hackaday Links: May 19, 2019

Cheap nostalgia, that’s the name of the game. If you can somehow build and ship ‘cheap nostalgia’, you’re going to be raking in the bucks. For the ‘musicians’ in the crowd, the king of cheap nostalgia has something great. Behringer is cloning the Yamaha CS-80. and it was announced at this month’s Superbooth.

The Yamaha CS-80 is the synth in Blade Runner, and since Toto’s Africa is making a comeback on top-40 radio, it’s the instrument of our time. A Wonderful Christmas Time, it seems. Aaaannnyway, yes, there might be a huge and inexpensive version of one of the greatest synthesizers ever made real soon. The cheap 808s and 909s are making their way to stores soon, and the 101 needs a firmware update but you can buy it now. Cheap nostalgia. That’s how you do it.

The PiDP-11/70 is a project we’ve been neglecting for some time, which is an absolute shame. This is a miniature simulation of what is objectively the best-looking minicomputer of all time, the PDP-11/70. This version is smaller, though, and it runs on a Pi with the help of SimH. There are injection molded switches, everything is perfect, and now there are a whole bunch of instructional videos on how to get a PiDP-11/70 up and running. Check it out, you want this kit.

Considering you can put a phone screen in anything, and anyone can make a keyboard, it’s a wonder no one is making real, well-designed palmtop computers anymore. The Vaio P series of PCs would be great with WiFi, Bluetooth, and a slight upgrade in memory and storage. This was [NFM[‘s recent project. This palmtop gets an SSD. The object of modification is a decade-old Sony Vaio CPCP11 palmtop modified with a 256 GB SSD. The Vaio only supports PATA, and the SSD is mSATA, so this is really a project of many weird adapters that also have to be built on flex connectors.

Here’s something for the brain trust in the Hackaday comments. First, take a look at this picture. It’s the inside of a rotary encoder. On the top, you have a Gray code (or what have you) that tracks the absolute position of a shaft. On the bottom, you have some sort of optical detection device with 13 photodiodes (or something) that keeps track of each track in the Gray code. This is then translated to some output, hopefully an I2C bus. What is this device, circled in red? I know what it is — it’s an optical decoder, but that phrase is utterly ungooglable, unmouserable, and undigikeyable. If you were me, what would you use to build your own custom absolute rotary encoder and you only needed the sensor? I technically only need 10 tracks/sensors/resolution of 1024, but really I only need a name.

Lol, someone should apply to Y Combinator and pitch yourself as a B Corp.

Laser Exposing PCBs With A Blu-Ray Laser

For those of us whose introduction to PCB making came decades ago and who share fond memories of permanent markers and crêpe paper sticky tape, the array of techniques available to PCB artists of today seem nothing short of magical. Toner transfer and peroxide etchant mixtures might seem run-of-the-mill to many readers, but even they are streets ahead of their predecessors from times past.

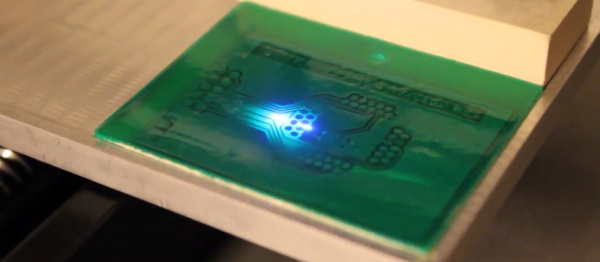
Photographic exposure of  etch-resist coating has traditionally been performed with a UV lamp through a sheet of acetate film, but there is no reason why that should be the only way it can be performed. There have been plenty of projects using lasers or LEDs to draw a PCB design onto the coating as a raster, and a rather nice example from [Terje Io] using a Blu-Ray laser diode is the subject of the video below the break.

The diode is mounted on a gantry with a THK KR33 linear actuator that he tells us was unsuitable for his CNC mill due to backlash. This gives a claimed 1200 dpi resolution, over a 100 mm x 160 mm exposure area. Software is provided in a GitHub repository, taking a PNG image exported through a PDF printer. And since it’s got a UV laser, it can be used in a second pass to process UV-responsive soldermask film. ([Terje] cheats and uses a separate CNC mill to drill out the holes.) The result looks great.

Continue reading “Laser Exposing PCBs With A Blu-Ray Laser”