Dead Washer Lives Again With ATTiny

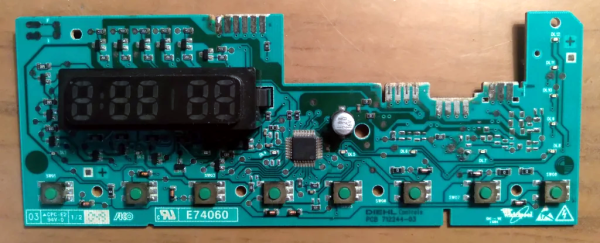
We aren’t saying that appliances are a scam, but we have noticed that when your appliances fail, there’s a good chance it will be some part you can no longer get from the appliance maker. Or in some cases, it’s a garden-variety part that should cost $2, but has been marked up to $40. When [Balakrishnan] had a failure of the timer control board for a Whirlpool washing machine, it was time to reverse engineer the board and replace it with a small microcontroller.

Of course, this kind of hack is one of those that won’t help you unless you need exactly that timer board. However, the process is generally applicable. Luckily, the motherboard chip was documented and the timer control board used a simple ATmega88, so it was easy to see that the devices were communicating via I2C.

Reading the I2C  bus is easy with a logic analyzer, and this revealed the faulty device’s I2C address. The board that failed was only for display, so a simple program that does nothing other than accept I2C data put the washer in working order. Once it was working with an Arduino, an ATTiny45 did the work with a lot less space and cost.

If you don’t want to reverse engineer the washing machine, you could just replace all the controls. That even works if the old washer wasn’t electronic to start.

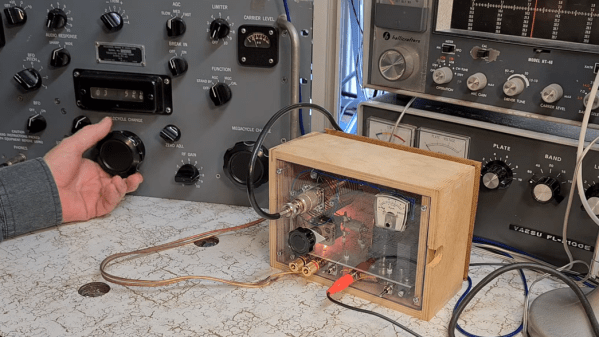
S15351 tube transmitter

Retro And New Tech Combine In This Hybrid Ham Transmitter

We’ve said it before and we’ll say it again: the best part about holding an amateur radio license is that it lets you build and use your own transmitting equipment. Hams have been doing this for more than a century — indeed, it was once the only way to get on the air — using whatever technology was available. But the mix of technologies in this low-power transmitter for the 80-meter band is something you don’t see every day.

As ham [Helge Fykse (LA6NCA)] describes in the video below, the project began when he came into possession of a bonanza of vacuum tubes — 12A6 tetrodes, specifically. The new-old-stock tubes were perfect for an RF power amplifier, but that left the problem of what to use for an oscillator. [Helge] chose to meld the old with the new and used oscillator board that he designed. The board has an ATmega88 microcontroller and an Si5351 oscillator, along with a 3V3 regulator to let the module run on 12 volts. And for a nice retro touch, [Helge] put the board in a 3D printed case that looks like an old-fashioned quartz crystal.

There are some other nice design touches here too. A low-pass filter cleans up the harmonics of the oscillator’s 3.5-MHz square wave output before feeding it to the amplifier, in a nod to proper spectrum hygiene. The primary for the amp’s air-core output transformer is hand-wound, with 3D printed spacers to keep the winding neat and even. The tuning process shown below is interesting, and the transmitter was used to make a solid contact with another ham about 100 km away. And we really liked the look of [Helge]’s shack, stuffed as it is with gear both old and new.

We’ve personally tried the Si5351 for QRP transmitters before, but this blend of the old and new really makes us want to find some tubes and get to playing.

Continue reading “Retro And New Tech Combine In This Hybrid Ham Transmitter”

ESP-01 Bridges The Gap Between IR And WiFi

[Emilio Ficara] dropped us a line recently about his efforts to drag his television and receiver kicking and screaming into the modern era. His TV is old enough that it needs an external tuner, which means it requires two separate remotes to properly channel surf. He wanted to simplify the situation, and figured that while he was at it he might as well make the whole thing controllable over WiFi.

To begin the project, [Emilio] had to capture the IR signals from the two remotes he wanted to emulate. He put together a quick little IR receiver out of parts he had in the junk bin which would connect up to his computer’s microphone port. He then used an open source IR protocol analyzer to capture the codes and decode them into hex values.

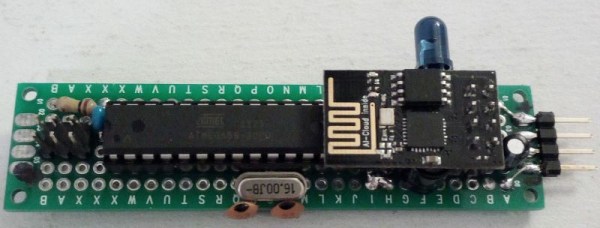
As a proof of concept he came up with a little device that combines an ESP-01 with an ATmega88. The ESP-01 runs a minimal web server that receives hex codes as URL query strings. These hex codes are then interpreted by the ATmega88 and sent out over the IR LED. [Emilio] notes that driving the IR LED directly off of the ATmega pin results in fairly low range of around one meter, but that’s good enough for his purposes. If you want to drive the IR LED with more power, you’ll need to add a transistor to do the switching.

Passing the hex code 0x0408 to turn off the TV

Now that he can decode the signals from his original remotes and transmit them over WiFi via his bridge device, he has all the groundwork he needs to come up with a streamlined home entertainment controller. A native application for his smartphone or perhaps a minimal web interface is the last piece of the puzzle.

This project reminds us of a similar attempt at controlling legacy IR devices from a smartphone via Bluetooth. If you’re looking for more information about wrangling IR signals from your microcontroller, this primer from 2013 is still a great look at the subject.

Aquarium Light Mimics The Outdoor Sky

[OlegZero] has some pet fish in his basement, and decided to work on a little project for them — an aquarium light that mimics the outdoors. He calls it the FishLight project.

His goal was to create a light panel that could imitate the color of the outdoor sky (approximately) using an RGB LED strip. During normal operation, the LEDs cycle through the colors of day, from dusk to dawn using an ATmega88 microcontroller. After his girlfriend saw what it could do, she quickly came up with the idea to add a cityscape to the background to turn it into a piece of attractive decor for their home.

Still fail to see the point of going to this much effort for a few fish? Well, besides it turning into a rather nice artistic light for their basement, the concept can be applied to other animals as well. Like encouraging chickens to produce more eggs by making the days “longer” with artificial light. As it turns out chickens produce less eggs when the days get shorter — an easy fix with something like this!

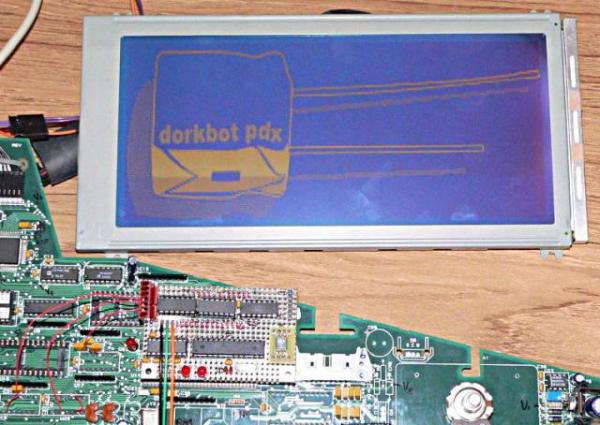
Dorkbot logo on a large LCD display

Reverse Engineering LCD Displays

Over at DorkbotPDX in Portland, a member showed up with a stack of large LCD displays from point of sale terminals. [Paul] took it upon himself to reverse engineer the displays so that they can be recycled in future projects.

The control circuit for this LCD resides on a rather large PCB with quite a variety of components. The board was reduced to three main components: an MSM6255 display controller, a 32k RAM chip which is used as the framebuffer, and a tri-state driver.

With all the unneeded components out of the way, a custom board based around an ATmega88 MCU was added. This board was soldered in to interface with the LCD controller’s bus. This allows data to be written from the 128k flash ROM on the custom board into the frame buffer. Once this is done, the display controller will display the data on the LCD.

Now that data could be written, [Paul] figured out the correct configuration for the display controller. That was the final piece in getting images to show up correctly on the display. If you happen to find some old Micros 2700 POS terminals, [Paul]’s detailed write-up will help you scavenge the displays.

Wireless Temperature Control For A Microbrewery

Wireless Temperature Control

When brewing your own beer, temperature control is important. If the temperature isn’t regulated correctly, the yeast will be killed when it’s added to the wort. It’s best to cool the wort from boiling down to about 25 C quickly before adding yeast.

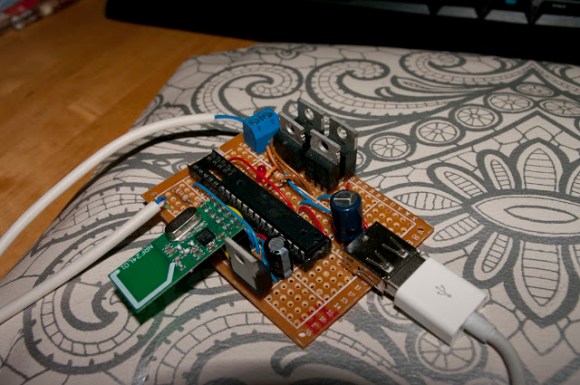
To do this, [Kalle] came up with a wireless temperature controller for his home brewing setup. The device uses a heat exchanger to cool the wort. An ATmega88 connected to a H-bridge controls a valve that regulates flow through the heat exchanger. It reads the current temperature from a LM35 temperature sensor and actuates the valve to bring the wort to a set point.

A neat addition to the build is a wireless radio. The nRF24L01 module provides a wireless link to a computer. There’s an Android application which communicates with the computer, providing monitoring of the temperatures and control over the set point from anywhere [Kalle] can get an internet connection.

Remote Control Command Center Includes RF And IR Functions

all-in-one-remote-relay-includes-RF

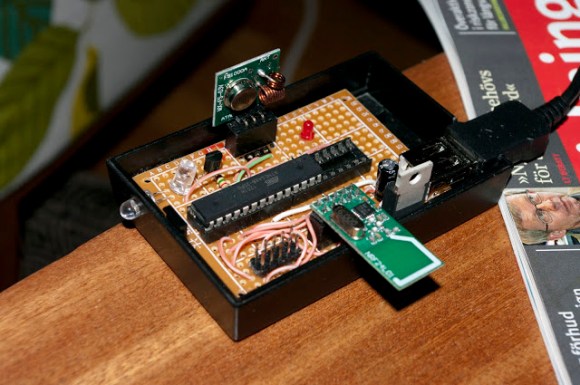
We’re still not quite sure what to call these projects, but as we’ve said before, it’s a pleasure to see what people are doing to use one remote control to rule them all. The project being developed by [Kalle Löfgren] seeks to simplify the remote controlled items in his home by combining all control into one smart phone app. The linchpin of the system is this command center which lets a smart phone send IR and RF commands to various devices (translated).

We’ve seen this done with pretty beefy microcontrollers, like this project that uses a PIC32. But the communications going on between the smartphone and the base station are very simple, as are the remote control commands which are being relayed. So we’re not surprised to find that this setup just uses an ATmega88, IR LED, Bluetooth Module, and RF module. There is no connection to a computer (the USB simply provides power via a cellphone charger). If you’re interested in how [Kalle] sniffed the protocol for each remote he wrote two other articles which you can find in the write-up linked above.