Dexter Robot Arm Embraces New Manufacturing With First Micro-Factory

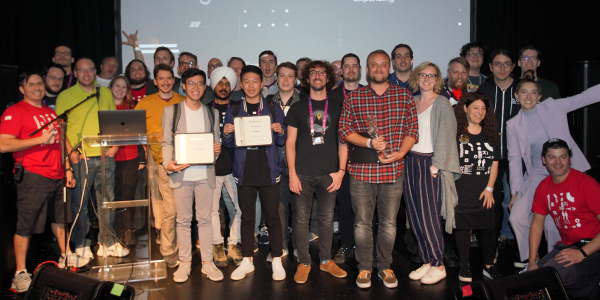
Haddington Dynamics, the company behind the Dexter robot arm that won the 2018 Hackaday Prize, has opened its first microfactory to build robot arms for Australia and Southeast Asia.

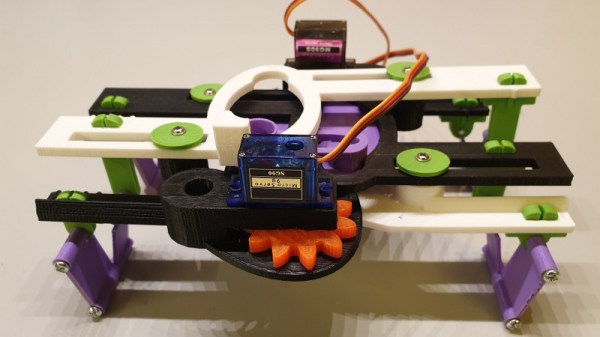
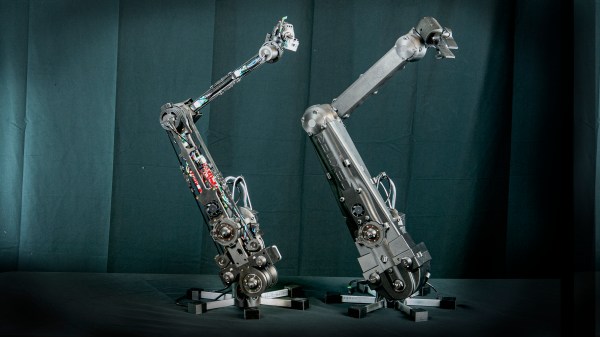
You may remember that the combination of Dexter’s makeup and capabilities are what let it stand out among robotics projects. The fully-articulated robot arm can be motion trained; it records how you move the arm and can play back with high precision rather than needing to be taught with code. The high-precision is thanks to a clever encoder makeup that leverages the power of FPGAs to amplify the granularity of its optical encodes. And it embraces advanced manufacturing to combine 3D printed and glue-up parts with mass produced gears, belts,  bearings, and motors.

It’s a versatile robot arm, for a fraction of the cost of what came before it, with immense potential for customization. And did I mention that it’s open source? Continue reading “Dexter Robot Arm Embraces New Manufacturing With First Micro-Factory”

Landbeest, A Single Servo Walking Robot

Walking robots have a rich history both on and off the storied pages of Hackaday, but if you will pardon the expression, theirs is not a field that’s standing still. It’s always pleasing to see new approaches to old problems, and the Landbeest built by [Dejan Ristic] is a great example.

It’s a four-legged walker with a gait dictated by a cam-and-follower mechanism that allows it to perform the full range of leg movement with only one motor. Each cam can control more than one leg in synchronisation, and in his most recent prototype, there are two such mechanisms that work on opposite corners of a four-legged machine. The legs are arranged in such a way that the two corner-to-corner pairs pivot at their centres in a similar manner to a pair of scissors; allowing a servo to steer the robot as it walks.

The result certainly isn’t as graceful as [Theo Janssen]’s Strandbeest, from which it evidently takes inspiration for its name, but it’s no less capable for it. After the break you can see a video he’s posted which clearly illustrates its operation and demonstrates its ability to traverse obstacles.

The only thing that’s missing are the files and software should you wish to create your own. He’s unapologetic about this, pointing out that he’d prefer to wait until he is satisfied with it before letting it go. Since he’s put a lot of work in so far and shows no sign of stopping, we’re sure he’ll reach that point soon enough.

Continue reading “Landbeest, A Single Servo Walking Robot”

FieldKit Is The Grand Prize Winner Of The 2019 Hackaday Prize

FieldKit, an open-source, modular sensor system for conducting research in harsh environments has just been named the Grand Prize winner of the 2019 Hackaday Prize. The award for claiming the top place and title of “Best Product” in this nine-month global engineering initiative is $125,000. Five other top winners and five honorable mentions were also named during this evening’s Hackaday Prize Ceremony, held during the Hackaday Superconference in Pasadena, California.

This year’s Hackaday Prize focused on product development. From one good idea and a working prototype, entrants were encouraged to iterate on their UX, industrial design, ergonomics, software, and mechanical plans as they worked toward a product that is both manufacturable and meets the needs of the user it has been designed for. Out of twenty finalists, the top eleven are covered below. Over $200,000 in cash prizes have been distributed as part of this year’s initiative where thousands of hardware hackers, makers, and artists compete to build a better future. Continue reading “FieldKit Is The Grand Prize Winner Of The 2019 Hackaday Prize”

Build Your Own Plasma Ball

The simple plasma ball – it graces science museums and classrooms all around the world. It shares a place with the Van de Graaf generator, with the convenient addition of spectacular plasma rays that grace its spherical surface. High voltage, aesthetically pleasing, mad science tropes – what would make a better DIY project?

For some background, plasma is the fourth state of matter, often created by heating a neutral gas or ionizing the gas in a strong electromagnetic field. The availability of free electrons allows plasma to conduct electricity and exhibit different properties from ordinary gases. It is also influenced by magnetic fields in this state and can often be found in electric arcs.

[Discrete Electronics Guy] built a plasma bulb using the casing from an old filament bulb and an ignition coil connected to a high voltage power supply. The power supply is based on the 555 timer IC. It uses a step-up transformer (the ignition coil) driven by a square wave oscillator circuit at a high frequency working as AC voltage. The square wave signal boosts the current into the power transistor, increasing its power.

The plasma is produced inside the bulb, which contains inactive noble gases. When touching the surface of the bulb, the electric arc flows to the point of contact. The glass medium protects the skin from burning, but the transparency allows the plasma to be seen. Pretty cool!

Continue reading “Build Your Own Plasma Ball”

Light Emitting Logic Gates Built From Scratch

What’s the weirdest computer you can think of? This one’s weirder.

[Dr. Cockroach] figured out a way to create an inverting NOT gate from just one LED and two resistors (one being a photo-resistor). The Dr. has since built AND, NAND, OR, NOR, XOR and XNOR gates, as well as a buffer, incorporating light into every logic gate.

Traditional inverters – NOT gates – are already made with diodes (typically not light-emitting), resistors (typically not light-dependent), and bipolar transistors. The challenge was to reduce the number of transistors. The schematic from the very first test shows the slight modifications [Dr. Cockroach] made to incorporate light into the logic gate using a 910 Ohm, output LED, and an LED and LDR in parallel.

The output is initially 4.5V for logic 1 and 1.5V for logic 0. Adding two 1N914 diodes and an AND gate ahead of the inverter create a two-input NAND gate. With the two diodes reversed and a 910 Ohm resistor removed, a NOR gate is created.

The next step was to build a S-R latch using the NAND gates and inverters, which holds some basic memory. From there, with some size reductions, a Master-Slave J-K Flip Flop, similarly using NAND gates and inverters, can be built. The current state of the project is a working sequencer and counter. You can even see a smooth sine wave propagating through the LED chaser, which is typically built with ICs or transistors but in this case is built simply with LEDs, LDRs, resistors, and capacitors.

The upcoming plan is to use the gates to build a processor that only uses diodes, resistors, and capacitors. While it’s probably not going to be nearly as fast as any processors we have today, it should be interesting (and educational!) to be able to visually track the flow of data from one logic gate over to the next. Continue reading “Light Emitting Logic Gates Built From Scratch”

Daisy Chained Seven Segment Art Display


This seven segment art display makes use of a 81 seven segment red common cathode LED displays. The LEDs are arranged onto 100x100mm boards that each contain an Arduino Nano and 9 seven segment displays, daisy chained through three-pin headers located on the sides of the boards. The pins (power, ground, and serial) provide the signals necessary for propagating a program across each of the connected boards.

The first board – with two Arduino Nanos – sends instructions for which digits to light and drives the display, sending the instructions over to the next board on the chain.

In a multiplexed arrangement, a single Arduino Nano is able to drive up to 12 seven segment displays, but only 9 needed to be driven for the program, keeping D13’s built in LED and the serial pins free. Since no resistors are featured on the boards, current limiting is done through software. This was inspired by the Bubble LED displays on the Sinclair Scientific Calculator, and was done in order to achieve a greater brightness by controlling the current through the duty cycle.

The time between digits lighting up is 2ms, giving them some time to cool down. The animations in the demos featured falling and incrementing digits, as well as a random number generator using a linear feedback shift register.

Continue reading “Daisy Chained Seven Segment Art Display”

A DIY Retrocomputer Programmed In Pure Rust

Can you generate VGA and handle a PS/2 keyboard with a Cortex-M4 in Rust? That’s precisely what [theJPster] wanted to find out with Monotron, a 1980s style home computer programmed in pure Rust.

In order to run embedded Rust without a working operating system, some tools are necessary: an LLVM back-end for generating machine code, a target file for specifying memory sizes and other configs, and a pre-compiled libcore as a substitute for a compiler when running an operating system. Rust takes the place of C running on top of the board support package (BSP) and hardware abstraction layer (HAL), and peripheral access crates (PACs) that specify the hardware and allow the code to be portable across different chips.

The implementation generates a 800 x 600 VGA video signal at 60 Hz, displays text on a 48 character by 36 line display, displays color graphics using color lookup (stored in flash memory), and runs applications that take less than 24 KiB for all data. Monotron also generates 8-bit audio with PWM and sports a synthesizer that uses a three-channel wavetable allowing it to make sounds with square waves, sine waves, sawtooth waves, and create white noise.

So far, the Monotron has been able to work with an Atari joystick, a PS/2 keyboard, and has outputs to VGA, MIDI, SD card, and audio. Next up for the Monotron: writing a programming language (tentatively named Monotronian), adding support for Sega Megadrive pads, displaying sprites, and many more exciting developments.

Continue reading “A DIY Retrocomputer Programmed In Pure Rust”