A closeup picture showing the jagged edge of the cut

Debugging Laser Cut Wobble, The Scientific Way

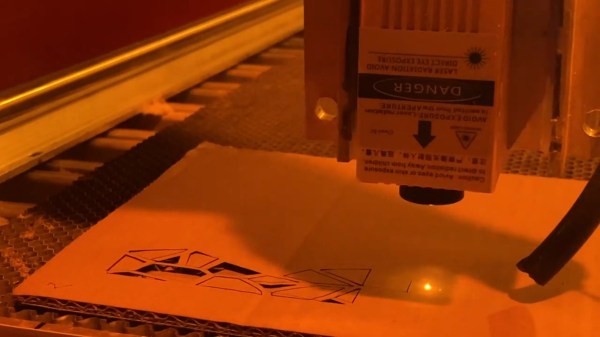
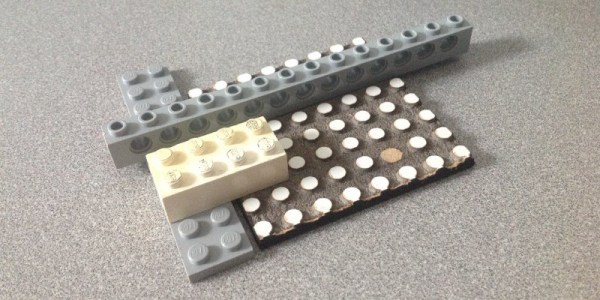
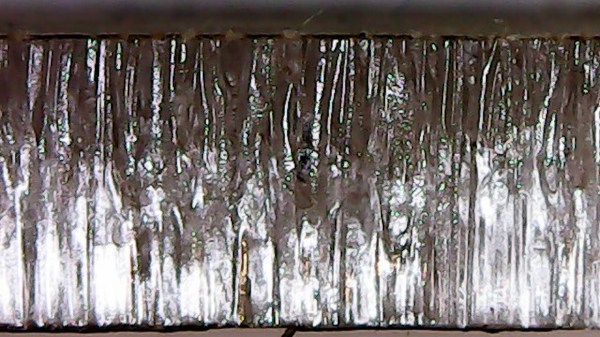
[PWalsh] was using his lasercutter to cut acrylic, expecting the cuts to have a pleasantly smooth edge. Alas, the edges turned out to be wobbly and sandpaper-like, not smooth in the slightnest. Bummer! Internet suggested a stepper motor swap, but not much in the way of insights – and that would’ve been a royal pain for sure. How would you approach debugging such a problem? Well, [PWalsh] didn’t want to swap crucial components willy-nilly, going the scientific way instead, and breaks it down for us.

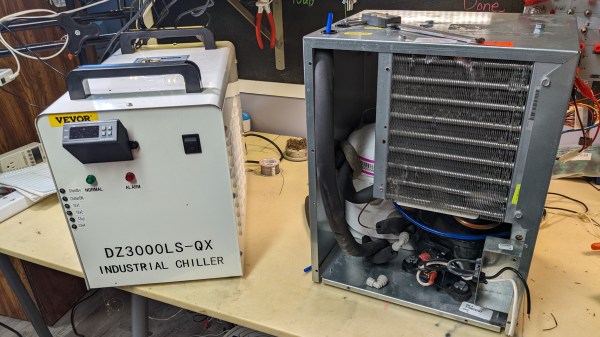
Having compiled an extensive list of possible places to look for a fault in, he started going through fundamental assumptions. Do other lasercutters experience this issue? No, even the cheap ones can cut things properly. Is it water level causing intermittent cooling? Nope, not that. Is it the stepping settings? Tweaked, not that. Laser pulsing frequency? No dice. Continue reading “Debugging Laser Cut Wobble, The Scientific Way”

Two chillers side-by-side - the fake chiller on the left and the water fountain chiller (lid-less) on the right

Gutting And Upgrading Laser “Chiller” With No Chill

Getting a cheap CO2 laser cutter is great for your workshop needs, and while you might get a weaker-than-declared laser tube, it’s still going to cut whatever you need to be cut. That might not be the case for the cooling equipment you’re getting alongside it, however, as [RealTimeKodi] shows in a post-project blogpost. They bought a CX3000 “chiller” and found out it had no chiller components (Nitter), only equipped with a radiator, a fan, and a pump.

Having your laser tube water be somewhat close to ambient temperature is something you can already achieve with an aquarium pump and a bucket of water — and it isn’t worth paying $100 for. Left with the sunk cost and an unfulfilled need for a proper chiller, [RealTimeKodi] started looking for paths to take – first one was using TEC elements. The upgrade process was fun, but the result was subpar, as the elements gobbled power with hardly any useful output to show for it.

[RealTimeKodi] didn’t give up, and eventually found an old water fountain chiller with chiller-like components inside, sold for $200. They could’ve used the water fountain as-is, but a few design issues and thirst for adventure got in the way, indisputably forcing them to stuff the fountain’s guts into the CX3000’s case.

Buying a laser cutter can sometimes feel like buying a 3D printer a decade ago — you get a K40, learn to use it, add the missing safety features, mod in autofocus, upgrade the control board, expand the work surface… That said, our experience shows that you don’t need any of those if A4-sized 3 mm wood cutting suit you, but a proper chiller is still worth its weight in gold-plated acrylic.

Continue reading “Gutting And Upgrading Laser “Chiller” With No Chill”

The laser module shown cutting shapes out of a piece of cardboard that's lying on the CNC's work surface

Giant CNC Partners With Powerful Laser Diode

[Jeshua Lacock] from 3DTOPO owns a large-format CNC (4’x8′, or 1.2×2.4 m), that he strongly feels is lacking laser-cutting capabilities. The frame is there, and a 150 W CO2 laser tube has been sitting in a box for ages – what else could you need? Sadly, at such a scale, aligning the mirrors is a tough and finicky job – and misalignment can be literally blinding. After reading tales about cutters of such size going out of alignment when someone as much as walked nearby, he dropped the idea – and equipped the CNC head with a high-power laser diode module instead. Having done mirror adjustment on a few CO2 tube-equipped lasers, we can see where he’s coming from.

Typically, the laser modules you see bolted onto CNC heads are firmly under three watts, which is usually only enough for engraving. With a module that provides 5 watts of optical power, [Jeshua] can cut cardboard and thin plywood as well he tells us even 10 W optical power modules are available, just that he didn’t go for one. We reckon that 20 W effective power diodes are not that far into our future, which is getting very close to the potential of the blue box “40 W but actually 35 W but actually way less” K40 laser cutters we cherish. [Jeshua]’s cutter is not breaking speed limits, but it’s built on what’s already there, and the diode is comparatively inexpensive. Equipped with a small honeycomb surface and what seems to be air assist, it’s shown in the video cutting an ornamental piece out of cardboard!

We hackers have been equipping CNCs with laser diodes for a while, but on a way smaller scale and with less powerful diodes – this is definitely a step up! As a hacker, you should have at least some laser cutting options at your disposal, and this overview of CO2 cutters and their availability can get you started. We’ve also given you detailed breakdowns about different sides of laser cutting, be it the must-have of safety, or the nice-to-have of air assist.

Continue reading “Giant CNC Partners With Powerful Laser Diode”

Lasercut Gears – A Learning Experience

Lasercutters are fantastic tools: they’re highly useful for making flat things, or even flat things that you later bend! This makes them particularly well suited for making gears out of flat stock. [sharvfish] needed to get his hands dirty with producing some gears for his automaton, and decided to share what he learned in the process.

The gears in question are cut out of MDF board, which is readily usable on all but the feeblest lasercutters you’ll find in the average makerspace. The first problem faced was when producing gears with low tooth counts – depending on the exact geometry used, teeth with lower counts can tend to jam easily. For [sharvfish]’s gears, 6 teeth seems to be just a touch too small to work well. Other issues cropped up around the kerf of the cuts affecting the gear mesh and the use of pins to improve the coupling of the gears to the shaft, which [sharvfish] expands upon in the video. There’s also a cheeky cephalopod cameo, too.

It’s always interesting to see the unique challenges faced in the undertaking of a project; we could see six more lasercut projects this week, and we’d likely see six unique problems the builders faced as well. It’s a great insight into the build process and it’s great when makers share their journey as well as the finished product. Video after the break.

Wondering what lasercut gears can do for you? Check out this build that rotates an entire television.

Continue reading “Lasercut Gears – A Learning Experience”

Laser Cut LEGO In MDF

It’s hard not to be a fan of LEGO. The humble plastic bricks from Denmark enabled many a young engineer to bring their architectural and mechanical fantasies to life. But one limitation was that you were stuck using the bricks LEGO designed. Thankfully, [John Sokol] has come up with a way to laser cut his own LEGO-compatible bricks, and provided the tools so you can do the same.

After hacking an OpenSCAD script to generate just the top pins of the block, [John] exported an SVG into Inkscape so that he couldĀ scale the pins properly before exporting a final PNG for the lasercutter. Using RDWorks, [John] was able to find an engraving setting that worked well with dry-erase whiteboard MDF — an unusual material for a brick, but functional nonetheless. The key here is that the engraving setting takes away just enough material to create a raised pin on the part, without cutting all the way through the MDF or burning the surface.

Despite some damage when removing the work pieceĀ from the laser cutter, the part mates up well with the official LEGO brand parts. We’d be interested to see how the MDF cut parts hold up over time compared to real LEGO bricks made in ABS, which seem to last forever.

This isn’t the first make-your-own-LEGO hack we’ve seen – maybe you’d like to 3D print your own bricks on a printer made of LEGO?

Laser Tattoo


We’re amazed we didn’t stumble across this ill advised burnination sooner. Earlier in the week [tetranitrate], of LED chess set fame, posted his experiences using a laser cutter to scarify his own skin. It’s very painful, not to mention the discomfort of smelling your own burning flesh. He’s using an Epilog with a magnet over the safety switch. To get the positioning right, a layer of painters tape was put down and then etched. For a less painful version, you could try Bre’s fingernail calendar from last Fall. Video of multiple tattoos embedded after the break.

Continue reading “Laser Tattoo”