Tiny Spheres Hiding In Your Display

Liquid crystal and Organic LED displays have revolutionized portable computing. They’re also made of glass. Which presents a problem: How do we get electrical signals from fiberglass circuit boards to the glass displays? The answer is double-sided adhesive tape. But we’re not talking about packing tape here. As [Breakingtaps] explains,  this tape has a trick up its sleeve.

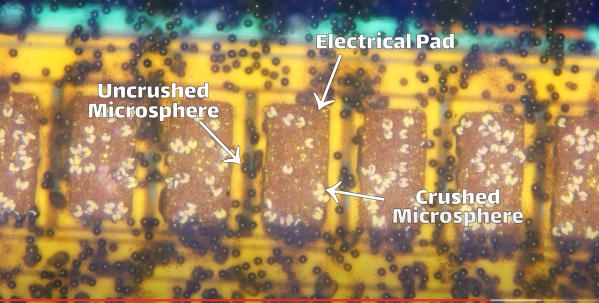
The magic is that the tape conducts only in the vertical plane. Even more so, any two conducting sections of the tape are insulated from each other. How does it do that? Magic beans balls, of course!

The tape and adhesive are insulators. Embedded in the adhesive are tiny spheres. The spheres are made of plastic and coated with metal. When the tape (also known as ACF or Anisotropic Conductive Film) is pressed between a PCB with conductors and glass, a few spheres are squished down between the layers. Electrical signals pass between the squished spheres, allowing an image to be displayed on the glass screen. The final step uses heat and pressure to bond the adhesive and cure it. You can also get the material in paste form if you don’t like the tape.

The system works so well that it can be used for connections from a silicon chip directly to the glass.  This is how many display controllers are mounted right to the module — definitely an improvement on the rubber strips used on LCDs of the past.

Continue reading “Tiny Spheres Hiding In Your Display”

A Look At Sega’s 8-Bit 3D Glasses

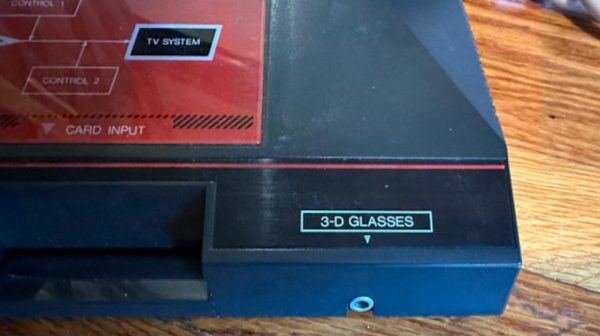
From around 2012 onwards, there was a 3D viewing and VR renaissance in the entertainment industry. That hardware has grown in popularity, even if it’s not yet mainstream. However, 3D tech goes back much further, as [Nicole] shows us with a look at Sega’s ancient 8-bit 3D glasses [via Adafruit].

[Nicole]’s pair of Sega shutter glasses are battered and bruised, but she notes more modern versions are available using the same basic idea. The technology is based on liquid-crystal shutters, one for each eye. By showing the left and right eyes different images, it’s possible to create a 3D-vision effect even with very limited display hardware.

The glasses can be plugged directly into a Japanese Sega Master System, which hails from the mid-1980s. It sends out AC signals to trigger the liquid-crystal shutters via a humble 3.5mm TRS jack. Games like Space Harrier 3D, which were written to use the glasses, effectively run at a half-speed refresh rate. This is because of the 60 Hz NTSC or 50 Hz PAL screen refresh rate is split in half to serve each eye.  Unfortunately, though, the glasses don’t work on modern LCD screens, as their inherent display lag throws off the timing of the pulses the console sends to the glasses.

It’s a neat look at an ancient bit of display tech that had a small resurgence with 3DTVs in the 2010s. By and large, it seems like humans just aren’t that into 3D, at least beneath a full-VR experience. Meanwhile, if you’re wondering what 8-bit 3D looked like, we’ve got a 3D video (!) after the break.

Continue reading “A Look At Sega’s 8-Bit 3D Glasses”

Spice Up The Humble 16×2 LCD With Big Digits

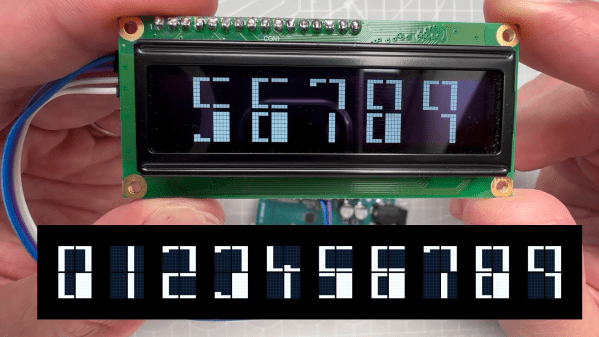
The 16×2 LCD display is a classic in the microcontroller world, and for good reason. Add a couple of wires, download a library, mash out a few lines of code, and your project has a user interface. A utilitarian and somewhat boring UI, though, and one that can be hard to read at a distance. So why not spice it up with these large-type custom fonts?

As [upir] explains, the trick to getting large fonts on a display that’s normally limited to two rows of 16 characters each lies in the eight custom characters the display allows to be added to its preprogrammed character set. These can store carefully crafted patterns that can then be assembled to make reasonable facsimiles of the ten numerals. Each custom pattern forms one-quarter of the finished numeral, which spans what would normally be a two-by-two character matrix on the display. Yes, there’s a one-pixel wide blank space running horizontally and vertically through each big character, but it’s not that distracting.

Composing the custom patterns, and making sure they’re usable across multiple characters, is the real hack here, and [upir] put a lot of work into that. He started out in Illustrator, but quickly switched to a spreadsheet because it allowed him to easily generate the correct binary numbers to pass to the display for each pattern. It seems to have really let his creative juices flow, too — he came up with 24 different fonts! Our favorite is the one he calls “Tron,” which looks a bit like the magnetic character recognition font on the bottom of bank checks. Everyone remembers checks, right?

Hats off to [upir] for a creative and fun way to spice up the humble 16×2 display. We’d love to see someone pick this up and try a complete alphanumeric character set, although that might be a tall order with only eight custom characters to work with. Then again, if Bad Apple on a 16×2 is possible…

Continue reading “Spice Up The Humble 16×2 LCD With Big Digits”

A solar-powered device with a small LCD screen

Low Power Challenge: LCD Solar Creatures Live On Sunlight, Sleep At Night

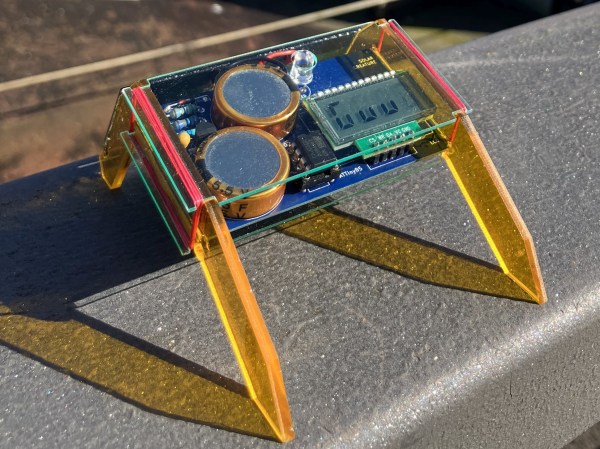
With all those e-paper based projects doing the rounds these days, including in our Low Power Challenge, you’d almost forget that monochrome LCDs were the original ultra-low-power display. Without them, we wouldn’t have had watches, calculators and handheld games operating off button cell batteries or tiny solar panels back in the ’80s and ’90s. [Gabor] decided to build a set of gadgets with a 1990s LCD aesthetic, called LCD Solar Creatures. These cute little beasts live on nothing but solar power and provide some amusing animations on a classic seven-segment LCD screen.

The Creatures’ activity depends entirely on the amount of power that’s available to them. If their supercapacitors dip below 3.3 V, their micros enter a deep sleep state and do nothing except briefly flash an LED every now and then as a sign of life. When light hits the solar panel, the supercaps are charged up and the Creatures come to life and display a few basic stats. Once the caps hit 4.1 V, they really start their day and run a few programs, including a Game of Life-style simulation and an animation of Euclidean rhythms. Continue reading “Low Power Challenge: LCD Solar Creatures Live On Sunlight, Sleep At Night”

Reliving A Bitmapped Past With A Veritable Hoard Of Bitmap Fonts

The fonts seen with old computer systems such as those from Apple and Commodore, as well as Microsoft Windows 3.1 and older, form an integral part of our interaction with these systems. These days such bitmap fonts are a rarity, with scalable vector-based fonts having taken their place on modern-day systems. This unfortunately also means that these fonts are at major risk of being lost to the sands of time. This is where [Rob Hagemans] seeks to maintain an archive of such bitmap fonts, ranging from Acorn to MSX to Windows.

Many of these fonts are extracted from character ROMs, with a preview of some of these fonts available via the Monobit viewer. The fonts themselves are made available in YAFF format, which is a text-based format that can be converted back to a binary format using the Monobit tool. If you ever wanted to use one of these old bitmap fonts in a project, this would seem to offer a treasure trove of options. The hoard of bitmap fonts might be the perfect fit for your next graphic LCD project.

(Via [SuperIlu] on Mastodon)

Reverse Engineering Saves Weller With A Wonky LCD From The Trash Pile

There’s nothing more satisfying than finding a broken piece of gear in the trash and bringing it back to life. Satisfying, but also potentially more time-consuming — someone tossed it for a reason, after all. Figuring out what that reason is and finding a way to back it better is where the fun — and the peril — are.

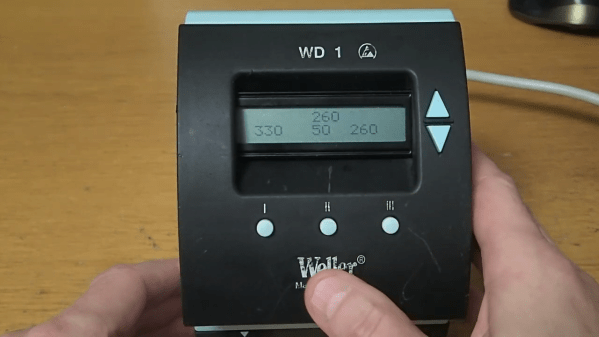
Luckily, some pieces of equipment have a relatively short list of well-known failure modes, a fact that [Lauri Pirttiaho] relied on for this fix of an old Weller WD1 soldering station. The unit, sporting the familiar light blue Weller livery and more than a few scratches and dings, had an LCD that was DOA. Typically it’s the driver that’s the problem here, but [Lauri]’s diagnosis revealed it was the LCD module itself that was bad.

With OEM replacements being basically unobtainium at this point, the fix was to intercept the data heading from the driver to the old LCD and send it to a new, easily sourced 16×2 character LCD display. This began with an inspection of the display controller’s datasheet, and a bit of probing of the old display to find out which segments and backplanes map to which pins. A little bit of case modding allowed the new display to fit, the old controller chip was removed, and a PIC16 went into its place, in a tidy nest of Kapton tape and bodge wires. The PIC does the job of translating the original display, which had a fair number of custom icons and symbols, into sensible text-based equivalents and sending them to the 16×2 via I2C. The video below shows the hack in action; it honestly looks like it could have come from the factory like that.

The nice thing here is that [Lauri]’s fix applies to a whole range of Weller stations, so if you find one in the trash, you might be able to resuscitate it. Failing that, you could always roll your own Weller from (more-or-less) scratch.

Continue reading “Reverse Engineering Saves Weller With A Wonky LCD From The Trash Pile”

What’s Inside A Super-Cheap Projector? Not A Lot!

[Raymond Ma] has a penchant for browsing Aliexpress and purchasing curious pieces of hardware that are as high on promises as they are low on cost. This is a process he aptly sums up with his opening line of “I should have known better, but…” Luckily, these devices all get torn down and analyzed so we can each enjoy and share a little slice of disappointment.

One such item is the $30 USD YT200 mini projector, which at 320×180 is almost as low on pixels as it is on cost. Still, [Raymond] looks inside to find out if there is perhaps more hacking potential than there is image resolution.

The YT200 lacks any kind of normal video input, and the anemic 15 lumen output is brazenly branded as a feature to protect children’s eyes from excessive brightness.

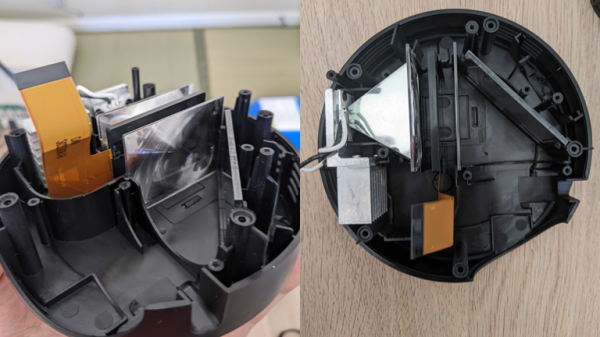
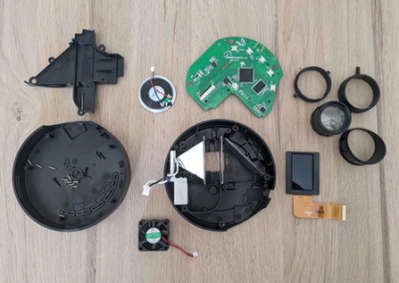
Light from the single LED is collimated with some Fresnel lenses. That light passes through an LCD panel, and from there the image bounces off a mirror and through a focusing lens housed in a spiral guide. Focal adjustments are made with a small lever, and the whole assembly provides just enough friction to prevent the lens from moving out of focus on its own.

The device actually does work fairly well for what it is: a way to play a range of different media types off a connected USB storage device. As long as one is in a dark room, anyway.

[Raymond] hopes to find some alternate use for the device. Might we suggest projecting into a frosted glass globe to create a sort of spherical display? A spooky eye animation on a USB stick might pair well with that.