SuperSlicer Reviewed: Another 3DP Slicer?

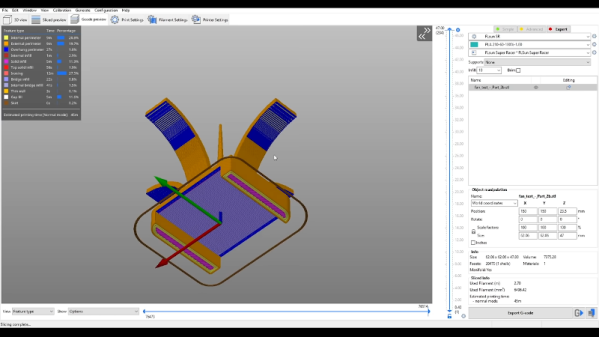
When you think of slicers for FDM 3D printing — especially free slicers — you probably think of Cura, Slic3r, or PrusaSlicer. There are fans of MatterControl and many people pay for Simplify3D. However, there are quite a few other slicers out there including the one [TeachingTech] has switched to: SuperSlicer. You can see his video review, below.

Of course, just as PrusaSlicer is a fork of Slic3r, SuperSlicer is a fork of the Prusa software. According to the project’s home page, the slicer does everything Prusa does but adds custom calibration tests, ironing, better thin wall support, and several other features related to infill and top surfaces. The software runs on Windows, Linux, or Mac.

Continue reading “SuperSlicer Reviewed: Another 3DP Slicer?”

Hackaday Links Column Banner

Hackaday Links: August 25, 2019

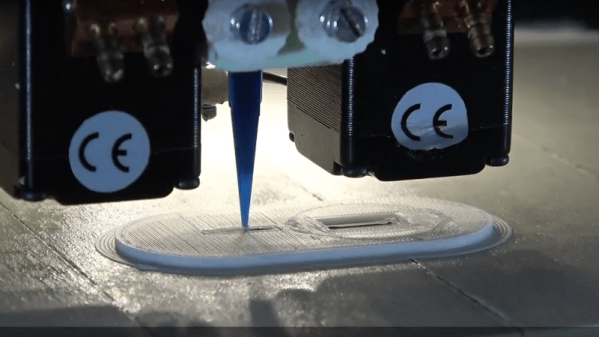
Doesn’t the Z-axis on 3D-printers seem a little – underused? I mean, all it does is creep up a fraction of a millimeter as the printer works through each slice. It would be nice if it could work with the other two axes and actually do something interesting. Which is exactly what’s happening in the nonplanar 3D-printing methods being explored at the University of Hamburg. Printing proceeds normally up until the end, when some modifications to Slic3r allow smooth toolpaths to fill in the stairsteps and produce a smooth(er) finish. It obviously won’t work for all prints or printers, but it’s nice to see the Z-axis finally pulling its weight.

If you want to know how something breaks, best to talk to someone who looks inside broken stuff for a living. [Roger Cicala] from LensRentals.com spends a lot of time doing just that, and he has come to some interesting conclusions about how electronics gear breaks. For his money, the prime culprit in camera and lens breakdowns is side-mounted buttons and jacks. The reason why is obvious once you think about it: components mounted perpendicular to the force needed to operate them are subject to a torque. That’s a problem when the only thing holding the component to the board is a few SMD solder pads. He covers some other interesting failure modes, too, and the whole article is worth a read to learn how not to design a robust product.

In the seemingly neverending quest to build the world’s worst Bitcoin mining rig, behold the 8BitCoin. It uses the 6502 processor in an Apple ][ to perform the necessary hashes, and it took a bit of doing to port the 32-bit SHA256 routines to an 8-bit platform. But therein lies the hack. But what about performance? Something something heat death of the universe…

Contributing Editor [Tom Nardi] dropped a tip about a new online magazine for people like us. Dubbed Paged Out!, the online quarterly ‘zine is a collection of contributed stories from hackers, programmers, retrocomputing buffs, and pretty much anyone with something to say. Each article is one page and is formatted however the author wants to, which leads to some interesting layouts. You can check out the current issue here; they’re still looking for a bunch of articles for the next issue, so maybe consider writing up something for them – after you put it on Hackaday.io, of course.

Tipline stalwart [Qes] let us know about an interesting development in semiconductor manufacturing. Rather than concentrating on making transistors smaller, a team at Tufts University is making transistors from threads. Not threads of silicon, or quantum threads, or threads as a metaphor for something small and high-tech. Actual threads, like for sewing. Of course, there’s plenty more involved, like carbon nanotubes — hey, it was either that or graphene, right? — gold wires, and something called an ionogel that holds the whole thing together in a blob of electrolyte. The idea is to remove all rigid components and make truly flexible circuits. The possibilities for wearable sensors could be endless.

And finally, here’s a neat design for an ergonomic utility knife. It’s from our friend [Eric Strebel], an industrial designer who has been teaching us all a lot about his field through his YouTube channel. This knife is a minimalist affair, designed for those times when you need more than an X-Acto but a full utility knife is prohibitively bulky. [Eric’s] design is a simple 3D-printed clamshell that holds a standard utility knife blade firmly while providing good grip thanks to thoughtfully positioned finger depressions. We always get a kick out of watching [Eric] design little widgets like these; there’s a lot to learn from watching his design process.

Thanks to [JRD] and [mgsouth] for tips.

3D Printering: The Past And Future Of Prusa’s Slicer

If you own a desktop 3D printer, you’re almost certainly familiar with Slic3r. Even if the name doesn’t ring a bell, there’s an excellent chance that a program you’ve used to convert STLs into the G-code your printer can understand was using Slic3r behind the scenes in some capacity. While there have been the occasional challengers, Slic3r has remained one of the most widely used open source slicers for the better part of a decade. While some might argue that proprietary slicers have pulled ahead in some respects, it’s hard to beat free.

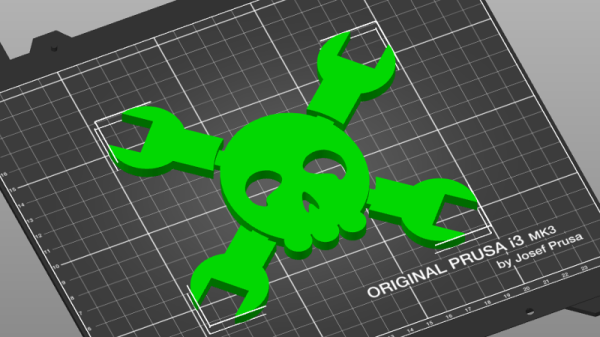
So when Josef Prusa announced his team’s fork of Slic3r back in 2016, it wasn’t exactly a shock. The company wanted to offer a slicer optimized for their line of 3D printers, and being big proponents of open source, it made sense they would lean heavily on what was already available in the community. The result was the aptly named “Slic3r Prusa Edition”, or as it came to be known, Slic3r PE.

Ostensibly the fork enabled Prusa to fine tune print parameters for their particular machines and implement support for products such as their Multi-Material Upgrade, but it didn’t take long for Prusa’s developers to start fixing and improving core Slic3r functionality. As both projects were released under the GNU Affero General Public License v3.0, any and all of these improvements could be backported to the original Slic3r; but doing so would take considerable time and effort, something that’s always in short supply with community developed projects.

Since Slic3r PE still produced standard G-code that any 3D printer could use, soon people started using it with their non-Prusa printers simply because it had more features. But this served only to further blur the line between the two projects, especially for new users. When issues arose, it could be hard to determine who should take responsibility for it. All the while, the gap between the two projects continued to widen.

With a new release on the horizon that promised to bring massive changes to Slic3r PE, Josef Prusa decided things had reached a tipping point. In a recent blog post, he announced that as of version 2.0, their slicer would henceforth be known as PrusaSlicer. Let’s take a look at this new slicer, and find out what it took to finally separate these two projects.

Continue reading “3D Printering: The Past And Future Of Prusa’s Slicer”

Pathio: New 3D Slicer From E3D

Having a great word processor won’t actually help you write the next bestselling novel. It might make it easier, but if you have a great novel in you, you could probably write it on paper towels with a crayon if you had to. A great 3D printer isn’t all you need to make great 3D prints. A lot depends on the model you start with and that software known as a slicer. You have several choices, and now you have one more: PathIO, a slicer sponsored by E3D, is out in beta. You can see a video about its features below.

The software has a few rough edges as you might expect from a beta. The slicer doesn’t feed Gcode to a printer directly, although Octoprint integration is forthcoming. Developers say they are focusing on the slicing engine which is totally new. According to their website, conventional slicers immediately cut a model into 2D slices and then decide how to realize each slice with respect to the shell and infill. Pathio works in 3D space and claims this has benefits for producing correct wall thickness and an increase in self-supporting geometries.

Continue reading “Pathio: New 3D Slicer From E3D”

This 3D Printed LED Softbox Really Shines

Generally speaking, objects made on desktop 3D printers are pretty small. This is of course no surprise, as filament based printers are fairly slow and most don’t have very large beds to begin with. Most people don’t want to wait days for their project to complete, so they use 3D printed parts where it makes sense and supplement them with more traditional components such as aluminum extrusion wherever possible. But not always…

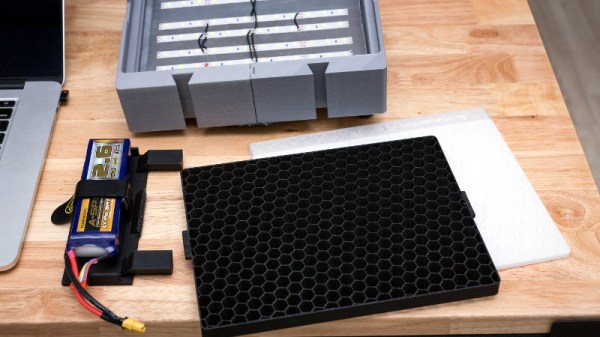
This 3D printed photography softbox created by [Nicholas Sherlock] doesn’t take the easy way out for anything. With the exception of the LEDs and the electronics to drive them, everything in the design has been printed on his Prusa i3. It wasn’t the easiest or fastest way to do it, but it’s hard to argue with the end result. Perhaps even more impressive than the final product is what it took to get there: he actually had to develop a completely new style of part infill he’s calling “Scattered Rectilinear” to pull it off.

Overall the design of the light itself isn’t that complex, ultimately it’s just a box with some LEDs mounted at the back and a pretty simple circuit to control their intensity. The critics will say he could have just used a cardboard box, or maybe wood if he wanted something a little bit stronger. But the point of this project was never the box itself, or the LEDs inside it. It’s all about the diffuser.

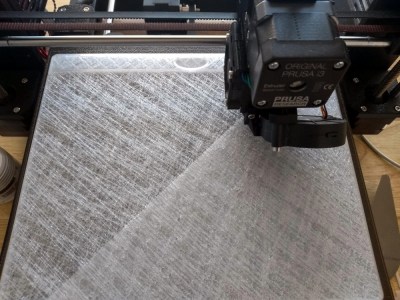
[Nicholas] forked Prusa’s version of Slic3r to add in his “Scattered Rectilinear” infill pattern, which is specifically designed to avoid the standard “ribs” inside of a 3D printed object. This is accomplished with randomized straight infill passes, rather than the traditionally overlapped ones. The inside of the print looks very reminiscent of fiberglass mat, which is perhaps the best way to conceptualize its construction. In terms of the final part strength, this infill is abysmal. But on the plus side, the light from the LEDs passing through it emerges with a soft pleasing look that completely obscures the individual points of light.

Anyone with a big enough 3D printer can run off their own copy of his light, as [Nicholas] has released not only his forked version of Slic3r but all of the STL files for the individual components. He’s also put together an exceptionally well documented Thingiverse page that has instructions and detailed build photos, something that’s unfortunately very rare for that platform.

If you’re in the market for a DIY softbox and don’t have a 3D printer handy, fear not. We’ve covered a few that you can build with more traditional methods, as well as several tips and tricks which you can use to get the most out of your photos and videos.

Hybrid 3D-Printer Creates Complete Circuits, Case And All

The cool kids these days all seem to think we’re on the verge of an AI apocalypse, at least judging by all the virtual ink expended on various theories. But our putative AI overlords will have a hard time taking over the world without being able to build robotic legions to impose their will. That’s why this advance in 3D printing that can incorporate electronic circuits may be a little terrifying, at least to some.

The basic idea that [Florens Wasserfall] and colleagues at the University of Hamburg have come up with is a 3D-printer with a few special modifications. One is a separate extruder than squirts a conductive silver-polymer ink, the other is a simple vacuum tip on the printer extruder for pick and place operations. The bed of the printer also has a tray for storing SMD parts and cameras for the pick-and-place to locate parts and orient them before placing them into the uncured conductive ink traces.

The key to making the hardware work together though is a toolchain that allows circuits to be integrated into the print. It starts with a schematic in Eagle, which joins with the CAD model of the part to be printed in a modified version of Slic3r, the open-source slicing package. Locations for SMD components are defined, traces are routed, and the hybrid printer builds the whole assembly at once. The video below shows it in action, and we’ve got to say it’s pretty slick.

Sure, it’s all academic for now, with simple blinky light circuits and the like. But team this up with something like these PCB motors, and you’ve got the makings of a robotic nightmare. Or not.

Continue reading “Hybrid 3D-Printer Creates Complete Circuits, Case And All”

PrusaControl: The Beginner’s Slicer

There are two main applications for managing 3D prints and G-Code generation. Cura is a fantastic application that is seeing a lot of development from the heavy hitters in the industry. Initially developed by Ultimaker,  Lulzbot has their own edition of Cura, It’s the default software packaged with thousands of different printers. Slic3r, as well, has seen a lot of development over the years and some interesting hacks. Do you want to print non-planar surfaces? Slic3r can do that. Slic3r and Cura are two sides of the CAM part of the 3D printing coin, although Cura is decidedly the prettier side.

The ability to combine the extensibility of Slic3r with the user interface of Cura has been on our wish list for a while now. It’s finally time. [Josef Prusa] has released PrusaControl, a 3D printing CAM solution that combines the best of Slic3r into a fantastic, great looking package. What are the benefits? What’s it like? Check that out below.

Continue reading “PrusaControl: The Beginner’s Slicer”