Jailbreak Your Apple Products

It’s finally here, after being declared completely legal to jailbreak your iPhone, JailbreakMe 2.0 is released.

Now, any and all iDevices can be jailbroken by simply visiting the URL above; however, before you start your devious adventure in the land of apps not approved by big brother Apple, there are a few issues.

The webpage is being slammed at the moment so you’ll have to wait. There is a chance the jailbreak will not work, and you could brick your phone. MMS and Facetime are having complications after jailbreaking. And finally, carrier unlock still needs to be done with ultrasn0w.

But beyond those small stepping stones, jailbreaking is just a touch away.

Doorbell Combo Lock Can Open Your Garage Door

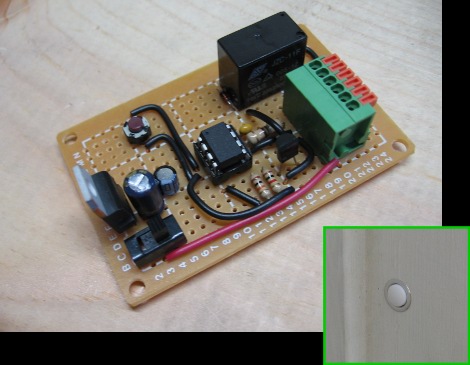
Sometimes I get enough away from writing about other people’s accomplishments long enough to actually do my own hacks. Most recently I developed a combination lock that opens the garage door. The idea isn’t original, it is based on [Alan Parekh’s] button code project, but I did develop my own hardware and software. A four digit code is entered by pressing the button a number of times for the first digit, and waiting for a flash of an LED inside before moving on to the next digit. If the correct code is entered the door opens.

My version centers around an ATtiny13. I originally downloaded [Alan’s] code in hopes that I could port the PIC firmware over pretty easily. Unfortunately it was written in BASIC so I just took what I knew about the interface and wrote my own program. I developed on an ATmega168 so that I would have no trouble running out of programming space, and was able to optimize my code down to 964 bytes to fit on the tiny13.

The hardware is quite simple. I purchased a lighted doorbell from Home Depot and swapped out the light bulb for an LED. I choose this because the doorbell mounts in a 5/8″ hole in the trim of the garage door and is easily overlooked. I’m quite happy with the results, and if you want to play around with the idea, you can easily build the circuit on a breadboard and use another LED for the load rather than including a relay. Hit the link at the top of this post for the schematic, code, and build images.

Update: Custom Cellphone Induction Charging

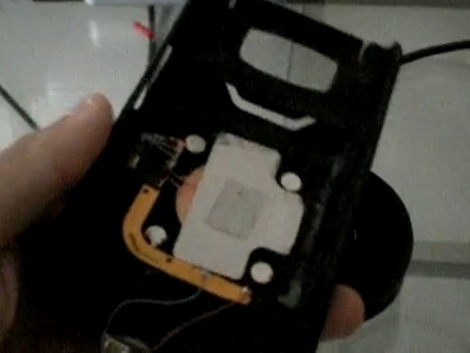
This is a custom back plate with induction charging circuitry that [Derek Hughes] build for his HTC HD2 cellphone. When we checked in with him last week he showed us how to add an inductive charger without voiding the warranty but it wasn’t very pretty because the stock back plate blocked the inductive field and couldn’t be used. The solution he came up with will work with any device if you want to put some time into the build.

He took two different aftermarket cases; one fits his cellphone and the other is a BlackBerry case meant for housing a credit card. After cutting a hole in the back of the cellphone case he epoxied the credit card holder in place, smoothed the seam with Bondo, and repainted. Not only does the charger fit in the credit card case, but there’s still room for a credit card. [Derek] also measured the magnetic fields around the circuitry and found they will not damage the magnetic strip on that American Express Black you’ve been keeping on you. In the video after the break he mentions the last step in finishing this case will be to locate a 90-degree USB plug as the current connector is a bit of an eyesore.

[youtube=http://www.youtube.com/watch?v=DgNOqJBSKmQ]

Hackaday Links: August 1, 2010

PCB Group Orders

[Phil] wrote in to let us know about the DorkbotPDX group orders. The site makes group PCB orders until a cutoff date or the panel is full. You get three copies of your design with no setup fee for just $5/square inch including domestic postage. Not a bad price. We aren’t affiliated with them, but we’re always looking for board production options for hobbyists. BatchPCB is another popular one, and if you need help getting your design ready we’ve got your covered.

Aspire One MAME cabinet

[Tim] built a MAME cabinet using foam board and some USB peripherals. Inside you’ll find an Acer Aspire One netbook. This build is quick, cheap, and if you get tired of it you won’t feel you’re stuck with it in the way owners of other MAME cabinet builds might.

Embedded Cake

If you are an embedded programmer who happens to be marrying another embedded programmer take note. This wedding cake is perfect for you; decorated with character LCD screens, solderless breadboards, and development boards along with the wires that connect them all together. [Francirius], a read from Chile, says this cake was the handy work of [Paulina Verdejo].

Multi-purpose Welding Cart

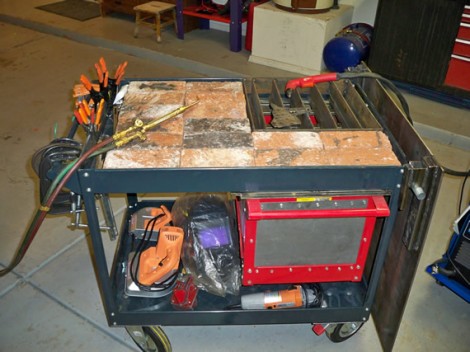
[Todd Harrison] put together a welding cart that has all kinds of tricks built-in. The carcass is a cheap rolling cart that has been reinforced with steel plate and beefier wheels. The top tray can be loaded up with fire brick for oxygen-acetylene welding or with a grate for cutting. That grate lets the slag fall through and into the red-rimmed fire-box below. Finally, there’s a steel plate to the right of the cart that rotates and slides over the top of the unit to prepare it for MIG welding. Todd walks us through his versatile invention in the video after the break. This will nicely augment your other welding hacks.

Continue reading “Multi-purpose Welding Cart”

Save A Baby, Nursery Temperature Monitor

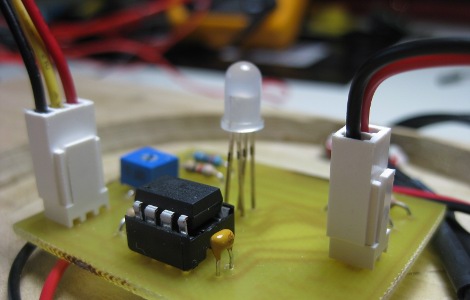
Yes, you could argue this Nursery Room Temperature Monitor is simply an LED and an Arduino with a temperature sensor, but [Jay] really did put more thought into the process. For instance he stuck with AVR, built a wooden base and sanded globe, and even included schematics and source code. Plus, SIDS is no laughing matter and the more you know, the more it can be prevented. Back on point, one thing we would add is PWM for a more gradual change in color. What would you add?

Continue reading “Save A Baby, Nursery Temperature Monitor”

XT IDE Controller

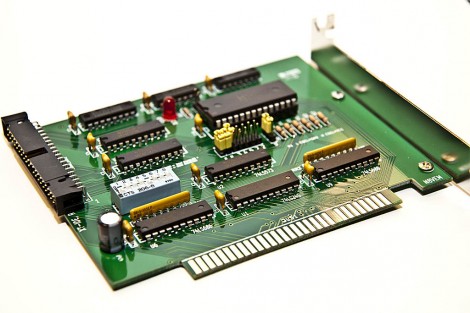
[Geordy] wanted to use some IDE devices but he didn’t have an interface card for his XT system, which can’t handle 16-bit  IDE. He looked around for 8-bit ISA controllers but they were hard to find and quite expensive. Lucky for him there’s an open source project that makes a solution to this problem. The XTIDE project brought together a group of vintage computing enthusiasts to design this ISA card. [Geordy] was even able to order a professional PCB from one of the forum members. He ordered the parts an soldered it together, costing about $30 total. He had a friend help him burn the code to the EEPROM but that’s easy enough to do with an Arduino, Bus Pirate, or one of several other methods. Now his grand plans at installing DOS 6.22 have been realized.