LEGO Sequencer Builds Sound In 3D

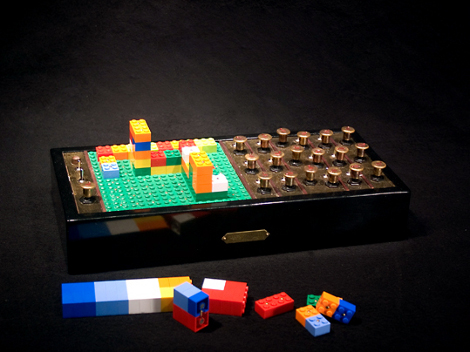
[Yoshi Akai] built a sequencer that is part steampunk, part injection molded plastic. The LEGO sequencer MR II has eight steps in a loop that is manipulated by adding the colorful blocks to a green base plate. Each color corresponds to one particular sound which can be modified by building skyward. On the other side of things he’s added a beautifully crafted control area for knobs and switches. We didn’t see much info about what is inside the device so, watch the clip after the break and then feel free to start the speculation in the comments.

This is a similar concept to the coin sequencer. From the picture above it seems the blocks have been altered and perhaps use light to identify the different blocks.

Continue reading “LEGO Sequencer Builds Sound In 3D”

Tube Clock Database

[youtube=http://www.youtube.com/watch?v=75Yl9hyPFRE]

[Brian] wrote in to show us a site he’s been working on for a while. He’s been building a tube clock database. We didn’t realize there was actually a big enough draw for such a site, but we have to admit that we spent more than a few minutes browsing through the different clocks. There isn’t a ton of data for each clock, but there are links to individual project pages wherever available. There is also a growing amount of information on the different components themselves, so submit any data you have that he’s missing to help flesh it out.

The video above wasn’t chosen for any reason other than it is quite stylish.

Cardboard Androids

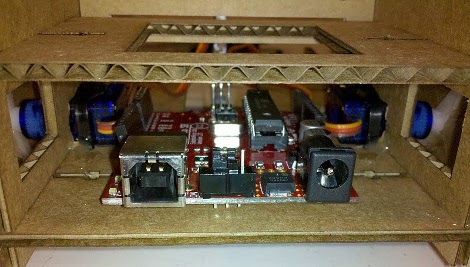
Who needs expensive acrylic based, microcontrolled robots with only a few sensors available when cardboard and an Android cellphone will work much better  for much less in cost! The team over at Cellbots have done just that. While they did cheat a little by using a laser cut cardboard for exact measurements and including an Arduino to control the servos, they certainly attained their goal of “cheap” (assuming the already had the cellphone). We’re just wondering why it took them 4 weeks for a little CAD and code.

Regardless, one idea that immediately comes to mind is thousands hundreds a few little cardboard swarm bots ravaging homes everywhere, just don’t step on them.

[Thanks Mashable]

LEDs Invade Coffee Table Crevice

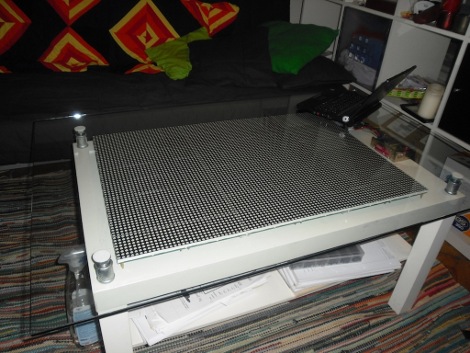
That’s a lot of LEDs, and a little bit of glass cleaner. [Tobias] spiced up his IKEA coffee table by adding 6144 LEDs. This is a larger realization of SparkFun’s LED coffee table which used 64 8×8 modules. [Tobias] sourced three display boards from Sure Electronics for a total of 96 8×8 modules. These boards are addressed through a serial interface; four serial lines for each board but a shared data bus for each of the row select pins and the data/latch/clock pins.  This method uses 19 of the 20 pins on the Arduino that drives the display. After the break you can see a demonstration. If this is more than you need there’s always the 112-LED and 81-LED table projects that can produce a full color range. Continue reading “LEDs Invade Coffee Table Crevice”

Dr. Boardman’s Color Conundrum

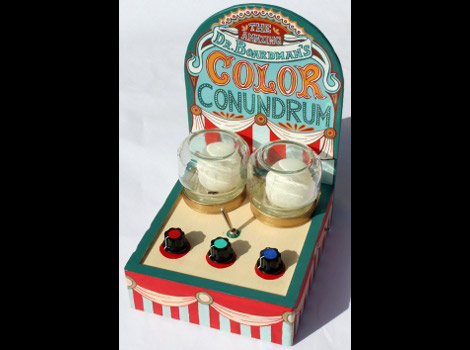
We feel like trumpets should be sounding. Someone took the overused project of connecting RGB LEDs to a microcontroller and produced something useful. [Paul] created Dr. Boardman’s Color Conundrum which works much like a simple mechanical coin-op game you might find at a carnival. When switched on, a random color is displayed by the ping-pong ball covered LED on the left. The player then manipulates three knobs to color-match the two lights.

Inside you’ll find a minimalist set of hardware. An ATmega8 polls the three potentiometers and uses them to mix the appropriate user color. Everything is wired-up using prototyping board and draws power from two AA batteries. He’s using a random seed stored in EEPROM and increments it every time the uC boots up. This keeps the input color different for every game.

Fun and simple, it’s not going to make your guests marvel at the complexity but [Paul’s] come up with a unique game that we think has marketing potential.

Give 1984 Mac A Leopard Makeover

[Jake Howe] brought his 1984 Mac up-to-date by cramming new guts inside of the classic case. The goal from the start was to run OS X Snow Leopard on the machine without altering the externals. He heated and formed acrylic around the original CRT screen to make a bezel for the replacement LCD screen. The floppy drive slot was used to hide an SD card slot and USB port. The original serial port openings were even outfitted with their own USB ports. In the end he did a brilliant job of hiding the Hackintosh mini-ITX board and components inside this iconic enclosure.

Lava Lamp Centrifuge

[youtube=http://www.youtube.com/watch?v=8-i9iI0ZA4M]

Like many projects, this one started with a harmless question. “Will lava lamps work in a high-gravity environment such as Jupiter?”. Well, as it turns out, this harmless question was not so easily answered. The only real solution was to test and prove for sure. To do this, [Neil Fraser] built a centrifuge in his living room. At 10 feet across and roughly 50 kilograms, this is no small toy. The end with the lava lamp is set to pivot, so at a stand still, it is positioned vertically and at full speed it is positioned horizontally. The whole process is recorded on video for proof. So, does a lava lamp work in high gravity? Watch the video or read the article to find out.

[via Makezine]