Blasting Off With GPS

Launching model rockets is a good time, but more often than not, it’s hard to tell how high the rocket went or how fast it moved – both essential facts when bragging about your latest flight. [Chris] recently built a GPS-based altimeter for the USC Rocket Propulsion Lab, so that they could track the performance of their latest project. The circuit is based off a Picaxe 18x and uses a GPS module to obtain NMEA altitude data. Once the data is obtained, it is stored on an external EEPROM to be read back after the rocket has been recovered.

[Chris] unfortunately does not have any pictures of the board he built, but he has made his circuit diagram and source code available. He reports that the logger worked perfectly aside from a small bit of time where the GPS module temporarily lost its satellite lock.

If you are interested in reading more about flight data recording and telemetry, be sure to check this out.

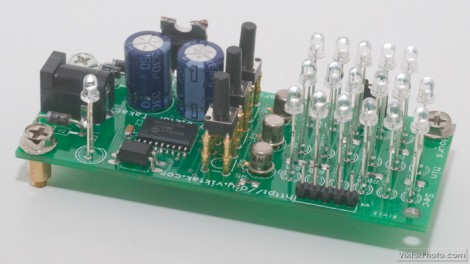
Three Digit Binary Clock

Here’s a three digit binary clock that [Viktor] designed. It uses a multiplexed display to drive one digit at a time with a PIC 16F628A. The video after the break shows it ticking away, display hours, minutes, and seconds in blue LEDs. You may be wondering why those LEDs are not flush to the board? [Viktor] took the project one step further than most binary clock projects, designing a PCB to fit into the enclosure of an old laptop PSU and then having the board manufactured. With options like DorkbotPDX groups orders its has become quite inexpensive to do this and it’s really good practice for when you need to design a highly complicated board for that super-fantastic project of the future.

Continue reading “Three Digit Binary Clock”

Toy Helicopter Charging Fix

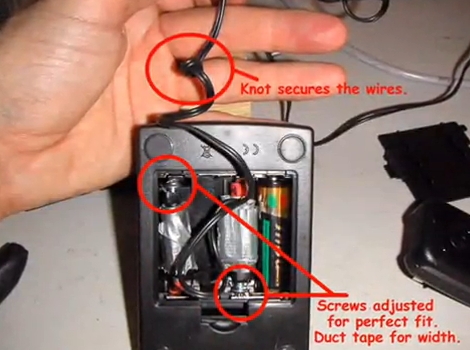
[Onefivefour] was surprised that his E-flite Blade MCX radio controlled helicopter came with a charger that used AA batteries to recharge the lithium batteries in the flying unit. Yeah, that’s a bit crazy. He set out to modify the base unit to work with AC power. There are four batteries inside this base unit, one of them powers the charge detector circuit and the others are used to juice-up the chopper’s rechargeable cells. He took a 5V regulated charger from a Motorola cellphone and modified it to interface with the contacts for the three AA cells. Like the Magic Trackpad hack, he did this without altering the holder by cutting a couple of pencils to length and attaching the positive and negative contacts from the AC charger to them. Check out the video after the break for a walk though, noting how he still has the option to go back to battery power if he so chooses.

Continue reading “Toy Helicopter Charging Fix”

RF Control From Just About Any Device

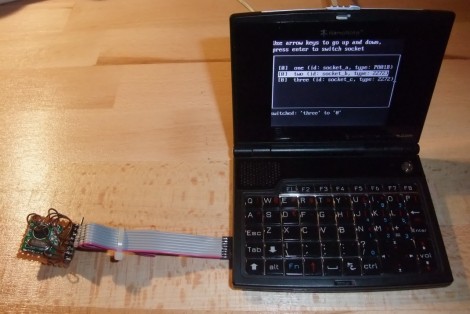
[Mirko] is working on a library that will allow you to add RF control to just about any device. The only requirement is that the device be capable of running a Linux kernel, and that it have a few GPIO pins available. One example is fairly straight forward, a Netgear router. Many, if not most routers run a Linux kernel natively and most have solder points on the board for unused IO pins so patching into the hardware is very straight forward. Less obvious and much more impressive is the hack seen in the image above. [Mirko] built an SD card adapter cable and uses the contacts in the card reader to bit bang four-wire SPI to communicate with that RF module.

Solar-powered Junkbot

solar_powered_junkbot

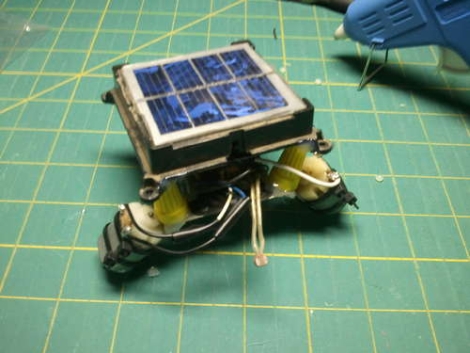
Instructables user [martzsam] recently built a simple robot using miscellaneous junk he found around his house. The first parts he scrounged up were a pair of 1.5v electric motors and some wire scraps, after which, he went to work on an old garden light. He detailed how to carefully remove the light’s solar panel as well as the charging circuit, which he used to power his robot. The pieces were mounted on some old erector set parts after a bit of rewiring, then the bot was set in motion. [martzsam] also mentions that he tweaked the solar panel’s charging circuit and battery to run the motors at half speed until light is shone on the panel, at which point the robot runs at full speed.

This project would be great to do with kids as it teaches the concepts of re-purposing common household items as well as allows them to use their imagination in designing a fun, yet simple robot. Gather up some old junk and your kids/nieces/nephews and get going!

Continue reading to see a quick video of the robot in action.

Continue reading “Solar-powered Junkbot”

Thingiverse Receives First DMCA Takedown

A landmark in home 3d printing was set when [Dr. Ulrich Schwanitz] sent a DMCA takedown notice to Thingiverse.com on users [artur83] and [chylld’s] takes on his Penrose triangle model. ([chylld’s] take is pictured above) While the takedown itself is highly debatable, we do think it’s cool that home 3d printing has come far enough to begin infringing on the copyrights of objects themselves. Right now media pirating has the front stage, but it’s not hard to look a little further into the crazy sci-fi universe that is our future and see a battle being fought over the rights to physical objects.

[via Thingiverse Blog]

Analog To Digital Converter Build

analogue_digital_converter

[Daniel Garcia] sent us a quick tutorial he put together demonstrating how to use an ATmega168 to perform analog to digital conversions. This timely tutorial would make for a nice complimentary project for those of you who decided to build your own digital to analog converter after reading our post from a few days ago.

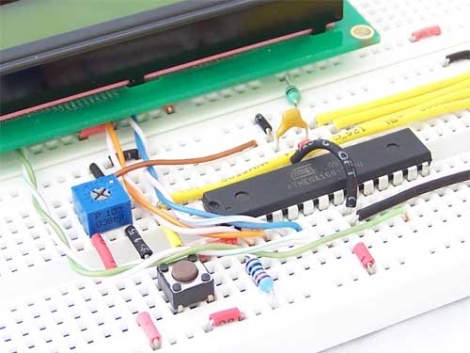
The ATmega168 has six pins that are typically used for digital I/O, but they can be used for analog input as well. In his example, he uses a trimpot as an analog input device, connecting it to one of the aforementioned analog pins. Its value is returned as a 16-bit number which is then displayed on the attached LCD. The LCD display and the breadboard layout used in this project are covered in his previous writeups, so be sure to give those a read through before working through this tutorial.