Trinket Everyday Carry Contest Roundup: Sniffing Trinket And Portable Trollmaster 3000!

Hackaday’s  Trinket Everyday Carry Contest is heating up. In just one week we’ve already got over 30 entries! Many of the contenders are completely new open source projects based on the Pro Trinket. Our first drawing will be tonight, at 9pm EST. The first giveaway prize is a BLINK(1) MK2 from the Hackaday store. Make sure you have at least one project log and a photo up to be eligible for this week’s giveaway!

sniffingtrinket
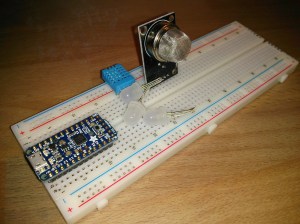
We can’t help but mention how awesome some of the entries are.  [Georg Krocker] is taking on the problem of indoor air quality – not with a central sensor, but with a personal sensor that goes where you do. Sniffing Trinket is designed to monitor the air around the user. If the air quality drops, it will alert the user to open a window – or get the heck out. [Georg] has a few sensors in mind, but he’s starting with the MQ135 gas sensor and a DHT11 temperature/humidity sensor. If air quality starts to drop, 3 WS2812b LEDs will alert the user that there is a problem. The system can also be connected to a PC with USB for more accurate readings and logging.

[Georg] has an aggressive schedule planned, with a custom “Trinket Shield” PCB being laid out and ordered next week. January 2 is fast approaching, so hurry up and get those boards designed!

trololo[Dr Salica] is taking a more humorous approach to personal space. The Portable Trollmaster 3000 is designed to surround its wearer in a bubble of  “I Am Glad, ‘Cause I’m Finally Returning Back Home” aka “The Trololol song” as sung by Eduard Khil. [Dr Salica] plans to pair the Pro Trinket with the popular Sony MMR-70 FM transmitter. The Trinket is capable of playing back short audio clips, so with a bit of I2C magic, [Dr. Salica] will be able to hijack any nearby FM receiver, creating his own personal trollbox.

Do you have an idea for a great wearable or pocketable project? Check out the Trinket Everyday Carry Contest, and get hacking!


Retrotechtacular: Ma Bell’s Advanced Mobile Phone Service (AMPS)

This gem from the AT&T Archive does a good job of explaining the first-generation cellular technology that AT&T called Advanced Mobile Phone Service (AMPS). The hexagon-cellular network design was first conceived at Bell Labs in 1947. After a couple of decades spent pestering the FCC, AT&T was awarded the 850MHz band in the late 1970s. It was this decision coupled with the decades worth of Bell System technical improvements that gave cellular technology the bandwidth and power to really come into its own.

AT&T’s primary goals for the AMPS network were threefold: to provide more service to more people, to improve service quality, and to lower the cost to subscribers. Early mobile network design gave us the Mobile Service Area, or MSA. Each high-elevation transmitter could serve a 20-mile radius of subscribers, a range which constituted one MSA. In the mid-1940s, only 21 channels could be used in the 35MHz and 150MHz band allocations. The 450MHz band was introduced in 1952, provided another 12 channels.

repeated channelsThe FCC’s allocation opened a whopping 666 channels in the neighborhood of 850MHz. Bell Labs’ hexagonal innovation sub-divided the MSAs into cells, each with a radius of up to ten miles.

The film explains quite well that in this arrangement, each cell set of seven can utilize all 666 channels. Cells adjacent to each other in the set must use different channels, but any cell at least 100 miles away can use the same channels. Furthermore, cells can be subdivided or split. Duplicate frequencies are dealt with through the FM capture effect in which the weaker signal is suppressed.

Those Bell System technical improvements facilitated the electronic switching that takes place between the Mobile Telephone Switching Office (MTSO) and the POTS landline network. They also realized the automatic control features required of the AMPS project, such as vehicle location and automatic channel assignment. The film concludes its lecture with step-by-step explanations of inbound and outbound call setup where a mobile device is concerned.

Continue reading “Retrotechtacular: Ma Bell’s Advanced Mobile Phone Service (AMPS)”

Arm Mounted Computer

Yet Another Awesome Working Prototype Of A PipBoy 3000

When we’re not busy writing up features on Hack a Day, some of the writers here have some pretty impressive projects on the go. One of our own, [Will Sweatman], just put the finishing touches on this amazing (and functional!) Pipboy 3000!

The funny thing is, [Will] here isn’t actually a very big gamer. In fact, he hasn’t even played Fallout. But when a friend queried his ability to build this so called “PipBoy 3000”, [Will] was intrigued.

His research lead him full circle, right back to here at Hack a Day. We’ve covered several PipBoy builds over the years, and [Will] fell in love with [Dragonator’s] 3D printed version — it was the perfect place to start. You see, [Dragonator] shared all the 3D models on his personal site!

Now this is where it starts to get cool. [Will] is using a 4D systems 4.3″ touch display, which doubles as the microprocessor — in fact, he didn’t even have to write a single line of code to program in it! The hardware can be programmed using the free Workshop 4 IDE, which allows him to use a visual editor to program the device. Watching a YouTube video on the Fallout 3 PipBoy, he was able to recreate all the menus with intricate detail to load onto the device. It even has GPIO which allow him to use buttons to navigate the menus (in addition to the touch screen stylus).

Continue reading “Yet Another Awesome Working Prototype Of A PipBoy 3000”

Illumination Captured In A Vacuum Jar

Experimentation with the unusual nature of things in the world is awesome… especially when the result is smokey glowing plasma. For this relatively simple project, [Peter Zotov] uses the purchase of his new vacuum pump as an excuse to build a mini vacuum chamber and demonstrate the effect his mosfet-based Gouriet-Clapp capacitive three-point oscillator has on it.

In this case, the illumination is caused due to the high-frequency electromagnetic field produced by the Gouriet-Clapp oscillator. [Peter] outlines a build for one of these, consisting of two different wound coils made from coated wire, some capacitors, a mosfet, potentiometer, and heat sink. When the oscillator is placed next to a gas discharge tube, it causes the space to emit light proportionate to the pressure conditions inside.

exploded

For his air tight and nearly air free enclosure, [Peter] uses a small glass jar with a latex glove as the fitting between it and a custom cut acrylic flange. With everything sandwiched snugly together, the vacuum hose inserted through the center of the flange should do its job in removing the air to less than 100 Pa. At this point, when the jar is placed next to the oscillator, it will work its physical magic…

[Peter] has his list of materials and schematics used for this project on his blog if you’re interested in taking a look at them yourself. Admittedly, it’d be helpful to hear a physicist chime in to explain with a bit more clarity how this trick is taking place and whether or not there are any risks involved. In any case, it’s quite the interesting experiment.

Finding A Cheaper USB To Serial Chips

FTDI-gate wasn’t great for anybody, and now with hardware hobbyists and technological tinkerers moving away from the most popular USB to serial adapter, some other chip has to fill the void. The cheapest USB to serial chip on the market appears to be the CH340G, available for 20-40 cents apiece from the usual retailers. There is, however, almost no English documentation, and the datasheet for the CH340 family doesn’t include this chip. [Ian]’s here to help you out. He got his mitts on a few of these chips and managed to figure out the pinout and a few reference schematics. He even made an Eagle part for you. Isn’t that nice?

The CH340 series of chips do exactly what you would expect them to do: a full-speed USB device that emulates a standard serial interface, with speeds from 50bps to 2Mpbs. The chip supports 5V and 3.3V, and all the weird modem lines are supported. This chip even has an IrDA mode, because wireless communication in the 90s was exactly as rad as you remember.

With [Ian]’s help, we now have a cheap source of USB to serial chips. If you need the datasheet, here you go. The driver is a bit more difficult to find, but what you’re looking for is the CH341 family of chips. That can be found with a little bit of Google fu.

3D Printing Lock Picks

Over at the 23B hackerspace in Fullerton, CA, [Dano] had an interesting idea. He took a zip tie, and trimmed it to have the same profile of a lock pick. It worked. Not well, mind you, but it worked. After a few uses, the pick disintegrated, but still the concept of picks you can take through a TSA checkpoint was proven.

A few days after this demonstration, [C] realized he had a very fancy Objet 3D printer at work, and thought printing some pics out would be an admirable goal. After taking an image of some picks through the autotracer in Solidworks, [C] had an STL that could be printed on a fancy, high-end 3D printer. The printer ultimately used for these picks was a Objet 30 Pro, with .001″ layer thickness and 600dpi resolution. After receiving the picks, [C] dug out an old lock and went to town. The lock quickly yielded to the pick, and once again the concept of plastic lock picks was proven.

Although the picks worked, there were a few problems: only half the picks were sized appropriately to fit inside a lock. Two picks also broke within 15 minutes, something that won’t happen with traditional metal picks.

Still, once the models are figured out, it’s easy to reproduce them time and time again. A perfect lock pick design is then trivial, and making an injection mold becomes possible. They might still break, but they’ll be far easier to manufacture and simple to replace.

$15 Car Stereo Bluetooth Upgrade

We’ve seen all sorts of ways to implement Bluetooth connectivity on your car stereo, but [Tony’s] hack may be the cheapest and easiest way yet. The above-featured Bluetooth receiver is a measly $15 over at Amazon (actually $7.50 today—it’s Cyber Monday after all) and couldn’t be any more hacker-friendly. It features a headphone jack for plugging into your car’s AUX port and is powered via USB.

[Tony] didn’t want the receiver clunking around in the console, though, so he cracked it open and went about integrating it directly by soldering the appropriate USB pins to 5V and GND on the stereo. There was just one catch: the stereo had no AUX input. [Tony] needed to rig his own, so he hijacked the CD player’s left and right audio channels (read about it in his other post), which he then soldered to the audio output of the Bluetooth device. After shoving all the bits back into the dashboard, [Tony] just needed to fool his stereo into thinking a CD was playing, so he burned a disc with 10 hours of silence to spin while the tunes play wirelessly. Nice!