Retrotechtacular: Radar Jamming

It’s been said that the best defense is a good offense. When aloft and en route to deliver a harmful payload to the enemy, the best defense is to plan your approach and your exit carefully, and to interfere with their methods of detection. If they can’t find you, they can’t shoot you.

As of May 1962, the United States military was using three major classifications of radar jamming technology as described in this week’s film: the AN/ALQ-35 multiple target repeater, the AN/ALQ-55 communications link disrupter, and the AN/ALQ-41 and -51 track breakers. The most important role of these pieces of equipment is to buy time, a precious resource in all kinds of warfare.

The AN/ALQ-35 target repeater consists of a tuner, pulse generator, transmitter, and control panel working in concert to display multiple false positives on the enemy’s PPI scopes. The unit receives the incoming enemy pulse, amplifies it greatly, repeats it, and sends them back with random delays.

The AN/ALQ-55 comm disrupter operates in the 100-210MHz band. It distinguishes the threatening enemy communication bands from those of beacons and civilians, evaluates them, and jams them with a signal that’s non-continuous, which helps avoid detection.

Finally, the AN/ALQ-41 and -51 track breakers are designed to break enemy lock-on and to give false information. It provides simultaneous protection against pulse ranging, FM-CW, conical, and monopulse radar in different ways, based on each method’s angle and range.
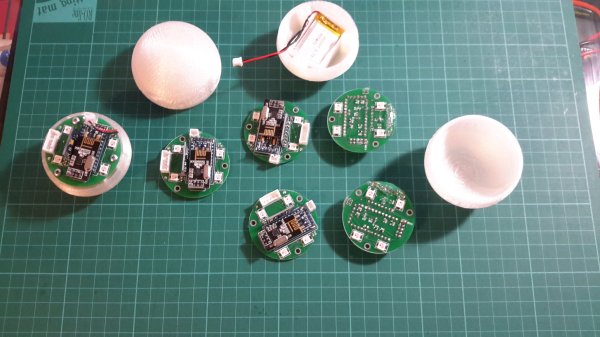
Continue reading “Retrotechtacular: Radar Jamming”

DOTS Uses Paint To Control Raspberry Pi 2

Two tables down from us at SXSW Create the Raspberry Pi foundation had a steady stream of kids playing Minecraft on Raspberry Pi, and picking up paint brushes. The painting activity was driven by a board they spun for the event that used conductive paint to control the Raspberry Pi 2.

rear-of-the-raspberry-pi-2The board uses the HAT form factor which it a fancy name for a shield (also a clever one as it stands for “Hardware Attached on Top”). You can see the back side of the board in this image. It utilizes an extremely low-profile surface mount pin socket.

The front side exposes several circular pads of copper which build up a “connect-the-dots” game that is played by painting conductive ink on the surface. This results in an airplane being pained on the board, as well as displayed on the computer. There is a set of pads that allow the user to select what color is painted on the monitor.

We like this as a different approach to education. Kids are more than used to tapping on a touchscreen, clicking a mouse, or pounding a keyboard. But conductive ink provides several learning opportunities; the paint simply connects the inner circle with the outer circle; one of these circles is the same on every single dot (ground); anything that connects these two parts of the dot together will result in input for the computer. Great stuff!

The foundation is taking the boards to Maker Faire Bay Area next month so stop by to see these in action. You can read about the production process for the DOTS board on the Raspberry Pi website. They’re giving away a few boards to software developers who want contribute to the project. And our video interview with [Matt Richardson] is found after the break.

Continue reading “DOTS Uses Paint To Control Raspberry Pi 2”

Header of the Project Byzantium website

Meshing Pis With Project Byzantium

If internet service providers go down, how are we going to get our devices to communicate? Project Byzantium aims to create an “ad-hoc wireless mesh networking for the zombie apocalypse.” It’s a live Linux distribution that makes it easy to join a secure mesh network.

[B1tsh1fter] has put together a set of hardware for running Byzantium on Pis in emergency situations. A Raspberry Pi 2 acts as a mesh node, using a powerful USB WiFi adapter for networking. Options are provided for backup power, including a solar charger and a supercapacitor based solution.

The Pi runs a standard Raspbian install, but uses packages from the ByzPi repository. This provides a single script that gets a Byzantium node up and running on the Pi. In the background, OLSR is used to route packets through the mesh network, so that nodes can communicate without relying on a single link.

The project has a ways to go, but the Raspberry Pi based setup makes it cheap and easy to get a wide area network up and running without relying on a single authority.

Smart juggling balls

Smart Juggling Balls

For the 2015 Hack a Day Prize, [Arkadi] is working on an educational platform using the Arduino for Smart Juggling Balls.

His goal for this is to create an open-source platform which, beyond juggling, can be used to teach physics in both an interactive and fun way. The juggling balls feature a RGB LED, an Arduino pro mini, and some MPU’s. They can be programmed to change color based on acceleration, gravity, centripetal force, rotation, or even controlled remotely. As the project develops further, he also plans on creating lecture content to go alongside the project, which would make it an excellent and interactive project for a high school (or even college) tech or physics class.

It’s not completely done yet but he’s already posted all the source code and instructions for making your own set over on GitHub. Stick around after the break to see the prototype balls in action and don’t forget to get cracking on your own Hackaday Prize entry!

Continue reading “Smart Juggling Balls”

Italian Law Changed By The Hackaday Prize

A recent change in Italian law was spurred by the Hackaday Prize. The old law restricted non-Italian companies from hosting contests in the country. With the update Italian citizens are now welcome to compete for the 2015 Hackaday Prize which will award $500,000 in prizes.

We’ve heard very few complaints about the Hackaday Prize. When we do, it’s almost always because there are some countries excluded from participation. We’ve tried very hard to include as much of the globe as possible, some countries simply must be excluded due to local laws regarding contests. The folks from Make in Italy saw last year’s offer of a Trip into Space or $196,418 and set out to get the local laws changed (translated). Happily they succeeded!

The Make in Italy Foundation was started to encourage and support FabLabs in Italy. After seeing two major Hacker and Maker oriented contests — The 2014 Hackaday Prize and the Intel Make it Wearable contest — exclude Italian citizens from entering. Their two prong approach sought out legal counsel and started a petition on Change.org signed by about 1.8k supporters.

We’ve been holding off on the announcement as we needed our own legal opinion on the change (we’re not great at understanding Italian legal PDFs without some help). But today we have removed Italy from the list of excluded countries. Submit your entry today just by writing down your idea of a build which will solve a problem faced by a large number of people. Build something that matters and you could win a Trip into Space, $100,000 for the ‘Best Product’, or hundreds of other prizes. But we’re not waiting until the end, over the next 17 weeks we’ll be giving out $50k in prizes to hundreds of entries.

[Thanks Alessandro]


The 2015 Hackaday Prize is sponsored by:

Try Not To Fall Off The Backwards Brain Bike

[Destin] of SmarterEveryDay fame has a challenge for your brain : a bicycle where the handlebars turn the front wheel in the opposite direction of a typical bike (YouTube link). For example, turning the handlebars left turns the wheel right and vice versa. He warns you it’s harder than it looks.

The hack that pulls this off is a simple one compared to bike hacks we’ve previously covered. Gears on the head tube make this possible. It was built by his welder friends who challenged him to ride it. He couldn’t at first; determined to overwrite his brain’s memory of bike riding, he practiced until he finally succeeded. It took him eight months. When it was time to ride an old-fashioned bike, it only took him about twenty minutes to “un-learn” the Backwards Brain Bike. [Destin’s] biking illustrates neuroplasticity, memory, and learning in a fun way (fun for us; no doubt frustrating for him).

As a testament to the sponge-like brains of youth, [Destin’s] son learned to ride the Backwards Brain Bike in only two weeks.

Continue reading “Try Not To Fall Off The Backwards Brain Bike”

Workbench Eye Candy From Around The World

The workbench. We’re always looking for ways to make the most out of the tools we have, planning our next equipment purchase, all the while dealing with the (sometimes limited) space we’re allotted. Well, before you go off and build your perfect electronics lab, this forum thread on the EEVblog should be your first stop for some extended drooling research.

You’ll find a great discussion about everything from workbench height, size, organization, shelf depth, and lighting, with tons of photos to go with it. You’ll also get a chance to peek at how other people have set up their labs. (Warning, the thread is over 1000 posts long, so you might want to go grab a snack.)

We should stop for a moment and give a special note to those of you who are just beginning in electronics. You do not need to have a fancy setup to get started. Most of these well equipped labs is the result of being in the industry for years and years. Trust us when we say, you can get started in electronics with nothing more than your kitchen table, a few tools, and a few parts. All of us started that way. So don’t let anything you see here dissuade you from jumping in. As proof, we’ve seen some amazingly professional work being done with the most bare-bones of tools (and conversely, we seen some head-scratching projects by people with +$10,000 of dollars of equipment on their desk.)

Here’s some links that you might find handy when setting up a lab. [Kenneth Finnegan] has a great blog post on how his lab is equipped. And [Dave Jones] of the EEVblog has a video covering the basics. One of the beautiful things about getting started in electronics is that used and vintage equipment can really stretch your dollars when setting up a lab. So if you’re looking into some vintage gear, head on over to the Emperor of Test Equipment. Of course no thread about workbenches would be complete with out a mention of Jim Williams’ desk. We’ll leave the discussion about workbench cleanliness for the comments.