Pong In Real Life, Mechanical Pong

[Daniel Perdomo] and two of his friends have been working on a mechanical version of Pong for the past two years. We can safely say that the final result is beautiful. It’s quite ethereal to watch the pixe–cube move back and forth on the surface.

[Daniel] has worked in computer graphics for advertising for more than 20 years. However, he notes that neither he nor his friends had any experience in mechanics or electronics when they began. Thankfully, the internet (and, presumably, sites like Hackaday) provided them with the information needed.

The pong paddles and and pixel (ball?) sit onto of a glass surface. The moving parts are constrained to the mechanics with magnets. Underneath is a construction not unlike an Etch A Sketch for moving the ball while the paddles are just on a rail with a belt. The whole assembly is made from V-groove extrusion.

Our favorite part of the build is the scroll wheel for moving the paddle back and forth. For a nice smooth movement with some mass behind it, what’s better than a hard-drive platter? They printed out an encoder wheel pattern and glued it to the surface. The electronics are all hand-made. The brains appear to be some of the larger Arduinos. The 8-bit segments, rainbow LEDs, etc were build using strips glued in place with what looks like copper foil tape connecting buses. This is definitely a labor of love.

It really must be seen to be understood. The movement is smooth, and our brains almost want to remove a dimension when watching it. As for the next steps? They are hoping to spin it up into an arcade machine business, and are looking for people with money and experience to help them take it from a one-off prototype to a product. Video after the break.

Continue reading “Pong In Real Life, Mechanical Pong”

Hackaday Prize Entry: Adding HDMI To Small Displays

LCDs come in a lot of sizes, and there’s a lot written about pushing pixel data out to larger displays. Smaller LCDs, like the 4, 5 and 7 inch variety, aren’t used much, because no one seems to know how to drive the things. For [Joe]’s Hackaday Prize Entry, he’s creating an open source interface for tiny LCDs, making it easy and cheap to add one to everything with an HDMI port.

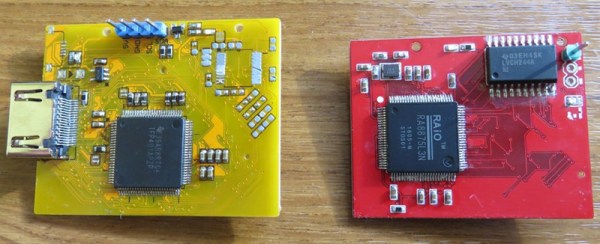
[Joe]’s Open LCD Interface comes on two boards, with the first providing connections to an LCD, all the power circuitry required, and a bunch of pads to break out every IO line. The second part of the puzzle is a decoder that takes HDMI signals and drives a small LCD.

HDMI decoders are nothing new to the world of hobby electronics – there are multiple projects that give the BeagleBoard a display through HDMI. Even Adafruit sells one of these converters. [Joe]’s board has another trick up its sleeve, though: it can give any microcontroller a high-resolution display, too.

There’s another module that connects to [Joe]’s breakout board that turns the LCD into an SPI display. This means any microcontroller can drive a high-resolution display. It’s fast, too: in the video below, [Joe]’s SPI display can push pixels at least as fast as any other microcontroller-based display we’ve seen.

It’s a great project, and a by opening up the doors to millions of cheap LCDs on eBay and Alibaba, [Joe] has a great entry for the Hackaday Prize on his hands.

Continue reading “Hackaday Prize Entry: Adding HDMI To Small Displays”

Raspberry Pi Levels With You

It is easy to imagine how early man started using rocks and then eventually developed better and better tools until they created the hammer. Some simple tools took a little longer to invent. The spirit level, for example, didn’t exist until sometime in the last half of the 1600’s.

The idea is simple. A clear tube holds a liquid and a bubble. When the bubble is in the center of the tube, the device is level in the direction of the tube. [Mark Williams] has a slightly more involved approach. He took an internal measurement unit (IMU) and a Raspberry Pi to create a modern take on the spirit level.

Continue reading “Raspberry Pi Levels With You”

FriendlyARM: A Different Flavor Of Raspberry

A lot of old science fiction movies show people wearing the same–or nearly the same–clothes. We’re left guessing if this is because there is a single centralized plant mass-producing skin-tight jumpsuits, or if everyone is under orders to dress the same. Now that we live in the past’s future, it looks like science fiction was a poor predictor of fashion. People want variety.

Which calls to mind development boards. How many different ones do we need? Need doesn’t matter, because we have plenty of them. There may be strong leaders: in the 8-bit world, you think of the Arduino, and on the Linux side, maybe the Raspberry Pi. But there are options.

[Eric Brown] recently compared several inexpensive development boards from FriendlyARM including the NanoPi M3, the NanoPi M1, and the NanoPC-T3. These range from about $11 to $60 with the M3 costing $35. You can see an M1 booting on an HDMI screen in the video below.

Continue reading “FriendlyARM: A Different Flavor Of Raspberry”

DIY Air Quality Meter And Emissions Tester

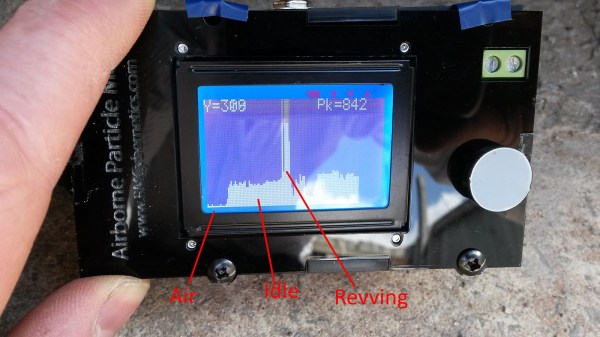
Handheld measuring devices make great DIY projects. One can learn a lot about a sensor or sensor technology by just strapping it onto a spare development board together with an LCD for displaying the sensor output. [Richard’s] DIY air quality meter and emissions tester is such a project, except with the custom laser-cut enclosure and the large graphic LCD, his meter appears already quite professional.

Continue reading “DIY Air Quality Meter And Emissions Tester”

Federico Musto Of Arduino SRL Shows Off New ARM-based Arduino Boards

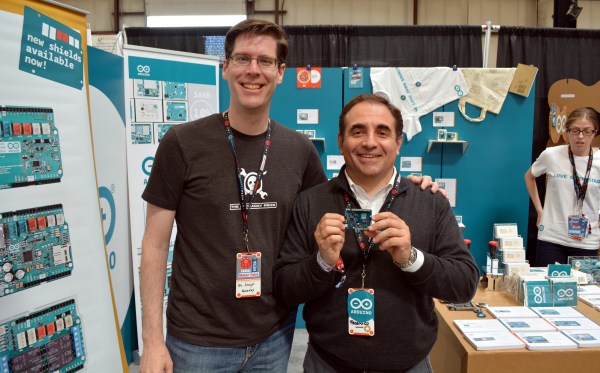
I caught up with Federico Musto, President and CEO of Arduino SRL, at the 2016 Bay Area Maker Faire. Their company is showing off several new boards being prepared for release as early as next month. In partnership with Nordic Semi and ST Microelectronics they have put together some very powerful offerings which we discuss in the video below.

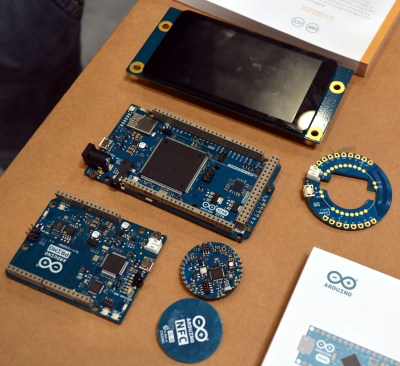
arduino-primo-core-alicepad-star-otto-lcdThe new boards are called Arduino Primo, Arduino Core, Arduino Alicepad, and Arduino Otto.
The first up is the Primo, a board built to adhere to the UNO form factor. This one is packing an interesting punch. The main micro is not an Atmel chip, but a Nordic nRF52832 ARM Cortex-M4F chip. Besides being a significantly fast CPU with floating-point support, the Nordic IC also has built-in Bluetooth LE and NFC capabilities, and the board has a PCB antenna built in.

On an UNO this is where the silicon would end. But on the Primo you get two more controllers: an ESP8266 and an STM32F103. The former is obvious, it brings WiFi to the party (including over-the-air programming). The STM32 chip is there to provide peripheral control and debugging. Debugging is an interesting development and is hard to come by in the Arduino-sphere. This will use the OpenOCD standard, with platformio.org as the recommended GUI.

Continue reading “Federico Musto Of Arduino SRL Shows Off New ARM-based Arduino Boards”

Minimal MQTT: Control And Clients

So you’ve built a central server and filled your house with WiFi-connected nodes all speaking to each other using the MQTT protocol. In short, you’ve got the machine-to-machine side of things entirely squared away. Now it’s time to bring the humans into the loop! We’re going to explore a couple graphical user interfaces.

You could build a physical knob and/or LED display for every little aspect of your entire system, but honestly, this is where GUIs really shine. In this installment of Minimal MQTT, we’re going to look at human-friendly ways of consuming and producing data to interact with your connected sensors, switches, and displays. There are a ton of frameworks out there that use MQTT to build something like this, but we’re going to cut out the middle-man and go straight for some GUI MQTT clients.

Continue reading “Minimal MQTT: Control And Clients”