Regrowing A Blackberry From The Keyboard Out

Here at Hackaday we’re big fans of device-reuse, and what [arturo182] has done with the Blackberry Q10’s keyboard is a fantastic example. Sometimes you’re working on a portable device and think to yourself “what this could really use is a QWERTY keyboard”. What project doesn’t need a keyboard?

Typically this descends into a cost benefit analysis of the horrors of soldering 60ish SMD tact switches to a board, which is no fun. With more resources you can use Snaptron snap domes like the [NextThingCo’s] PocketCHIP, but those are complex to source for a one off project and the key feel can be hard to really perfect. Instead of choosing one of those routes, [arturo182] reverse engineered the keyboard from a Blackberry Q10.

When you think of good, small keyboards, there has always been one standout: Blackberry. For decades Blackberry has been known for absolutely nailing the sweet tactile feel of a tiny key under your thumb. The Q10 is one example, originally becoming avalible in 2013 as one of the launch devices for their then-new Blackberry OS 10. Like most of Blackberry’s business the OS and the phone are long out of date, but that doesn’t mean the keyboard has aged.

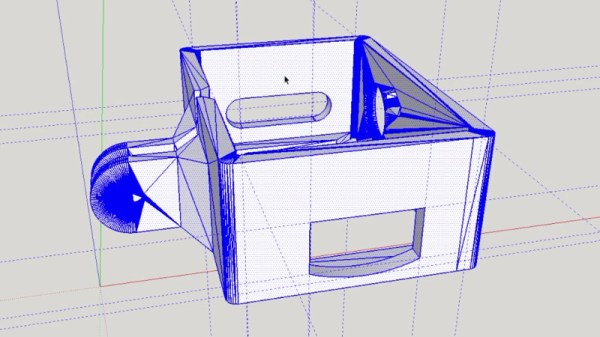
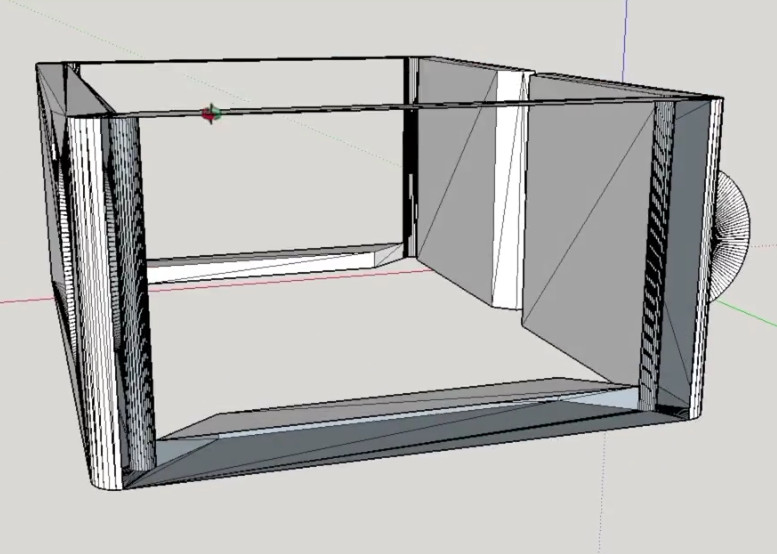
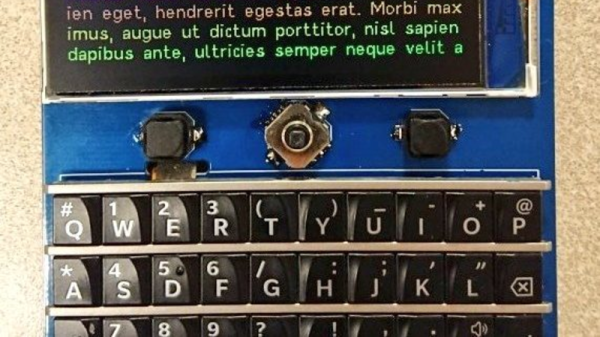
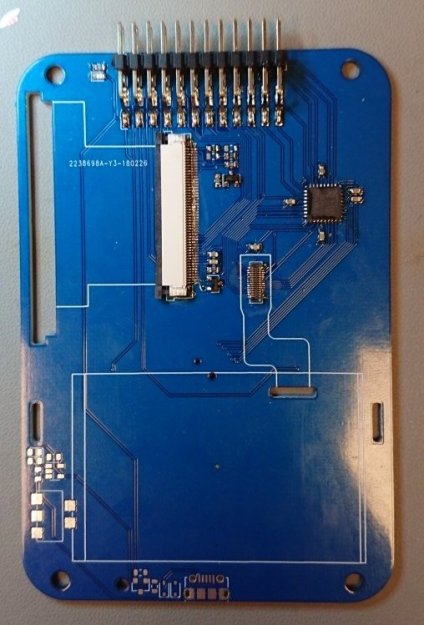
[Arturo182] says he can find them from the usual Chinese sources for around $3 each, which is too cheap to not explore. Building on the work of [WooDWorkeR] (on Hackaday.io) and [JoeN] to reverse engineer the matrix and to find the correct connector, he integrated the keyboard into an easy to use breakout board that exposes the key matrix, per-row backlight controls, and even the MEMS mic! More excitingly, he has built a small portable device with all the trappings of the original Q10; a color LCD, joystick, function buttons, and more in a very small footprint.

KiCAD sources, including 3D models, for the keyboard and for the breakout board are available.

Now if only someone can find a way to salvage the unusual square, high-DPI displays from the Q10, we’d be in portable device nirvana.

Continue reading “Regrowing A Blackberry From The Keyboard Out”

Adding Optics To A Consumer Thermal Camera

[David Prutchi] writes in to tell us about his recent experiments with building lenses for thermal imaging cameras, which to his knowledge is a first (at least as far as DIY hardware is concerned). With his custom designed and built optics, he’s demonstrated the ability to not only zoom in on distant targets, but get up close and personal with small objects. He’s working with the Seek RevealPro, but the concept should work on hardware from other manufacturers as well.

In his detailed whitepaper, [David] starts by describing the types of lenses that are appropriate for thermal imaging. Glass doesn’t transmit the wavelengths that thermal camera is looking for, so the lenses need to be made of either germanium or zinc selenide. These aren’t exactly the kind of thing you can pick up at the local camera shop, and even small lenses made of these materials can cost hundreds of dollars. He suggests keeping an eye out on eBay for surplus optics you could pull them out of to keep costs down.

Creating the macro adapter is easy enough, you simply put a convex lens in front of the thermal camera. But telephoto is a bit more involved, and the rest of the whitepaper details the math and construction techniques used to assemble it the optics. [David] gives a complete bill of materials and cost breakdown for his telephoto converter, but prepare for a bout of sticker shock: the total cost with all new hardware is nearly $500 USD. The majority of that is for the special lenses though, so if you can score some on the second-hand market it can drop the cost significantly.

We’ve seen an impressive array of thermal camera hacks and projects recently, no doubt due to the falling prices of consumer-level imaging hardware. Given their utility as a diagnostic tool, a thermal camera might be something worth adding to your bag of tricks.

Hijacking A Sony Watchman For Pong

The era of the vintage television was a great one, and one of the transitional by-products was the Sony Watchman. It was a portable TV which Sony started selling in 1982, and the amazing thing about it was that it had an actual 4-inch cathode ray tube or CRT. [Sideburn] just posted a video in which he hijacks the internals of a Watchman to make it into a portable game of Pong.

The hack begins with removing the TV tuner module inside to make some room for the new residents. Next comes the M51364P which is VIF video decoder chip, and for which surprisingly there is not a lot of info on the web. They were able to find a part of the schematic, which though it was in Russian may still be useful for enthusiasts. Removing the VIF revealed the audio and video pins that needed the appropriate signals for the hack to be successful. In an age of multilayer boards it is amazing how a two-layer PCB makes life so easier for the tinkerer.

For the new brains an Arduino Nano clone was selected, and instead of adding modern buttons the existing volume and band select switches were convinced to be the paddle control and play/pause button. Getting everything to fit was easy with the absence of the tuner module, and voila! New(ish) hardware. For the firmware, [Sideburn] turns to Hackvision firmware which has a host of games such as Space Invaders, Asteroids, and even Tetris.

We covered Hackvision a few years ago as a hardware/firmware bundle, and if you are more into CRTs then check out the Arduino driven 6845 CRT controller.

Continue reading “Hijacking A Sony Watchman For Pong”

Desperately Trying To Find A Use For The ChugPlug

[AkBKukU] writes in to tell us of his experiments with the rather vile-sounding “ChugPlug”, an odd portable AC power bank designed for the express purpose of powering MacBook chargers. It would seem more efficient to simply build a DC power bank with a MagSafe connector to cut out the charger all together, but presumably there is some market for this particular niche device. Especially at the $15 they are currently selling for on Amazon.

Unfortunately, the ChugPlug that [AkBKukU] bought doesn’t seem to work. After some experimenting he found that it appears to only be outputting 80 VAC, obviously too low for many devices to function. But he reasoned that some things, like switch mode power supplies or restive loads, might still work. He just needed to come up with a way to plug them into the ChugPlug.

If his testing setup gives you a case of sweaty palms, you aren’t alone. He breaks open a dead MacBook charger to recover the female AC connector, and then solders that directly to an AC grounding adapter. The resulting pigtail lets [AkBKukU] plug in various AC loads while allowing him to probe the wires with his multimeter and oscilloscope.

Once he’s satisfied his hack works conceptually, that is, he’s able to plug arbitrary AC loads into this purpose-built battery pack, he follows up with a less dangerous looking adapter. Making use of the shell of the dead MacBook charger and what some might describe as a salacious amount of hot glue, he produces a compact and relatively safe looking device that will let him use his handicapped ChugPlug as a general purpose source of AC power.

It’s not the most elaborate portable power supply we’ve ever seen, and certainly wouldn’t be our first choice in an emergency, but at least [AkBKukU] managed to wring some use out of the thing in the end.

Continue reading “Desperately Trying To Find A Use For The ChugPlug”

Hacking Balsa To Make It Stronger

Balsa wood has long been revered for its strength and lightweight composition, two properties that make it ideal for building model structures and airplanes. Researchers from the US and China have managed to make balsa even stronger and more useful. They’ve found a way to change its structure, turning it into a carbon sponge that’s strong enough to withstand repeated mechanical strain, but light enough to sit atop a dandelion gone to seed.

Using common chemicals like lye and hydrogen peroxide, the scientists burned the hemicellulose and lignin fibers that make up balsa’s rectangular cell walls. Then they incinerated the sample at 1,000°C, which morphed the cellular structure into a cross between a helical spring and a honeycomb.

Normally, carbonized wood just collapses under weight. But by first burning the cell fibers, the carbonization process results in a balsa carbon sponge capable of withstanding thousands of compressions before deforming. The researchers used the new material as part of a mechanical strain sensor prototype for wearable electronics, and they see a solid future for the material in water purification devices, supercapacitors, and rechargeable batteries.

This is big news for a society that’s trying to find more environmentally responsible ways to keep going full steam ahead in technological growth. Balsa trees grow fast, averaging 10+ feet per year, so this is a more sustainable alternative to graphene and carbon nanotubes. We’re excited to see what comes of this hack of nature. You can read the full paper here.

Even in its natural state, balsa is an interesting material. We once saw someone exploit its water retention abilities to make a rain-activated, shape-shifting prototype for roofing shingles.

Thanks for the tip, [Gervais].

Not Just Your Average DIY Spot Welder

Microwave oven transformer spot welder builds are about as common as Nixie tube clocks around here. But this spot welder is anything but common, and it has some great lessons about manufacturing techniques and how to achieve a next level look.

Far warning that [Mark Presling] has devoted no fewer than five videos to this build. You can find a playlist on his YouTube channel, and every one of them is well worth the time. The videos covering the meat of what went into this thing of beauty are below. The guts are pretty much what you expect from a spot welder — rewound MOT and a pulse timer — but the real treat is the metalwork. All the very robust parts for the jaws of the welder were sand cast in aluminum using 3D-printed patterns, machined to final dimensions, and powder coated. [Mark] gives an excellent primer on creating patterns in CAD, including how to compensate for shrinkage and make allowance for draft. There are tons of tips to glean from these videos, and plenty of inspiration for anyone looking to achieve a professional fit and finish.

In the category of Best Appearing Spot Welder, we’ll give this one the nod. Runners-up from recent years include this plastic case model and this free-standing semi-lethal unit.

Continue reading “Not Just Your Average DIY Spot Welder”

Customizing STLs For Off-Brand Devices

[Rob Clarke] needed a mount for his off-brand action camera, but it’s not exactly the kind of thing with a bustling accessory market. To make matters worse, it turns out the camera is so low-key that he couldn’t find a 3D printable mount for it either. Luckily, a check with his calipers confirmed his camera is just about the same size as an old GoPro Hero 3, so all he had to do was modify an existing design to fit his needs.

As anyone who’s worked with STL files will tell you, they are a pain to modify. An STL is essentially a completed solid model, and not really meant to be fiddled around with. It’s a bit like trying to take an edited image and get back to the layers that were used to create it in Photoshop or GIMP. The final output has been “flattened”, so that granular control is lost.

That being said, [Rob] got rather lucky in this case. He found a GoPro mount that was about 90% there, he just needed to adjust the depth and change the positioning of the holes on the side. He loaded the STL into SketchUp, deleted the two sides, and replaced them with new surfaces. This gave him a clean slate to add the appropriate openings for his camera’s USB port and microSD card. To adjust the depth of the mount, he simply stretched the model out on the Z axis.

[Rob] event went ahead and released his modified STLs as a remix of the original case he found on Thingiverse for anyone else that has the same camera. That’s what we love to see.

If you’re interested in learning more about using SketchUp for designing 3D printed parts, check out this excellent guide by our very own [Brian Benchoff].

Continue reading “Customizing STLs For Off-Brand Devices”