Reverse Engineering A DNA Sequencer

Improvements in methodology have dramatically dropped the cost of DNA sequencing in the last decade. In 2007, it cost around $10 million dollars to sequence a single genome. Today, there are services which will do it for as little as $1,000. That’s not to bad if you just want to examine your own DNA, but prohibitively expensive if you’re looking to experiment with DNA in the home lab. You can buy your own desktop sequencer and cut out the middleman, but they cost in the neighborhood of $50,000. A bit outside of the experimenter’s budget unless you’re Tony Stark.

But thanks to the incredible work of [Alexander Sokolov], the intrepid hacker may one day be able to put a DNA sequencer in their lab for the cost of a decent oscilloscope. The breakthrough came as the result of those two classic hacker pastimes: reverse engineering and dumpster diving. He realized that the heavy lifting in a desktop genome sequencer was being done in a sensor matrix that the manufacturer considers disposable. After finding a source of trashed sensors to experiment with, he was able to figure out not only how to read them, but revitalize them so he could introduce a new sample.

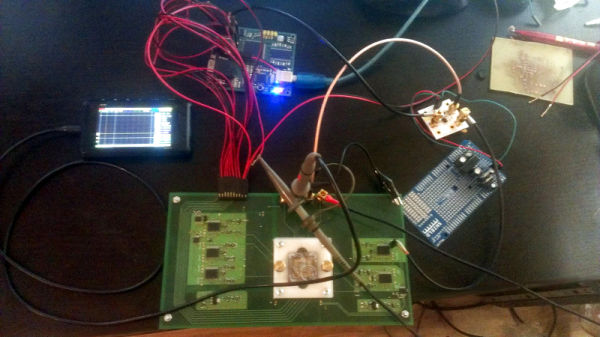
To start with, [Alexander] had to figure out how these “disposable” sensors worked. He knew they were similar in principle to a digital camera’s CCD sensor; but rather than having cells which respond to light, they read changes in pH level. The chip contains 10 million of these pH cells, and each one needs to be read individually hundreds of times to capture the entire DNA sequence.

Enlisting the help of some friends who had experience reverse engineering silicon, and armed with an X-Ray machine and suitable optical microscope, he eventually figured out how the sensor matrix worked electrically. He then designed a board that reads the sensor and dumps the “picture” of the DNA sample to his computer over serial.

Once he could reliably read the sensor, the next phase of the project was finding a way to wash the old sample out so it could be reloaded. [Alexander] tried different methods, and after several wash and read cycles, he nailed down the process of rejuvenating the sensor so its performance essentially matches that of a new one. He’s currently working on the next generation of his reader hardware, and we’re very interested to see where the project goes.

This isn’t the first piece of DIY DNA hardware we’ve seen here at Hackaday, and it certainly won’t be the last. Like it or not, hackers are officially fiddling with genomes.

Results Of 3D-Printed Cylinder Head Testing Fail To Surprise

It’s the suburbanista’s weekend nightmare: you’re almost done with the weekly chores, taking the last few passes with the lawn mower, when you hear a pop and bang. The cylinder head on your mower just blew, and you’re out of commission. Or are you? You’ve got a 3D printer – couldn’t it save the day?

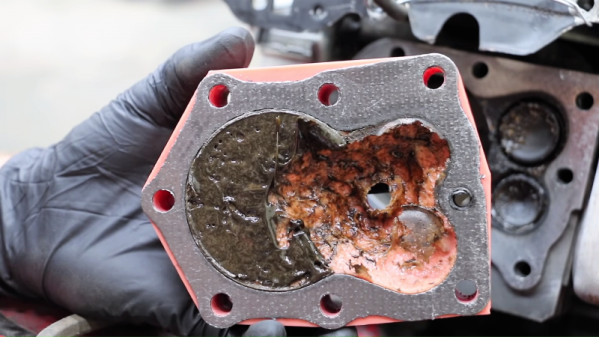
If this bench test of plastic cylinder heads is any indication, it’s possible – just as long as you’ve only got 40 seconds of mowing left to do. [Project Farm] has been running all sorts of tests on different materials as field-expedient cylinder heads for small gasoline engines, using everything from JB Weld epoxy to a slab of walnut. For this test, two chunky heads were printed, one from ABS, of the thermochromic variety apparently, the other in PLA. The test went pretty much as expected for something made of thermoplastic exposed to burning gasoline at high pressure, although ABS was the clear winner with two 40-second runs. The PLA only lasted half as long before the spark plug threads melted and the plug blew out. A gasket printed from flexible filament was also tested, with predictably awful results.

As bad as all this was, it still shows that 3D-printed parts are surprisingly tough. Each part was able to perform decently under a compression test, showing that they can stand up to pressure as long as there’s no heat. If nothing else, it was a learning experience. And as an aside, the cylinder heads were printed by [Terry] from the RedNeckCanadians YouTube channel. That video is worth a watch, if just for a few tips on making a 3D-printed copy of an object. Continue reading “Results Of 3D-Printed Cylinder Head Testing Fail To Surprise”

Mechanical Issues For A Pi CNC

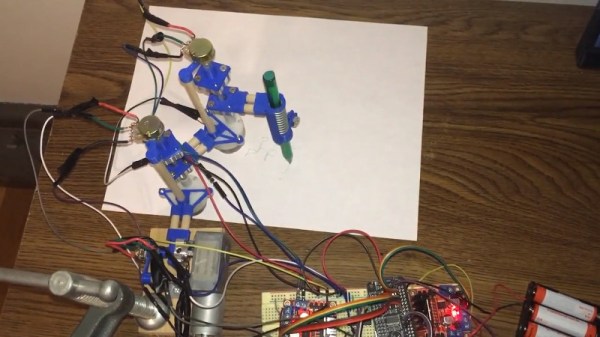
The Raspberry Pi platform has become popular in the maker community for various CNC projects. The single board computers are readily suited to acting as a server for a small CNC setup or 3D printer, though it’s fair to say that for heavy work they probably aren’t quite up to the task of driving the steppers in a serious rig directly. [Danny] set out to try to build a CNC plotter of his own, using a Pi Zero, and learned a few things along the way.

The plotter uses 3D printed parts combined with brushed DC motors which are geared down. Potentiometers are added to allow the Pi to keep track of the location of the pen. This enables the position to be corrected through feedback.

While the plotter does move and accept commands, it does have some issues. There is significant play in the gear train which [Danny] suspects of causing the poor output results. If you’ve got any ideas as to how this could be improved or overcome, throw them down in the comments!

We’ve seen another take on CNC control with the Raspberry Pi, too. Video after the break.

Continue reading “Mechanical Issues For A Pi CNC”

Facebook Wants To Teach Machine Learning

When you think of technical education about machine learning, Facebook might not be the company that pops into your head. However, the company uses machine learning, and they’ve rolled out a six-part video series that they say “shares best real-world practices and provides practical tips about how to apply machine-learning capabilities to real-world problems.”

The videos correspond to what they say are the six aspects of machine learning development:

  1. Problem definition
  2. Data
  3. Evaluation
  4. Features
  5. Model
  6. Experimentation

Continue reading “Facebook Wants To Teach Machine Learning”

Electric Bike From The Ground Up

Electric vehicles are getting more traction these days, but this trend is rolling towards us in more ways than just passenger vehicles. More and more bikes are being electrified too, since the cost of batteries has come down and people realize that they can get around town easily without having to pay the exorbitant price to own, fuel, and maintain a car. Of course there are turnkey ebikes, but those don’t interest us much around here. This ebike from [Andy] is a master class in how to build your own ebike.

Due to some health issues, [Andy] needed a little bit of assistance from an electric motor on his bike, but found out that the one he wanted wouldn’t fit his current bike quite right. He bought a frame from eBay with the right dimensions and assembled the bike from scratch. Not only that, but when it was time to put the battery together he sourced individual 18650 cells and built a custom battery for the bike. His build goes into great detail on how to do all of these things, so even if you need a lithium battery for another project this build might be worth a read.

If you’ve never been on an electric bike before, they’re a lot of fun to ride. They’re also extremely economical, and a good project too if you’re looking for an excuse to go buy a kit and get to work. You can get creative with the drivetrain too if you’d like to do something out of the box, such as this bike that was powered by AA batteries and a supercapacitor.

Printed Part Gets Classic Truck Rolling

When working on classic vehicles, and especially when modifying them outside of their stock configurations, things can get expensive. It’s a basic principle in economics: the rarer something is the more money somebody can charge you for it. But if you’ve got the skills and the necessary equipment, you can occasionally save yourself money by custom-fabricating some parts yourself.

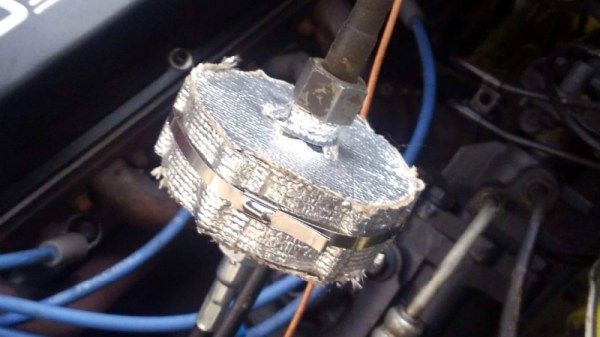
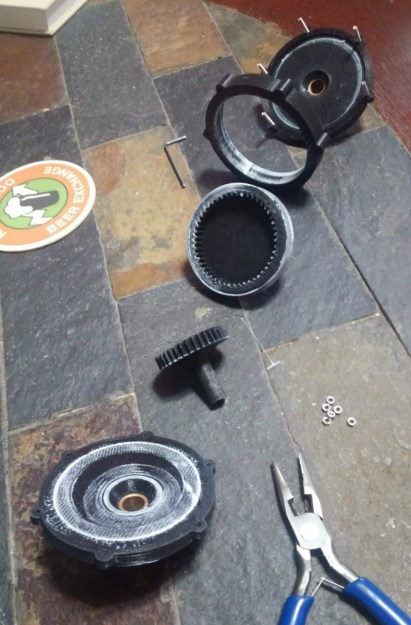
After changing the gear ratio in his 1971 Ford F100, [smpstech] needed to adjust his speedometer to compensate. Unfortunately, a commercial speedometer reducer and the new cables to get it hooked up to his dash would have run into the hundreds of dollars, so he decided to try designing and 3D printing his own gearbox. The resulting development process and final product are a perfect example of how even a cheap desktop 3D printer, in the hands of a capable operator, can do a lot more than print out little toy boats.

The gearbox contains a large ring gear driven by a smaller, offset, spur gear. This compact inline package drops the speed of the input shaft by 25.5%, which [smpstech]  mentions is actually a bit slower than necessary, but it does give him some wiggle room if he decides to change his tire size.

Even if you’re not looking for a speedometer reducer for a nearly 50 year old truck, there are some lessons to be learned here in regards to 3D printed car parts. The first version of his gearbox, while functional initially, ended up looking like a deflated balloon after being exposed to the temperatures inside the F100’s engine bay. His cheapo PLA filament, which is probably fine for the aforementioned toy boats, simply wasn’t the right material for the job.

[smpstech] then reprinted the gadget in HTPLA, which needs to be annealed after printing to reach full strength. Usually this would involve a low-temperature bake in the oven, but he found that simmering the parts in a pot of water on the stove gave him better control over the temperature. Not only did the HTPLA version handle the under-hood conditions better, it was also strong enough that he was able to use a standard die on the connections for the speedometer cables to create the threads instead of having to model and print them. Definitely a material to keep an eye on if regular PLA isn’t cutting it for you.

This isn’t the first time we’ve seen 3D printed parts used to get a vintage vehicle back on the road. Building these custom parts would have been possible without a 3D printer, of course, but it’s a good example of how the technology can make these types of repairs faster and easier.

[via /r/functionalprint]

Regenerative Braking Charges Your Phone

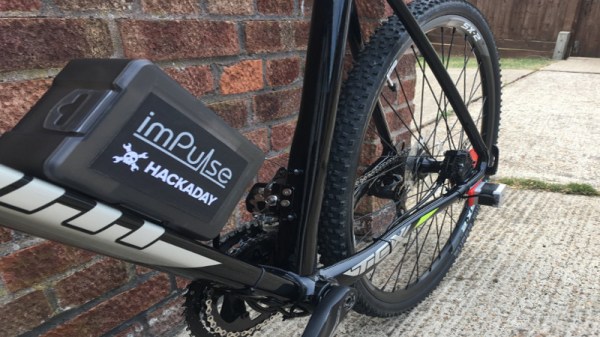
Way back when, if you wanted lights on your bike, you’d head off to the local bicycle store and purchase yourself a bottle dynamo. This would consist of a magneto that was attached to a bracket on the back of the bike and would rotate by rubbing against the rear tire, generating power for the lights. These fell out of favor over the years as batteries got better and cheaper and people grew tired of the increased drag and maintenance required. Despite this, the idea of generating power onboard a bicycle has never really gone away, and [Javier] has decided to have a crack with his imPulse project.

The formerly popular bottle dynamo had one advantage over contemporary models located in bicycle hubs – they were geared down to allow the generating device to make multiple turns for each revolution of the bicycle wheel. This is useful to allow the generating device to operate in its ideal range of rotational speed. Going for a more modern take, however, [Javier] has decided to leverage a stepper motor as his generating device of choice. Further taking advantage of modern technology, the imPulse system is designed to fit on to the caliper mounts of modern bicycles with disc brakes, allowing easy fitment while also leaving room for a geared-down drive.

[Javier] hasn’t just stopped at power generation, however – there are also plans for lighting systems and power distribution to enable the generated power to be used for a variety of purposes. It even has turn signals – though that’s not the first time we’ve seen them on a bike! Video after the break.

Continue reading “Regenerative Braking Charges Your Phone”