Boost Your WiFi Range With Cookware

WiFi was the killer technology that made home networking easy. No more messing around with hubs and cables and drilling holes in walls, simply turn the devices on and hit connect. Over time the speed and range has increased, but those with larger houses or granny flats out back have suffered. There are tricks to boost range however, and some of them involve cookware.

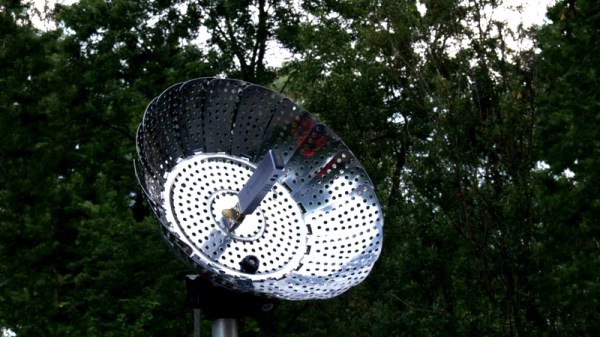
The clever hack here is to use a metal strainer as a parabolic reflector, to capture signals and focus them onto the PCB antenna in a USB WiFi dongle. The strainer is drilled out, and a USB extension cable has its female end glued into the base. This allows the dongle to be positioned inside the strainer. For best results, the dongle should be positioned so that its antenna elements are sitting at the focal point of the parabola; this can be determined through mathematics or simply by experimenting with positions to see what gives the best signal strength.

It’s a design that is quite directional, and should help boost signals as well as block out those from unwanted stations. The build is simple, and can even be tripod mounted which helps with aiming and looks cool to boot.

For many, WiFi antenna hacks are old school, but it’s always good to keep the techniques in mind as you never know when it will come in handy to solve a new problem. Some crazy things are possible with the right gear, too.

CPAP Monitor Alerts Wearer To Malfunctions

Continuous Positive Airway Pressure machines are a common treatment tool for sleep apnea and other respiratory issues. A common problem with their use is that the mask becomes dislodged during sleep, and thus fails to provide airway pressure to the patient. [Bin Sun] decided to take a stab at solving this problem.

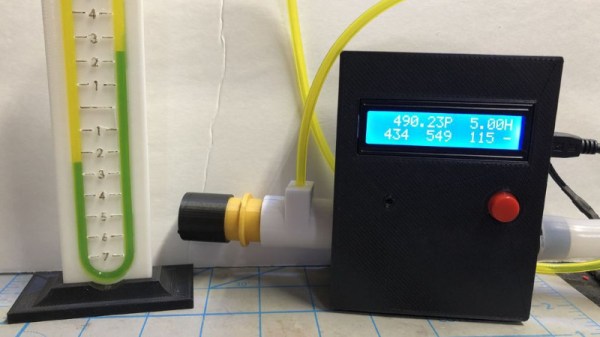
The project consists of an Arduino fitted with a MPXV7002DP pressure sensor. The sensor is used to monitor the pressure in the CPAP pipes. If the pressure varies regularly, it is likely the system is working. If however, the pressure remains at a roughly constant level, that suggests the mask is no longer properly fitted to the wearer, or that there is another problem. In this event, the device sounds a buzzer to wake the wearer, alerting them to check the equipment.

It’s a simple solution to the problem, and something we’re surprised isn’t built into most CPAP machines from the factory. It’s important to be careful before modifying any medical equipment, though we see plenty of hackers taking the plunge to innovate in this area.

Abraham Wald’s Problem Solving Lesson Is To Seek What’s Not There

You may not know the name Abraham Wald, but he has a very valuable lesson you can apply to problem solving, engineering, and many other parts of life. Wald worked for the Statistical Research Group (SRG) during World War II. This was part of a top secret organization in the United States that applied elite mathematical talent to help the allies win the war. Near Columbia University, mathematicians and computers — the human kind — worked on problems ranging from how to keep an enemy plane under fire longer to optimal bombing patterns.

One of Wald’s ways to approach problem was to look beyond the data in front of him. He was looking for things that weren’t there, using their absence as an additional data point. It is easy to critique things that are present but incorrect. It is harder to see things that are missing. But the end results of this technique were profound and present an object lesson we can still draw from today.

Continue reading “Abraham Wald’s Problem Solving Lesson Is To Seek What’s Not There”

Supercon CFP Extended By Two Weeks

Need a bit more time to submit your talk proposal for the 2019 Hackaday Superconference? Okay, but we can only do this once. You now have until August 16th to submit your proposal.

Supercon is the ultimate hardware conference. Take all the best conversations you’ve had about electronics, firmware development, industrial design, art, music, and culture and pack them into three incredible days in Pasadena. That’s the start of what you’ll find at this event. There is no substitute for experiencing it in person.

What makes this so unique is the people who show up. We are forever on the search of people with clever, compelling, delightful, and bizarre stories about hardware creation… and that means you. Yes, you! Supercon is a great place to give your first-ever conference talk. Package up the details of your recent hardware adventures and send them in as a proposal. The biggest mistake we see people make is assuming nobody wants to hear about what’s going on in their workshop or lab. Long talk or short talk, we want to hear your talk!

Take the plunge, the water is warm the so are the soldering irons which run constantly in the Hacker Village that forms during Supercon. There are still tickets available, but of course, speaker receive our undying gratitude and of course, free admission.

A Look At The Basics Of Building An Arduino Watch

Miniaturization has made smart watches possible, even for the DIY maker to tinker with. For those just getting to grips with basic digital electronics, it can be daunting, however. For those just starting out, [陳亮] put together a handy guide to building the core of an Arduino-based watch.

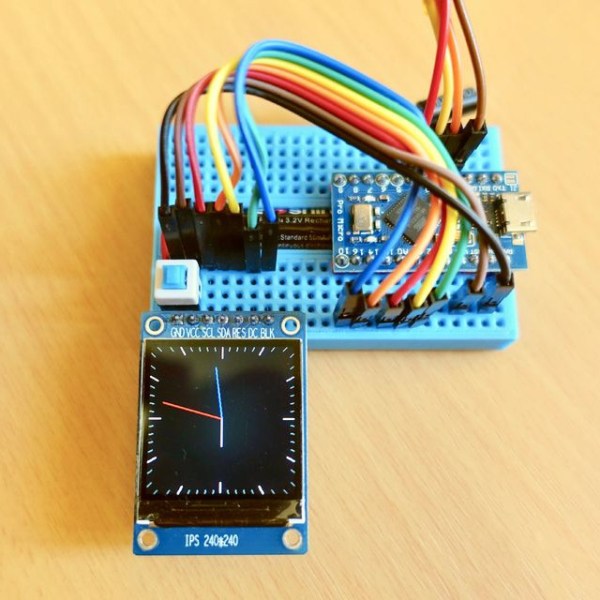
The writeup starts at the beginning, going over the basic hardware requirements for a smart watch. This involves considering size, packaging and power draw, as well as the user interface. The build settles on an Arduino Pro Micro, as it uses the ATmega32U4 which eliminates secondary USB-to-serial chips, helping cut down on power consumption. A square IPS LCD display is used to display an analog-style watch face, and time is kept by a DS3231 real-time clock. A pair of small vibration sensors are used to wake the watch when the user moves their wrist to check the time.

While it doesn’t cover the final assembly into a watch-like form factor, it’s a handy guide on what it takes to build a working watch for those who are still getting their feet wet with hardware. Once you’ve got that down, it’s time to contemplate how you’ll build the sleek exterior. Naturally, a good maker has that covered, too.

Automate The Freight: When The Freight Is People

Before I got a license and a car, getting to and from high school was an ordeal. The hour-long bus ride was awful, as one would expect when sixty adolescents are crammed together with minimal supervision. Avoiding the realities going on around me was a constant chore, aided by frequent mental excursions. One such wandering led me to the conclusion that we high schoolers were nothing but cargo on a delivery truck designed for people. That was a cheery fact to face at the beginning of a school day.

What’s true for a bus full of students is equally true for every city bus, trolley, subway, or long-haul motorcoach you see. People can be freight just as much as pallets of groceries in a semi or a bunch of smiling boxes and envelopes in a brown panel truck. And the same economic factors that we’ve been insisting will make it far more likely that autonomous vehicles will penetrate the freight delivery market before we see self-driving passenger vehicles are at work with people moving. This time on Automate the Freight: what happens when the freight is people?

Continue reading “Automate The Freight: When The Freight Is People”

Driving P5 Panels With A Raspberry Pi

Building displays out of LEDs can be fun, but quickly becomes tedious as the pixel count increases. At this point, it’s worthwhile investing in off-the-shelf panels that have everything pre-soldered and ready to go. [Tom Hammond] wanted to run a P5 panel, and put a Raspberry Pi to work to get it going.

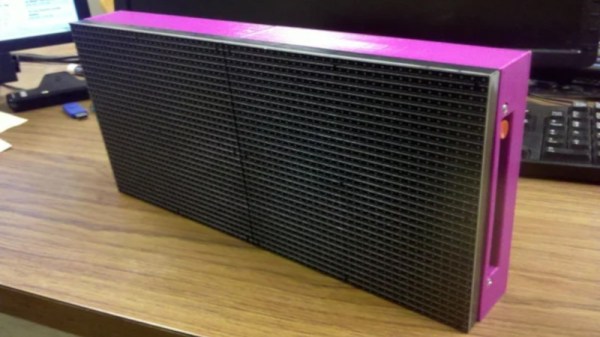
P5 panels are so-called for their 5 mm spacing between LEDs. The panels in question are built with RGB LEDs, allowing full-color graphics to be displayed. In this build, a 64 x 32 panel is used for a total of 2048 pixels. A Raspberry Pi Zero runs the display, using its GPIO to clock out pixel data. Software designed for Christmas light displays is used to program the light show, with xLights being the choice in this case. It’s all wrapped up in a tidy 3D printed frame, and the final product looks remarkably well put together.

It’s a great way to get familiar with P5 panels, and an excellent starting point if you’re contemplating a larger build down the track. If you’re going all out, consider how to make the most of your install from an architectural perspective. Video after the break.

Continue reading “Driving P5 Panels With A Raspberry Pi”