The Righteous Quest To Crack A Canon I9900

[Starhawk] is a man with a problem. More accurately, he’s a man whose mother has a problem, but ultimately that ends up being the same thing. Her wide-format Canon printer recently stopped working after better than a decade of reliable service, and he wants to know why. Rather than spend the money on buying a new printer, he’s determined to find out if she’s been the victim of planned obsolescence by reverse engineering the Canon i9900 to see what makes it tick (or stop ticking, as the case may be).

In the absence of any obvious hardware faults, [Starhawk] has suspicions that the machine’s QY6-0055 printhead has run over some internal “odometer” and simply turned itself off. We’ve all seen similar trickery at play when trying to use third party ink cartridges in our printers, so it’s certainly not outside the realm of possibility that the Canon i9900 is designed to reject heads once they’ve seen enough usage. Perhaps the biggest clue is that the QY6-0055 has a Seiko S93C56BR EEPROM on the board that’s keeping track of…something.

Right now, [Starhawk] is devoting his energies on trying to make sense of the data he pulled from the EEPROM using his TL866A programmer. But that’s no easy feat with a sample size of just one, which is why he’s looking for help. He’s hoping that other hackers with similar printers (and ideally ones that use the same QY6-0055 head) could submit their own EEPROM dumps and the community could get to work trying to decipher what’s stored on the chips. He’s really hoping that somebody at Canon might be willing to sneak him a couple tips on what he should be looking for, but at this point we think he’ll take whatever assistance he can get.

Now to be fair, there’s really no way to know definitively if there’s some flag stored on the EEPROM that’s keeping the printer from working. It could just be good old fashioned hardware failure, which would hardly be a surprise for a piece of consumer electronics from 2005. But even if the effort to understand the Canon’s EEPROM doesn’t get him any closer to a working printer, we still think it’s a fascinating example of real-world reverse engineering that’s worth it for the experience alone.

There’s a long history of hackers doing battle with their printers, from emulating an ink cartridge with a microcontroller to reinking the ribbon of a vintage 1980s behemoth. We’re interested in seeing where this project takes [Starhawk], but no matter what happens there are likely to be some interesting discoveries made along the way.

X-Printer Fits In A Backpack

3D printers are great for rapid prototyping, but they’re not usually what you’d call… portable. For [Malte Schrader], that simply wouldn’t do – thus, the X-printer was born!

The X-printer is a fused-deposition printer built around a CoreXY design. Its party piece is its folding concertina-style Z-axis, which allows the printer to have a build volume of 160x220x150mm, while measuring just 300x330x105mm when folded. That’s small enough to fit in a backpack!

Getting the folding mechanism to work took some extra effort, with the non-linear Z-axis requiring special attention in the firmware. The printer runs Marlin 1, chosen for its faster compile time over Marlin 2. Other design choices are made with an eye to ruggedness. The aluminium frame isn’t as light as it could be, but adds much needed rigidity and strength. We’d love to see a custom case that you could slide the printer into so it would be protected while stowed.

It’s a build that shows there’s still plenty to be gained from homebrewing your own printer, even in the face of unprecedented options on the market today. We’ve seen other unique takes on the portable printer concept before, too. Video after the break.

Continue reading “X-Printer Fits In A Backpack”

Review: The RC2014 Micro Single-Board Z80 Retrocomputer

At the end of August I made the trip to Hebden Bridge to give a talk at OSHCamp 2019, a weekend of interesting stuff in the Yorkshire Dales. Instead of a badge, this event gives each attendee an electronic kit provided by a sponsor, and this year’s one was particularly interesting. The RC2014 Micro is the latest iteration of the RC2014 Z80-based retrocomputer, and it’s a single-board computer that strips the RC2014 down to a bare minimum. Time to spend an evening in the hackerspace assembling it, to take a look!

It’s An SBC, But Not As You Know It!

The kit contents
The kit contents

The kit arrives in a very compact heat-sealed anti-static packet, and upon opening was revealed to contain the PCB, a piece of foam carrying the integrated circuits, a few passives, and a very simple getting started and assembly guide. The simplicity of the design becomes obvious from the chip count, there’s the Z80 itself, a 6850 UART, 27C512 ROM, 62256 RAM, 74HCT04 for clock generation, and a 74HCT32 for address decoding. The quick-start is adequate, but there is also a set of more comprehensive online instructions (PDF) available.

I added chip sockets and jumpers to my kit.

Assembly of a through-hole kit is hardly challenging, though this one is about as densely-packed as it’s possible to make a through-hole kit with DIP integrated circuits. As with most through-hole projects, the order you pick is everything: resistors first, then capacitors, reset button and crystal, followed by integrated circuits.

I’m always a bit shy about soldering ICs directly to a circuit board so I supplemented my kit with sockets and jumpers. The jumpers are used to select an FTDI power source and ROM addresses for Grant Searle’s ROM BASIC distribution or Steve Cousins’ SCM 1.0 machine code monitor, and the kit instructions recommended hard-wiring them with cut-off resistor wires. There was no row of pins for the expansion bus because this kit was supplied without the backplane that’s a feature of the larger RC2014 kits, but it did have a set of right-angle pins for an FTDI serial cable.

Your Arduino Doesn’t Have A Development Environment On Board!

Having assembled my RC2014 Mini and given it a visual inspection it was time to power it up and see whether it worked. Installing the jumper for FTDI power, I attached my serial cable and plugged it into a USB port.

A really nice touch is that the Micro has the colours for the serial cable wires on the reverse side of the PCB, taking away the worry of getting it the wrong way round. A quick screen /dev/ttyUSB0 115200 to get a serial terminal from a bash prompt, hit the reset button, and I was rewarded with a BASIC interpreter. My RC2014 Micro worked first time, and I could straight away give it BASIC commands such as PRINT "Hello World!" and be rewarded with the expected output.

The SCM ROM monitor.

So I’ve built a little Z80 single board computer, and with considerably less work than that required for the fully modular version of the RC2014. Its creator Spencer tells me that the Micro was originally designed as a bargain-basement RC2014 as a multibuy for workshops and similar activities, being very similar to his RC2014 mini board but without provision for a Pi Zero terminal and a few other components. It lacks the extra hardware required for a more comprehensive operating system such as CP/M, so I’m left with about as minimal an 8-bit computer as it’s possible to build using parts available in 2019. My question then is this: What can I do with it?

So. What Can I Do With An 8-bit SBC?

My first computer was a Sinclair ZX81, how could it possibly compare this small kit that was a giveaway at a conference? Although the Sinclair included a black-and-white TV display interface, tape backup interface, and keyboard, the core computing power was not too far different in its abilities from this RC2014 Micro — after all, it’s the same processor chip. It was the platform that introduced a much younger me to computing, and straight away I devoured Sinclair BASIC and then went on to write machine code on it. It became a general-purpose calculation and computing scratchpad for repetitive homework due to the ease of BASIC programming, and with my Maplin 8255 I/O port card I was able to use it in the way a modern tech-aware kid might use an Arduino.

The RC2014 Micro is well placed to fill all of those  functions as a BASIC and machine code learning platform on which to get down to the hardware in a way you simply can’t on most modern computers, and though the Arduino represents a far more sensible choice for hardware interfacing there is also an RC2014 backplane and I/O board available for the Micro’s expansion bus should you wish to have a go. Will I use it for these things? It’s certainly much more convenient than its full-sized sibling, so it’s quite likely I’ll be getting my hands dirty with a little bit of Z80 code. It’s astounding how much you can forget in 35 years!

The RC2014 Micro can be bought from Spencer’s Tindie store, with substantial bulk discounts for those workshop customers. If you want the full retrocomputer experience it’s a good choice as it provides about as simple a way into Z80 hardware and software as possible. The cost of simplicity comes in having no non-volatile storage and in lacking the hardware to run CP/M, but it has to be borne in mind that it’s the bottom of the RC2014 range. For comparison you can read our review of the original RC2014, over which we’d say the chief advantage of the Micro is its relative ease of construction.

Get Hands-On At Supercon: Workshop Tickets Now Available

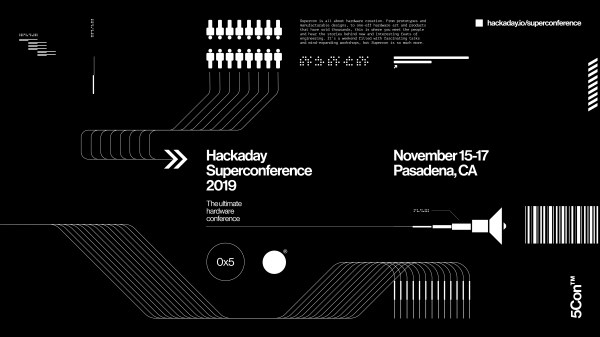
Build something cool and pick up new skills from the workshops at the Hackaday Superconference. But decide right now, workshops will sell out and tickets to the conference itself are nearly gone.

You must have a Superconference ticket in order to purchase a workshop ticket; buy one right now if you haven’t already. We think this is “The Year of the FPGA” and we hope you do too — the badge is based on an FPGA running a RISC-V core and using Open Source tools. Try your hand at FPGA for the first time, hone your skills in the advanced course, or design synthesizer circuits using all of those gates in workshops using the badge itself.

But of course it’s not all about the badge. Jump into quantum computing, learn how to use living hinges in your 3D printed designs, sharpen your low-level C, and sit down at the Scanning Electron Microscope. You can brush up on capacitive touch design, learn about rolling-your-own USB devices, hack together a malicious hardware implant, and get your projects connected to the cloud.

Space in these workshops is limited so make sure to sign up before all the seats are taken. The base price for workshops is $15 (basically a “skin in the game” price to encourage those who register to show up). Any tickets priced above that base is meant to cover the material expense of the workshop. Here’s what we have planned:

Introduction to FPGA Hacking on the Supercon Badge

Piotr Esden-Tempski, Sylvain Munaut, Mike Walters, Sophi Kravitz

In this basic FPGA badge workshop you will get a quick introduction on how to add and program new virtual hardware on your Supercon badge. While a microcontroller always has a fixed set of hardware, the badge has an FPGA that can be reprogrammed and the RISC-V microcontroller inside the FPGA can be changed. In this workshop you will learn how to synthesize an existing IP core to your RISC-V core on the badge and how to use that new added hardware.

(To include as many people as possible, this workshop will be held in a least four identical sessions, please choose one.)

Introduction to Quantum Computing

Kitty Yeung

You’ll learn the basic physics and math concepts needed to get started with quantum computing. There will also be coding so please bring your computers. Instructions on installing Quantum Development Kit will be provided prior to the workshop.

USB Reverse Engineering: Ultra-Low-Cost Edition

Kate Temkin & Mikaela Szekely

Interested in learning more about the inner workings of USB? In this workshop we’ll cover some of the basic, low-level details of USB, then go into detail on how you can interact with (and create!) USB devices as a hobbyist, engineer, or hacker.

SEM Scan Electron Microscope

Adam McCombs

Come get hands-on with an Electron Microscope! In this workshop you will get a chance to get on console on a JEOL JSM-840 Scanning Electron Microscope (SEM) capable of resolving 5nm details. We’ll cover all aspects of running an SEM, be that setup and alignment, sample preparation, or imaging.

Logic Noise: Build Silly Synths in the FPGA Fabric of the Supercon Badge

Elliot Williams

Most FPGA programming classes start off with the basics of logic circuits and how they’re implemented in an FPGA, and then jump 30 years into the present where FPGA design consists of downloading someone else’s IP and ironing out the timing bugs. But not this one! We’re going to stay fully stuck in the past: playing around with the combinatorial logic possibilities inside the Superconference badge’s FPGA fabric to make glitchy musical instruments. If you followed Hackaday’s Logic Noise series, you know how to make crazy noisemakers by abusing silicon on breadboards. In this workshop, we’ll be coding up the silicon and the breadboard. Whoah.

Prototyping Malicious Hardware on the Cheap

Joe FitzPatrick

Alleged multi-million-dollar hardware attacks might catch headlines, but what can we DIY with limited time and budget? We’ll have all the tools you need to prototype, build, and test both the hardware and software of a custom malicious hardware implant.

Advanced FPGA Hacking on the Supercon Badge

Piotr Esden-Tempski

In this advanced FPGA badge workshop you will learn how to develop your own simple FPGA IP core. You already know how to program microcontrollers and how memory-mapped IO works, but you want to go beyond that and develop your own hardware? This class is an introduction on how to write, synthesize and add new hardware periphery on your Supercon badge.

Flexure Lecture: designing springy and bi-stable mechanisms

Amy Qian

Flexures are used all around us to provide simple spring force, constrain degrees-of-freedom of motion, make satisfying clicky sounds, and much more. In this workshop, you’ll learn about basic flexure design, see lots of examples of how you might use them in your future projects, and assemble your very own laser-cut gripper mechanism.

Microcontrollers the Hard Way: Blink Like a Pro

Shawn Hymel (sponsored by Digi-Key)

Registers, timers, and interrupts, oh my! Get those semicolon-punching fingers ready, because we’re writing some C. Arduino, MicroPython, CircuitPython, and MakeCode have been steadily making microcontrollers easier to use and more accessible for a number of years. While ease-of-use is thankfully making embedded systems available to anyone, it means that writing optimized code still remains somewhat of a mystery, buried beneath layers of abstraction. In this workshop, we’ll write a simple fading LED program using registers, timers, and interrupts in an AVR ATtiny microcontroller. This workshop will help you understand some of the low-level, inner workings of microcontrollers and start to write space efficient and computationally quick code.

DK IoT Studio Using the ST NUCLEO-L476RG Sensor Demo

Robert Nelson (sponsored by Digi-Key)

This workshop is about developing an end-to-end solution, from sensor to the cloud. Learn about all the different elements involved in the design, from the sensor, to the processor, to connectivity, cloud storage, and data visualization. Participants will learn to develop an IoT application using the ST NUCLEO-L476RG Development Board. Learn to use Digi-Key IoT Studio design environment to connect easily to the cloud and visualize your data in real time. The new tool has a graphical user interface that allows for easy drag-and-drop functionality. Participants will be able to send data to the cloud thru the development environment and visualize the data.

From Outdated to Outstanding: Easily Add a Touchpad to Your Next Design

TBD (sponsored by Microchip)

What if you could easily make your design more advanced, and let’s face it, cooler? You can, and we can show you how by replacing your old-school pushbuttons with capacitive touch buttons or touchpad! In this workshop, we will practice how to use Microchip’s graphic code generator to produce the code for a simple water-tolerant touchpad. The capacitive touch sensing expert from Microchip will also introduce some tips and tricks of how to lay out a touch button. Come and find out everything you need to know about adding a touch button to your next design!


Superconference workshops tend to sell out extremely quickly. Don’t wait to get your ticket.
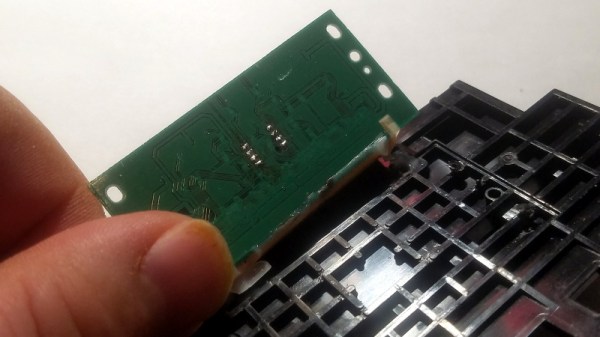
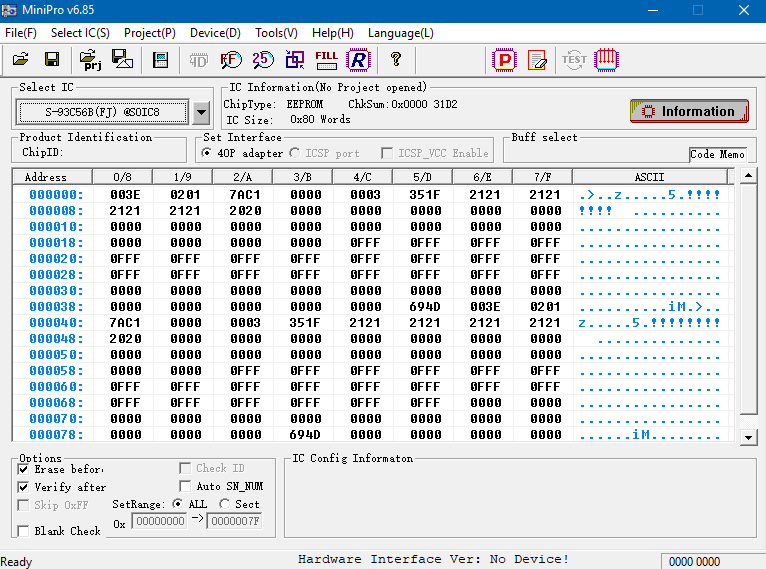
Think IN18s Are Cool? Get A Load Of This Must-Have Custom Nixie Tube

Us: “I’ll take Retro style displays we absolutely have to have for $200, Alex.”

Trebek: “This nixie tube is unlike any conventional tube you’ve seen before, handbuilt and NOT numbers or letters.”

Us: “What is FriendlyWire’s new logo tube?”

Trebek: “Heck yeah.”

Nixie tubes are the vacuum technology that manages to do far less than a graphic LCD while looking about a million times cooler. Generally speaking, these tubes are no longer manufactured, and the old stock you can get your hands on usually contain a set of filaments shaped like numbers. But @FriendlyWire’s tweet of this Nixie tube by [Dalibor Farny] breaks both of those rules. This handmade tube isn’t just a numerical display or a colon display (the punctuation mark, get your head out of the gutter). It’s a custom logo, and it’s beautiful.

Continue reading “Think IN18s Are Cool? Get A Load Of This Must-Have Custom Nixie Tube”

When Does Moving To Resin 3D Printing Make Sense?

An Elegoo Mars resin 3D printer, straight to my doorstep for a few hundred bucks. What a time to be alive.

Resin-based 3D printers using digital light processing (DLP) and especially stereolithography (SLA) are getting more common and much more affordable. Prosumer-level options like Formlabs and the Prusa SL1 exist, but more economical printers like the Elegoo Mars, Anycubic Photon, and more can be had for a few hundred bucks. Many printers and resin types can even be ordered directly from Amazon, right at this moment.

Resin prints can look fantastic, so when does it make sense to move to one of these cheap resin printers? To know that, consider the following things:

  • The printing process and output of resin printers is not the same as for filament-based printers. Design considerations, pre-processing, and post-processing are very different.
  • Resin printing has a different workflow, with consumables and hidden costs beyond the price of resin refills.

Things may not be quite where fused deposition modeling (FDM) printers were just a few short years ago when we were extremely impressed with the quality of printer one could get for about $200, but it is undoubtedly far more accessible than ever before. Let’s look at how to inform a decision about whether to take the plunge. Continue reading “When Does Moving To Resin 3D Printing Make Sense?”

Interactive LED Dome Glows With The Best Of Them

With the price and availability of components these days, it’s easier than ever to throw a whole pile of LEDs at a build and get them flashing away. The hard part is doing it well. [Amy Goodchild] is an artist, and has a knack for producing rather beautiful LED projects. The When in Dome installation is no exception.

The build is based around a large geodesic dome, fitted with LED panels that glow and react to the occupants inside. Using the Microsoft Kinect as a sensor enables the dome to map out what’s happening in 3D space, and use this data to guide its animations. WS2812B LED strips were used, in combination with a Fadecandy controller along with Processing. This is a powerful combination which makes designing attractive LED effects easier, without forcing users to go to the effort of writing their own libraries or optimizing their microcontroller code.

For those more interested in the dome itself, you’ll be happy to know that [Amy] doesn’t skimp on the details there either. The build actually started as a commercially available kit, though there’s still plenty of manual cutting, screwing, and painting required. She does an excellent job documenting the dome build through a series of videos, and walks the reader through some of the design decisions she made (and would remake, if given the chance).

People love geodesic domes at the best of times; adding an interactive LED installation just takes things to the next level. We’ve seen them used as greenhouses too, and they make a great hackerspace project as well. Video after the break.

Continue reading “Interactive LED Dome Glows With The Best Of Them”