Connecting Commercial 433 MHz Sensors To MQTT And Home Assistant With RTL-SDR

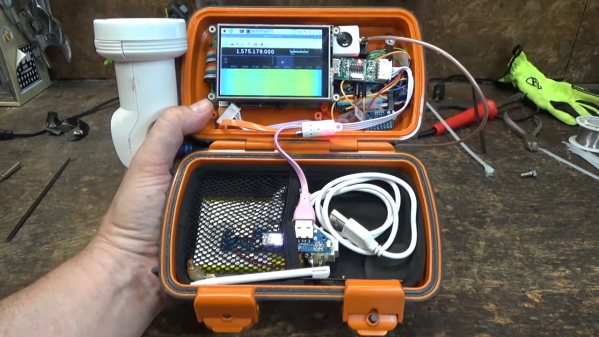
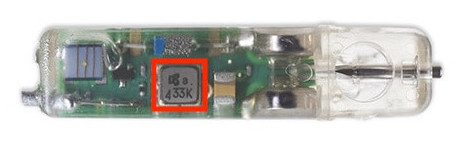
When [Elixir of Progress] was looking at setting up environmental sensors around their home to keep track of temperature, humidity and such, the obvious ideas of using WiFi-connected sensors didn’t work due to lack of WiFi range. Although Zigbee (Z-wave) sensors have longer range than WiFi, they are decidedly more expensive, proprietary and require a special transceiver hub. That’s where 433 MHz sensors for weather stations come into the picture.

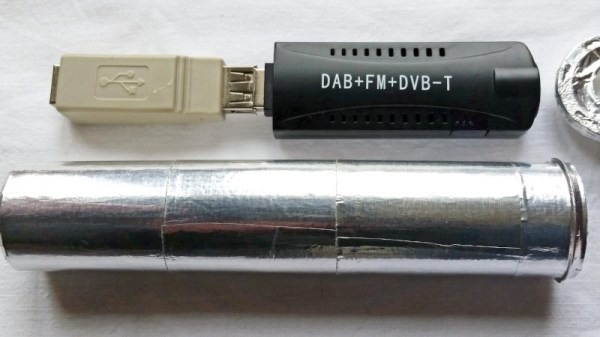
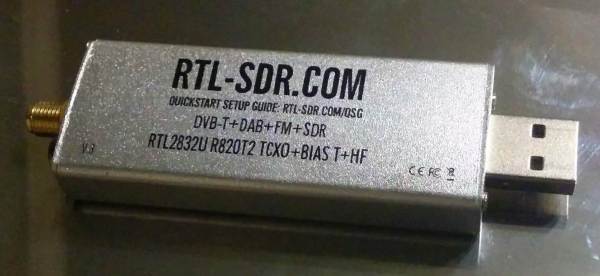
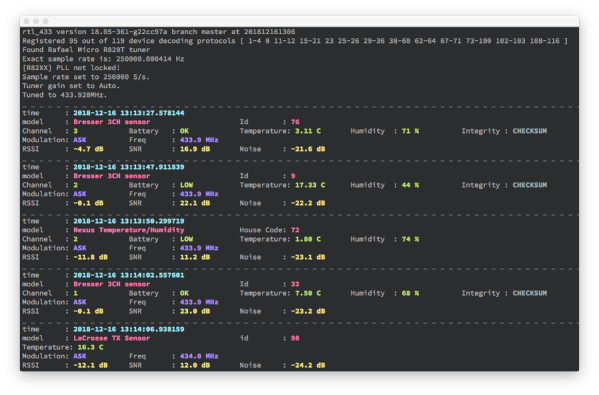
The idea is simple: virtually all of those sensors – many of them rated for outdoor use – use the unlicensed 433 MHz spectrum that can easily be captured using cheap RTL-SDR (software defined radio) USB dongles. With the data stream from these sensors captured, the open source rtl_433 project enables automatic decoding of these data streams for a wide range of supported sensors.

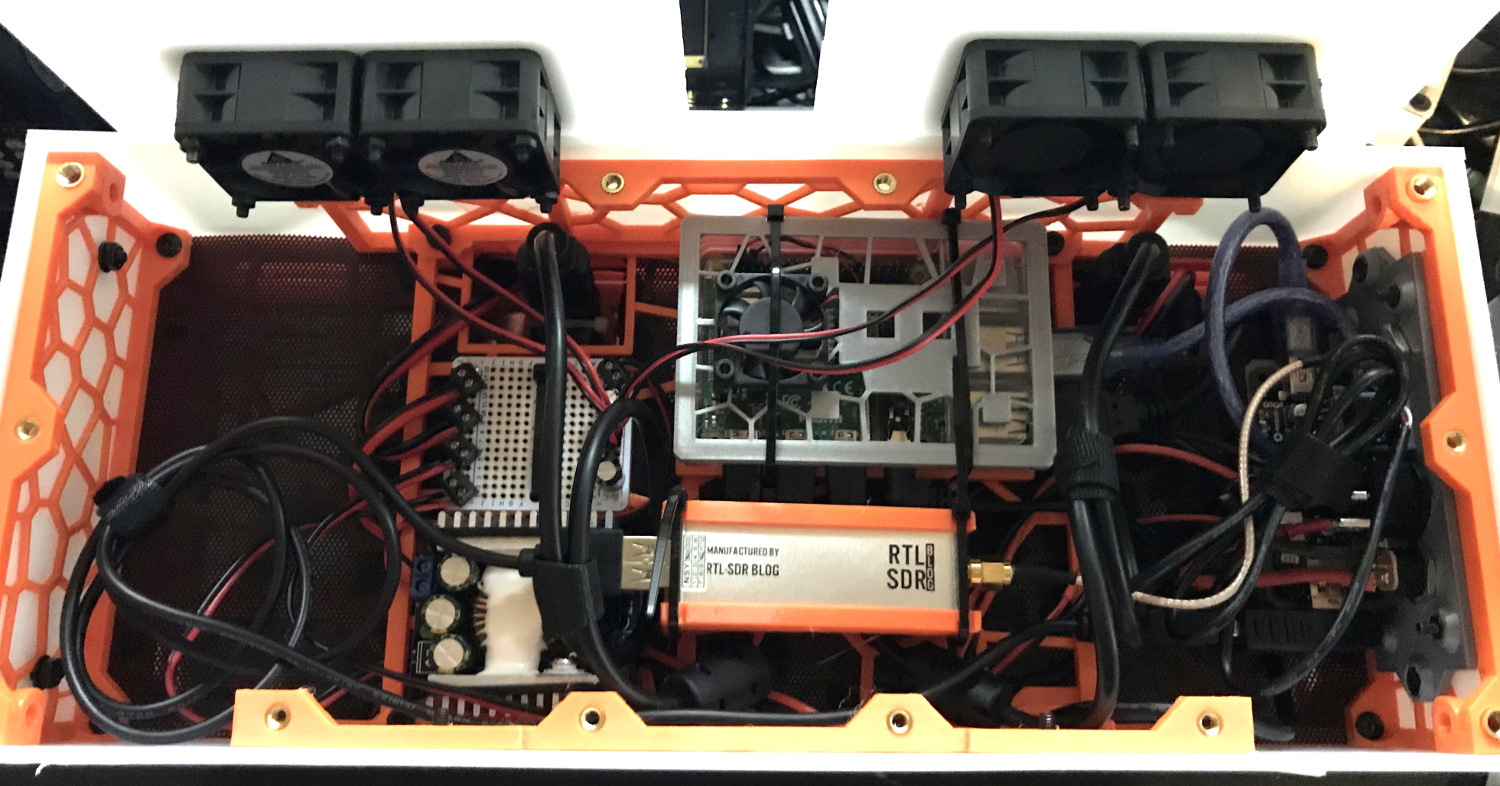
While Realtek RTL2832-based and other RTL-SDRs can be found for quite cheap, it should be noted that these can run quite hot. Rather than heatsinking the IC, for this project it was elected to only listen sporadically and allow the RTL-SDR receiver to cool down in between listening sessions.

Getting the data from there into Home Assistant, InfluxDB or similar is easy, as rtl_433 can output the decoded data directly to an Influx database, MQTT broker as well as other formats. In this case, the data was sent via MQTT with the Home Assistant instance configured to treat these MQTT topics as sensors. With each sensor’s location carefully registered, this allows for setting up a dense, very low-power network of 433 MHz sensors for monitoring and home automation purposes.

Snooping On Starlink With An RTL-SDR

With an ever-growing constellation of Starlink satellites whizzing around over our heads, you might be getting the urge to start experimenting with the high-speed internet service. But at $100 or more a month plus hardware, the barrier to entry is just a little daunting for a lot of us. No worries, though — if all you’re interested in is tracking [Elon]’s birds, it’s actually a pretty simple job.

Now, we’re not claiming that you’ll be able to connect to Starlink and get internet service with this setup, of course, and neither is the delightfully named [saveitforparts]. Instead, his setup just receives the beacon signals from Starlink satellites, which is pretty interesting all by itself. The hardware consists of his “Picorder” mobile device, which sports a Raspberry Pi, a small LCD screen, and a host of sensors, including an RTL-SDR dongle. To pick up the satellite beacons, he used a dirt-cheap universal Ku-band LNB, or low-noise block downconverter. They’re normally found at the focal point of a satellite TV dish, but in this case no dish is needed — just power it up with a power injector and point it to the sky. The signals show up on the Picorder’s display in waterfall mode; curiously, the waterfall traces look quite similar to the patterns the satellites make in the night sky, much to the consternation of astronomers.

Of course, you don’t have to have a Picorder to snoop in on Starlink — any laptop and SDR should work, despite [saveitforparts]’ trouble in doing so. You shouldn’t have much trouble replicating the results by following the video below, which also has a few tips on powering an LNB for portable operations.

Continue reading “Snooping On Starlink With An RTL-SDR”

Shielding A Cheap RTL-SDR Stick

Even though not every Hackaday reader is likely to be a radio enthusiast, it’s a fair guess that many of you will have experimented with an RTL-SDR USB dongle by now. These super-cheap devices are intended for digital TV reception and contain an RTL2832 chip, which with the proper software, can be pushed into service as a general purpose software defined radio receiver. For around $10 USD they’re fantastic value and a lot of fun to play with, even if they’re not the best radio ever. How to improve the lackluster performance? One of the easiest and cheapest ways is simply to shield it from RF noise, which [Alan R] has done with something as mundane as a tubular fizzy orange tablet container.

This is probably one of the simpler hacks you’ll see on this site, as all it involves is making an appropriate hole in the end of the tube and shielding the whole with some aluminium foil sticky tape. But the benefits can be seen immediately in the form of reduced FM broadcast band interference, something that plagues the cheaper dongles.

Perhaps the value in this hack aside from how easy it is on a cheap dongle is that it serves to remind us some of the benefits of paying a little extra for a better quality device. If you’d like to know more about RTL-SDR improvements, it’s a topic we covered in detail back in 2019 when we looked at seven years of RTL-hackery.

Tuning Into Medical Implants With The RTL-SDR

With a bit of luck, you’ll live your whole life without needing an implanted medical device. But if you do end up getting the news that your doctor will be installing an active transmitter inside your body, you might as well crack out the software defined radio (SDR) and see if you can’t decode its transmission like [James Wu] recently did.

Before the Medtronic Bravo Reflux Capsule was attached to his lower esophagus, [James] got a good look at a demo unit of the pencil-width gadget. Despite the medical technician telling him the device used a “Bluetooth-like” communications protocol to transmit his esophageal pH to a wearable receiver, the big 433 emblazoned on the hardware made him think it was worth taking a closer look at the documentation. Sure enough, its entry in the FCC database not only confirmed the radio transmitted a 433.92 MHz OOK-PWM encoded signal, but it even broke down the contents of each packet. If only it was always that easy, right?

The 433 ended up being a coincidence, but it got him on the right track.

Of course he still had to put this information into practice, so the next step was to craft a configuration file for the popular rtl_433 program which split each packet into its principle parts. This part of the write-up is particularly interesting for those who might be looking to pull data in from their own 433 MHz sensors, medical or otherwise

Unfortunately, there was still one piece of the puzzle missing. [James] knew which field was the pH value from the FCC database, but the 16-bit integer he was receiving didn’t make any sense. After some more research into the hardware, which uncovered another attempt at decoding the transmissions from the early days of the RTL-SDR project, he realized what he was actually seeing was the combination of two 8-bit pH measurements that are sent out simultaneously.

We were pleasantly surprised to see how much public information [James] was able to find about the Medtronic Bravo Reflux Capsule, but in a perfect world, this would be the norm. You deserve to know everything there is to know about a piece of electronics that’s going to be placed inside your body, but so far, the movement towards open hardware medical devices has struggled to gain much traction.

Comparing Shortwave Antennas With RTL-SDR And Python

Measuring the performance of antennas in absolute terms that can involve a lot of expensive equipment and specialized facilities. For practical applications, especially when building antennas, comparing performance in relative terms is more practical. Using cheap RTL-SDR dongles and Python, [Eric Urban] was able to compare the performance of two shortwave/HF antennas, and documented the entire process.

The two antennas in question was a single band inverted-L and smaller broadband T3FD antenna. [Eric] first gathered performance data for each over few days, connected to separate PCs with RTL-SDRs via low-pass filters. These were set up to receive FT8 transmissions, a popular digital ham radio mode, which allowed [Eric] to automate data collection completely. GQRX, a software receiver, converted the signals to audio, which was then piped into WSJT-X for demodulation.

Data for each received FT8 transmission was recorded to a log file. [Eric] also modified GQRX and WSJT-X to give him all the remote control features he needed to automatically change frequencies. Between the two antenna setups, more than 100,000 FT8 transmissions were logged. Using the recorded data and Python he compared the number of received transmissions, the distance, and the heading to the transmitters, using the location information included in many FT8 transmissions. Where the same transmission was received by both antennas, the signal-to-noise ratios was compared.

From all this data, [Eric] was able to learn that the inverted-L antenna performed better than the T3FD antenna on three of the four frequency bands that were tested. He also discovered that the inverted-L appeared to be “deaf” in one particular direction. Although the tests weren’t perfect, it is impressive how much practical data [Eric] was able to gather with low-cost hardware. Continue reading “Comparing Shortwave Antennas With RTL-SDR And Python”

A Dual Screen Luggable With Integrated RTL-SDR

It’s been fascinating to watch the development of bespoke mobile computers go from a few sheets of foam board and a Raspberry Pi into hardware that looks like it’s actually been transported here from an alternate reality. Granted a Raspberry Pi is more often than not still onboard, but the overall design and construction techniques of these very personal computers has improved by leaps and bounds.

The latest of these cyberdecks, a dual screen “luggable” reminiscent of classic computers like the Compaq Portable or Kaypro, comes our way from [dapperrogue]. Powered by the Raspberry Pi 4 and featuring a scratch-built mechanical keyboard to perfectly fit the machines’s specific dimensions, this is easily one of the more practical builds we’ve seen. As visually striking as they may be, few would argue that the small offset display that seems characteristic of most decks are ideal from a usability standpoint.

While the keyboard plate was milled out on a CNC, [dapperrogue] says the design of the HDPE body panels and rear polycarbonate viewing window were simple enough they could be done by hand on a band saw. The PETG internal frame uses a Voronoi pattern that not only reduces the amount of time and material required to print it, but maximizes airflow. The fact that it looks like some kind of alien biological life form only helps the retro-futuristic aesthetics.

There’s still plenty of room inside the enclosure, which is good, as [dapperrogue] says there’s more goodies to come. Adding internal battery power is a logical next step, and now that the Pi 4 can boot to external drives, and SSD is also on the list of future upgrades.

For readers who might be getting a sense of déjà vu from this project, [dapperrogue] notes this design was inspired by the phenomenal Reviiser that [Dave Estes] released earlier this year.

Ham Radio Gets Embedded RTL-SDR

We usually think of the RTL-SDR as a low-cost alternative to a “real” radio, but this incredible project spearheaded by [Rodrigo Freire] shows that the two classes of devices don’t have to be mutually exclusive. After nearly 6 months of work, he’s developed and documented a method to integrate a RTL-SDR Blog V3 receiver directly into the Yaesu FT-991 transceiver.

The professional results of the hack are made possible by the fact that the FT-991 already had USB capability to begin with. More specifically, it had an internal USB hub that allowed multiple internal devices to appear to the computer as a sort of composite device.

Unfortunately, the internal USB hub only supported two devices, so the first order of business for [Rodrigo] was swapping out the original USB2512BI hub IC with a USB2514BI that offered four ports. With the swap complete, he was able to hang the RTL-SDR device right on the new chip’s pins.

Of course, that was only half of the battle. He had a nicely integrated RTL-SDR from an external standpoint, but to actually be useful, the SDR would need to tap into the radio’s signal. To do this, [Rodrigo] designed a custom PCB that pulls the IF signal from the radio, feed it into an amplifier, and ultimately pass it to the SDR. The board uses onboard switches, controlled by the GPIO ports on the RTL-SDR Blog V3, for enabling the tap and preamplifier.

In the video after the break, you can see [Rodrigo] demonstrate his modified FT-991. This actually isn’t the first time somebody has tapped into their Yaesu with a software defined radio, though this is surely the cleanest install we’ve ever seen.

Continue reading “Ham Radio Gets Embedded RTL-SDR”