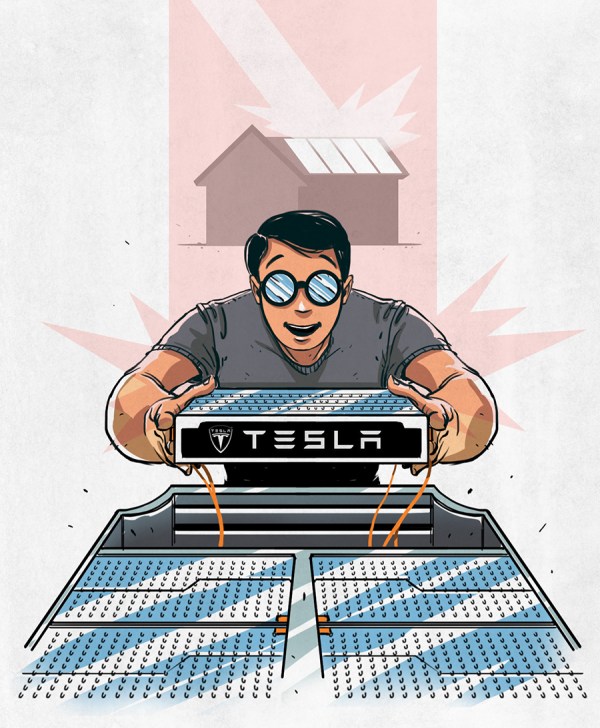
Make Flexible PCBs With Your 3D Printer

The last few years have seen great strides in budget printed circuit board manufacturing. These days you can have boards made in a week for only a few dollars a square inch. Flexible PCBs still tend to be rather expensive though. [Mikey77] is changing that by making flex circuits at home with his 3D printer. [Mikey77] utilized one of the properties of Ninjaflex Thermoplastic Elastomer (TPE) filament – it sticks to bare copper!

The TPE filament acts as an etch resist, similar to methods using laser printer toner. For a substrate, [Mikey77] lists 3 options:

.004″ thick “Scissor cut” copper clad board from Electronics Goldmine

.002″ thick pure copper polyester taffeta fabric from lessEMF.com

<.001″ Pyralux material from Adafruit, which is one of the materials used to make professional flex PCBs.

A bit of spray adhesive will hold the Flex PCB down on the printer’s bed. The only issue is convincing the printer to print a few thousandths of an inch higher than the actual bed level. Rather than change the home position on his Z axis, [Mikey77] used AutoDesk 123D to create 3D PCB designs. Each of his .stl files has a “spacer bar”, which sits at the bed level. The actual tracks to be printed are in the air a few thousandths of an inch above the bed – exactly the thickness of the substrate material. The printer prints the spacer bar on the bed, then raises its Z height and prints on the flexible PCB material. We’re sure that forcing the printer to print in mid-air like this would cause some printer software to throw errors, but the system worked for [Mikey77] and his Makerbot.

Once the designs have been printed, the boards are etched with standard etching solutions such as ferric chloride. Be careful though – these thin substrates can etch much faster than regular PCB.

Thumbnail that say The Hacklet

Hacklet 20 – Halloween Hacks

20

Hey, did you know that Hackaday.io is continuously being updated and improved? One of the coolest features this week is the new LaTeX based equation editor. That’s right, you can now put symbols, equations, and all sorts of other LaTeX goodies into your posts. Check out [Brian Benchoff’s] LaTeX demo project for more information.

Every holiday is a season for hacks, but Halloween has to be one of the best. From costumes to decorations, there are just tons of opportunities for great projects. We know that with an entire week left before the big day, most of you are still working on your projects. However a few early bird hackers already have Halloween themed projects up on Hackaday.io. We’re featuring them here – on the Hacklet!

pumpkin1[philmajestic] is in the Halloween spirit with his AVR Halloween Pumpkin. [Phil] created a motion activated Jack-o’-lantern with an ATmega328 as its brain. The AVR monitors a PIR motion sensor. When motion is detected, it flashes Jack’s LED eyes and plays spooky sound files from a WTV-020-16sd audio player. This is a great example of how a bit of work can create something cooler and infinitely more flexible than a store-bought decoration. Nice work [Phil]!

littlebitsPortraitThe littleBits crew have been working overtime on Halloween hacks this year. We definitely like their Halloween Creepy Portrait. A motion trigger, a servo, and a few glue bits are all it take to turn a regular portrait into a creepy one. When the motion detector is triggered, the servo moves a paper behind the portrait’s eyes. The replacement eyes look like some sort of demon or cat. Definitely enough to give us nightmares!

ironman[jeromekelty] helped his friend [Greg] build an incredible Animatronic Iron Man MKIII suit. The suit features RFID tags which trigger suit features. Since we’re talking about an Iron Man suit, “features” are things like shoulder rockets, boot thrusters, and a helmet that lifts up to reveal “Tony Stark”. No less than four Arduinos handle the various I/O’s. The suit even features an Adafruit WaveShield for authentic sounds! The electronics are just one piece of the puzzle here. [Greg] is a card-carrying member of the Replica Prop Forum. His MKIII suit is incredibly detailed. We especially like the weathering and battle damage!

tenticlesFinally, [Griff’s] son is going to be wearing a Crochet Cthulhu Mask, with Arduino controlled tentacles for Halloween this year. [Griff] is an experienced crochet hobbiest. He’s mixing his love of needlework with his love of electronics to build the animated Cthulhu mask for his 4-year-old son. The mask is based on a free crochet pattern from ravelry, though [Griff] is making quite a few changes to support his application. The mask will be smaller to fit a 4-year-old, and will contain servos to move the tentacles. We haven’t heard from [Griff] in a while, so if you see him, tell him to post an update on the mask!

If you haven’t started working on your Halloween hacks, get busy! But don’t forget to upload them to Hackaday.io! If we get enough, we’ll run a second Hacklet with even more great projects. Until then, you can check out our Halloween Projects List!

That’s about it for this frightful episode The Hacklet. As always, see you next week. Same hack time, same hack channel, bringing you the best of Hackaday.io!

I Love The Smell Of Rocket Candy In The Morning

[Grant Thompson aka “The King of Random”] has created a great tutorial on making sugar rocket motors. [Grant] is using a fuel based on potassium nitrate and sugar. Known as Rocket Candy or R-Candy in the amateur rocket community, various forms of this mixture have been used for decades. In fact, this is similar to one of the mixtures [Homer Hickam] and friends used to build rockets in his novel Rocket Boys.

[Grant] bought a cheap blender from the thrift store, which he used to grind his ingredients. You probably won’t want to use this blender for food after it’s been full of KNO3-based stump remover. The blender made quick work of grinding down the KNO3 to a fine powder. [Grant] then added in powdered sugar and carefully mixed the two by shaking, not by running the blender.

A 5″ length of schedule 40 PVC pipe made the rocket motor casing. The rocket motor’s end caps are made from ground clay cat litter. [Grant] rams the layers with a wooden dowel and hammer. First a top cap of clay, then the rocket fuel, then a bottom cap also of clay. With all the layers in place, he hand drilled a hole through the bottom cap and the entire fuel layer. Drilling all the way through turns the motor into a core burning rocket. The entire fuel cylinder burns away from the inside out, with more surface area than burning the end alone.

[Grant] tested his rocket motor at a remote location. We probably would have gone with an electric igniter rather than a fireworks style fuse, but the end result is the same. The rocket motor performed admirably, blasting up to over 2000 feet in altitude.

It goes without saying that working with solid rocket fuel isn’t something to be taken lightly. Something as simple as an air gap in the fuel could lead to a CATO, turning this rocket motor into a pipe bomb. We echo [Grant’s] suggestion to search for local amateur rocket clubs before trying this one at home.

Continue reading “I Love The Smell Of Rocket Candy In The Morning”

Thinkpad 701c: Reverse Engineering A Retro Processor Upgrade

[Noq2] has given his butterfly new wings with a CPU upgrade. Few laptops are as iconic as the IBM Thinkpad 701 series and its “butterfly” TrackWrite keyboard. So iconic in fact, that a 701c is part of the permanent collection of the Museum of Modern Art in New York.

Being a 1995 vintage laptop, [Noq2’s] 701c understandably was no speed demon by today’s standards. The fastest factory configuration was an Intel 486-DX4 running at 75 MHz. However, there have long been rumors and online auctions referring to a custom model modified to run an AMD AM-5×86 at 133 MHz. The mods were performed by shops like Hantz + Partner in Germany. With this in mind, [Noq2] set about reverse engineering the modification, and equipping his 701c with a new processor.

thinkpad-brainsurgeryThe first step was determining which AMD processor variant to use. It turns out that only a few models of AMD’s chips were pin compatible with the 208 pin Small Quad Flat Pack (SQFP) footprint on the 701c’s motherboard. [Noq2] was able to get one from an old Evergreen 486 upgrade module on everyone’s favorite auction site. He carefully de-soldered the AM-5×86 from the module, and the Intel DX4 from the 701c. A bit of soldering later, and the brain transplant was complete.

Some detailed datasheet research helped [noq2] find the how to increase the bus clock on his 5×86 chip, and enable the write-back cache. All he had to do was move a couple of passive components and short a couple pins on the processor.

The final result is a tricked out IBM 701c Thinkpad running an AMD 5×86 at 133 MHz. Still way too slow for today’s software – but absolutely the coolest retro mod we’ve seen in a long time.

Thumbnail that say The Hacklet

Hacklet 19 – Ham Radio

19

Amateur, or ham radio operators have always been hackers. For much of the early 1900’s, buying a radio was expensive or impossible. Hams would build their own rigs, learning electronics and radio theory along the way. Time moves on, but hams keep hacking. Today we’re highlighting some of the best ham radio projects on Hackaday.io!

rtl

We start with [DainBramage1991] and his very practical RTL-SDR With Upconverter and Case. [DainBramage1991] fell in love with his low-cost RTL software defined radio dongle. He even added a Ham-It-Up upconverter to cover HF bands. The only problem was RF noise. the Realtek USB sticks tend to have little or no filtering, which means they are very susceptible to noise. [DainBramage1991] used the time-honored technique of insulating with copper clad board. Bits of PCB hold the RTL-SDR and upconverter in place. More PCB separates the two boards. Everything goes into a steel enclosure which keeps that unwanted RF at bay.

foxhunt-attenNext up is [Ryan Miller’s aka KG7HZQ]’s  ham radio fox hunt attenuator. Ham radio fox hunt’s don’t involve baying dogs or horses. In this case a fox hunt is a contest to find hidden low power transmitters. If you’ve never tried one, it’s a heck of a lot of fun. One of the challenges with a fox hunt is to find the direction to the transmitter when you’re very close. Even with directional antennas, reflections and swamped receivers make it hard to figure out just where the transmitter is. The solution is an attenuator, which simply reduces the signal to a more reasonable value. [Ryan] also used copper clad PCB for his circuit. Since the attenuator parts are soldered directly to the PCB, this is more of a Manhattan style design. Two ceramic 1k pots help him achieve his goal of near perfect linear attenuation. We’re betting this attenuator will help [Ryan] win some contests!

psdrWho says amateur radio won’t take you places? It may well be taking [Michael R Colton] to space! [Michael’s] project PortableSDR is one of the five finalists in The Hackaday Prize. We covered Michael earlier in the contest. PortableSDR started as a ham radio project: a radio system which would be easy for hams to take with them on backpacking trips. It’s grown into so much more now, with software defined radio reception and transmission, vector network analysis, antenna analysis, GPS, and a host of other features. We seriously love how [Michael] optimized a small LCD for waterfall display, tuning, and bandpass filter adjustment.

e2ra[W5VO] is working on an Ethernet to Radio Adapter. Every foot of coax in a radio system loses signal. Connections are even worse. It can all add up to several dB loss. [W5VO] wants to put an SDR at the antenna feed-point. With the signal path minimized, more watts make it out when transmitting, and more signal gets back to the receiver when listening. The interface between the SDR and host computer will be all digital; Ethernet to be precise. [W5VO] isn’t the first person to do something like this, microwave systems have had the transmitter and LNB at the antenna for years. That doesn’t take away from [W5VO’s] design at all  He’s been quiet for a while, but we’re hoping he continues on his design!

Where is everyone else? We’re a bit light on projects this week, but we have a good reason. There just aren’t enough ham radio projects on Hackaday.io! We’re hoping to change that though. Are you an amateur radio enthusiast? Document your project on the site. Get input from other hams and push the envelope! You might even find yourself on the Ham Radio List!

That’s all for this episode of The Hacklet. As always, QRX is next week. Same hack time, same hack channel, bringing you the best of Hackaday.io! 73’s!

The DIY Open Crank Engine Moped

Anyone can strap a two-stroke engine on a bicycle to create a moped. But [robinhooodvsyou] has created something infinitely more awesome. He’s built an inverted open crank engine on a 10 speed bicycle. (YouTube link)  As the name implies, the engine has no crankcase. The crankshaft, camshaft, and just about everything not in the combustion chamber hangs out in the open where it can be seen and appreciated.

[robinhooodvsyou] started with an air-cooled Volkswagen cylinder. He filled the jug with a piston from a diesel car. Camshaft, flywheel, valves, and magneto are courtesy of an old Briggs and Stratton engine. The cylinder head, crankshaft, pushrods, and the engine frame itself are all homemade.

Being an open crank engine, lubrication is an issue. The crankshaft’s ball bearing is lubricated by some thick oil in a gravity fed cup. Even though the engine is a four-stroke,[robinhooodvsyou] adds some oil to the gas to keep the rings happy. The camshaft and connecting rod use Babbit bearings. While they don’t have an automatic oiling system, they do look pretty well lubricated in the video.

Starting the engine is a breeze. [robinhooodvsyou] created a lever which holds the exhaust valve open. This acts as a compression release. He also has a lever which lifts the entire engine and friction drive off the rear wheel. All one has to do is pedal up to cruising speed, engage the friction drive, then disengage the compression release.

We seriously love this hack. Sure, it’s not a practical vehicle, but it works – and from the looks of the video, it works rather well. The unmuffled pops of that low 4:1 compression engine reminds us of old stationary engines. The only thing we can think to add to [robinhooodvsyou’s] creation is a good set of brakes!

Continue reading “The DIY Open Crank Engine Moped”

[Peter] And The Amazing Technicolor Phone Wire Bracelet

When a job left him with some extra phone wire, [Peter] didn’t toss it in the scrap pile. He broke out the casting resin and made an awesome bracelet (Imgur link). [Peter] is becoming quite an accomplished jeweler! When we last checked in on him, he was making rings out of colored pencils.

Casting the wire in resin was as simple as building a square form, placing the wires, then filling the form with appropriate amounts of epoxy and hardener. Once the epoxy cured, [Peter] drilled out the center with a sharp Forstner bit. A band saw brought the corners of the block closer to a cylinder.

From there it was over to the lathe, where [Peter] used a jam chuck to hold the bracelet in place. Once he shaped the bracelet [Peter] started wet sanding. It took Lots and lots of sanding both inside and out to finish the bracelet. The result is a mirror smooth finish, with bits of insulation bright copper just popping out of the resin.

One might think that the bracelet would be rough with all that copper, but [Peter] mentions on his Reddit Thread that it feels like plastic, though the bits of copper were “very pokey” before sanding. We’d recommend tossing on a clear coating to protect the exposed copper. Worn on a wrist, all that exposed metal would start oxidizing in no time.

This hack gives us lots of ideas for casting wearable circuits. Some WS2812’s and a teensy would make for a pretty flashy setup! Got an idea for a project? Tell us about in the comments, or post it up on Hackaday.io!

Continue reading “[Peter] And The Amazing Technicolor Phone Wire Bracelet”