M&Ms And Skittles Sorting Machine Is Both Entertainment And Utility

If you have OCD, then the worst thing someone could do is give you a bowl of multi-coloured M&M’s or Skittles — or Gems if you’re in the part of the world where this was written. The candies just won’t taste good until you’ve managed to sort them in to separate coloured heaps. And if you’re a hacker, you’ll obviously build a sorting machine to do the job for you.

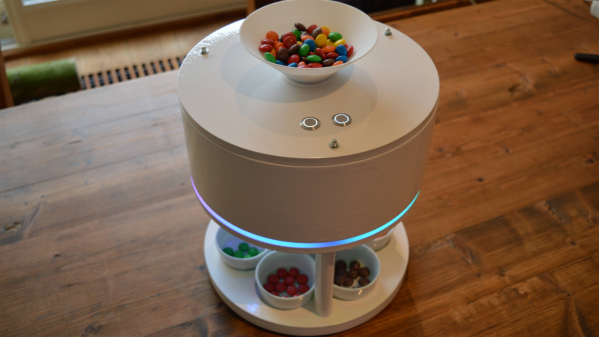
Use our search box and you’ll find a long list of coverage describing all manner and kinds of sorting machines. And while all of them do their designated job, 19 year old [Willem Pennings]’s m&m and Skittle Sorting Machine is the bees knees. It’s one of the best builds we’ve seen to date, looking more like a Scandinavian Appliance than a DIY hack. He’s ratcheted up a 100k views on Youtube, 900k views on imgur and almost 2.5k comments on reddit, all within a day of posting the build details on his blog.

As quite often happens, his work is based on an earlier design, but he ends up adding lots of improvements to his version. It’s got a hopper at the top for loading either m&m’s or Skittles and six bowls at the bottom to receive the color sorted candies. The user interface is just two buttons — one to select between the two candy types and another to start the sorting. The hardware is all 3D printed and laser cut. But he’s put in extra effort to clean the laser cut pieces and paint them white to give it that neat, appliance look. The white, 3D printed parts add to the appeal.

Rotating the input funnel to prevent the candies from clogging the feed pipes is an ace idea. A WS2812 LED is placed above each bowl, lighting up the bowl where the next candy will be ejected and at the same time, a WS2812 strip around the periphery of the main body lights up with the color of the detected candy, making it a treat, literally, to watch this thing in action. His blog post has more details about the build, and the video after the break shows the awesome machine in action.

And if you’re interested in checking out how this sorter compares with some of the others, check out these builds — Skittles sorting machine sorts Skittles and keeps the band happy, Anti-Entropy Machine Satiates M&M OCD, Only Eat Red Skittles? We’ve Got You Covered, and Hate Blue M&M’s? Sort Them Using the Power of an iPhone!  As we mentioned earlier, candy sorting machines are top priority for hackers.

Continue reading “M&Ms And Skittles Sorting Machine Is Both Entertainment And Utility”

Blow Up Your Face

[Yuji Hayashi] and some of his buddies in Tokyo did a fun project at the Tokyo Maker Faire last August that proved to be a big hit. They built a cardboard box which enlarged the wearers face when it was worn. It’s an amazing effect — high resolution and impossible to look at without plastering your face with a huge smile!

Low Poly paper face mask
Low poly paper face mask which prompted this new technique

This work was the result of their frustration with a previous project they did early last year. They would take multiple pictures of a person’s head and use software to stitch up the images. The resulting print on a large sheet of paper was then cut, folded and glued to create a low-poly 3D paper mask of the person. Their bottleneck was that the whole process took well over 2 hours for each mask. Even reducing the mask mesh complexity, and omitting the back of the head didn’t make it much faster. But the activity was so fun, that they had to figure out a way to repeat it but in a simpler and faster way.

Obviously, a different tack was needed. A team member was visiting a research institute and saw a Fresnel lens lying around. He took a picture of himself behind the lens and shared it with the team. They inquired with a lens manufacturer and obtained a sample. After some fiddling to get the right focal distance, it seemed like they had a winner. Attaching the lens to a cardboard box and fixing it to a volunteer head raised another problem. The inside of the box was too dark for the wearers face to be seen clearly. Nothing that some LED strips couldn’t solve. The initial LEDs were cool white and gave a ghostly, pale blue tinge to the wearers face. Warm white LEDs created a much better effect. Finally, it was time to trim the Fresnel lens (done easily using a sharp blade) and to wrap up the project. On the day the Maker Faire opened, they had a set of four of these “face magnifiers” available for visitors to have fun with. As the pictures show, the result was awesome, and way better than the original, paper mask idea. Not surprising, given that the Japanese love their Animé and Manga comics and are great fans of Cosplay.

If this project stirs up your creativity, then let us goad you towards Hackaday’s 2017 Sci-Fi Contest where you can submit an awesome Sci-Fi Project to win some cool prizes.

Get To Know 3½ Digit ADCs With The ICL71xx

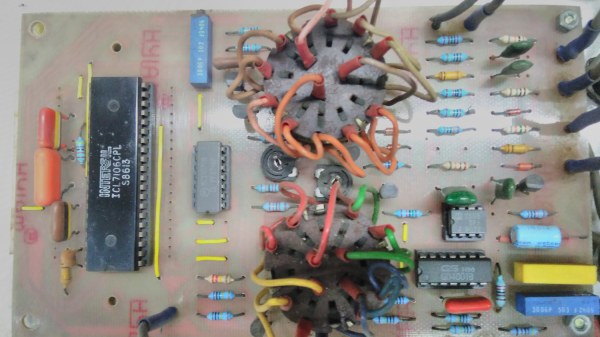
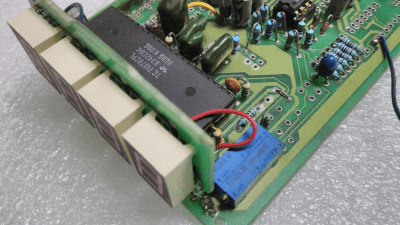
Riffling through my box of old projects, I came upon a project that I had built in the 80’s — an Automotive Multimeter which was published in the Dutch/British Elektor magazine. It could measure low voltage DC, high current DC, resistance, dwell angle, and engine RPM and ran off a single 9V battery. Besides a 555 IC for the dwell and RPM measurement and a couple of CMOS gate chips, the rest of the board is populated by a smattering of passives and a big, 40 pin DIP IC under the 3½ digit LCD display. I dug some more in my box, and came up with another Elektor project from back then — a True RMS digital Wattmeter with a 3½ digit LCD display that could measure up to 2kW. It had the same chip too. Some more digging, and I found a digital panel meter. This had a 7 segment LED display, but the chip was again from the same family.

ICL7107 LED version
ICL7107 LED version

Look under the hood of any device with a 3½ or 4½ digit, 7 segment, LCD or LED from the ’80’s or ’90’s and you will likely spot this 40-pin DIP with the Intersil logo (although it was later also manufactured by many other fabs; Harris and Maxim among others). The chip doing all the heavy-lifting was likely to be the ICL7106 or ICL7107. These devices were described as high performance, low power, 3½ digit A/D converters containing seven segment decoders, display drivers, voltage reference and clock. In short, everything you needed to take a DC analog signal and display it. Over time, a whole series of devices were spawned:

  • 7106 – 3½ digit, 7 segment LCD
  • 7107 – 3½ digit, 7 segment LED
  • 7116 – 3½ digit, 7 segment LCD, with display HOLD (freeze)
  • 7117 – 3½ digit, 7 segment LED, with display HOLD (freeze)
  • 7126 – improved 7106
  • 7136 – improved 7126
  • 7135 – 4½ digit, 7 segment LCD

There were many similar devices available, but the ICL71xx series was by far one of the most popular, due to its easy of use, low parts count and single chip implementation. Here are several parts (linking to PDF datasheets) to illustrate my point: the TC14433/A needed several peripheral devices, ES5107 (a clone of a clone — read below), CA3162 (which has BCD output, and needs the CA3161 or similar to interface to a display), or the AD2020 (which too needed a lot of support circuitry).

The ICL71xx was the go-to device for a reason. Let’s take a look at the engineering and business behind this fascinating chip.

Continue reading “Get To Know 3½ Digit ADCs With The ICL71xx”

World’s Smallest LED Cube – Again

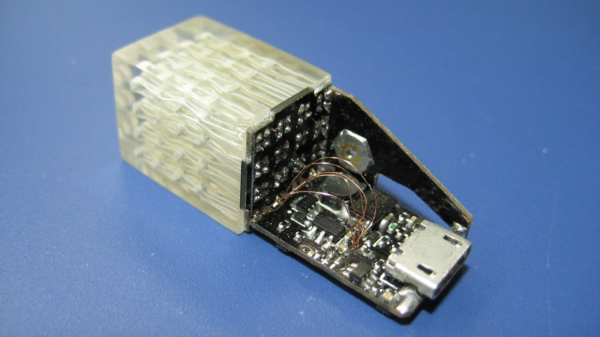
There’s a new challenger on the block for the title of the “Worlds Smallest 4x4x4 RGB LED Cube“. At 13x13x36 mm, [nqtronix]’s Cube Pendant is significantly smaller than [HariFun’s] version, which measures in at about 17x17x17 mm just for the cube, plus the external electronics. It took about a year for [nqtronix] to claim this spot, and from reading the comments section, it seems [HariFun] isn’t complaining. The Cube Pendant is small enough to be used as a key fob, and [nqtronix] has managed to really cram a lot of electronics in it.

The LED’s used are 0606 RGB’s which are 1.6mm square, although he did consider using 0404’s before scrubbing the idea. There’s many ways of driving 192 IO’s, but in this case, Charlieplexing seemed like the best solution, requiring 16 IO’s. Unlike [HariFun]’s build, this one is fully integrated, with micro-controller, battery and everything else wrapped up in a case made entirely from PCB — inspired by [Voja Antonic]’s FR4 enclosure technique, and the LED array is embedded in clear resin.

Continue reading “World’s Smallest LED Cube – Again”

Objectifier: Director Of Domestic Technology

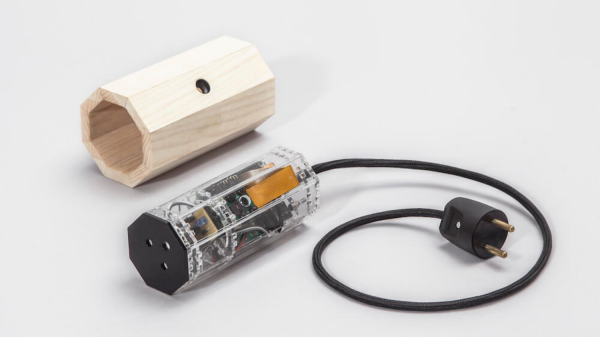
book-example[Bjørn Karmann]’s Objectifier is a device that lets you control domestic objects by allowing them to respond to unique actions or behaviour, using machine learning and computer vision. The Objectifier can turn on a table lamp when you open a book, and turn it off when you close the book. Switch on the coffee maker when you place the mug next to the pot, and switch it off when the mug is removed. Turn on the belt sander when you put on the safety glasses, and stop it when you remove the glasses. Charge the phone when you put a banana in front of it, and stop charging it when you place an apple in front of it. You get the drift — the possibilities are endless. Hopefully, sometime in the (near) future, we will be able to interact with inanimate objects in this fashion. We can get them to learn from our actions rather than us learning how to program them.

The device uses computer vision and a neural network to learn complex behaviours associated with your trigger commands. A training mode, using a phone app, allows you to train it for the On and Off actions. Some actions require more human effort in training it — such as detecting an open and closed book — but eventually, the neural network does a fairly good job.

The current version is the sixth prototype in the series and [Bjørn] has put in quite a lot of work refining the project at each stage. In its latest avatar, the device hardware consists of a Pi Zero, a Raspberry-Pi camera module, an SMPS power brick, a relay block to switch the output, a 230 V plug for input power and a 230 V socket outlet for the final output. All the parts are put together rather neatly using acrylic laser cut support pieces, and then further enclosed in a nice wooden enclosure.

On the software side, all of the machine learning part is taken care of using “Wekinator” — a free, open source software that allows building musical instruments, gestural game controllers, computer vision or computer listening systems using machine learning. The computer vision is handled via Processing. All the code is wrapped using openframeworks, with ml4A providing apps for working with machine learning.

All of the above is what we could deduce looking at the pictures and information on his blog post. There isn’t much detail about the hardware, but the pictures are enough to tell us all. The software isn’t made available, but maybe this could spur some of you hackers into action to build another version of the Objectifier. Check out the video after the break, showing humans teaching the Objectifier its tricks.

Continue reading “Objectifier: Director Of Domestic Technology”

Tiny Morse Code USB Keyboard

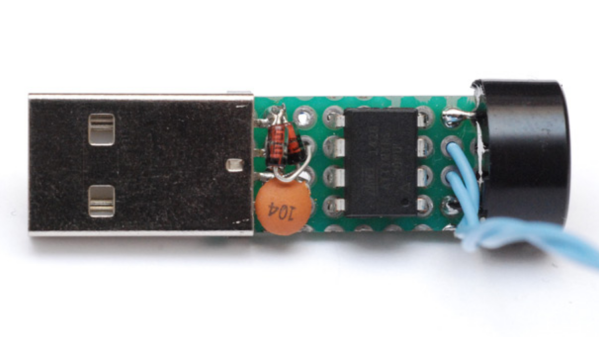
We’ve featured quite a few of [mitxela]’s projects here in the past, and many of them have the propensity to be labelled “smallest”. His Morse Code USB Keyboard Mk II adds to that list. It’s a Saturday afternoon project, with a few parts slapped onto a piece of perf-board, that allows using a Morse key as a USB keyboard. This project isn’t new or fresh, but we stumbled across it while trying to figure out a use for a Morse key lying in the author’s bin of parts. You can practise transmitting, by reading text and typing it out on the key, and then look it up on your computer to see if you made any mistakes. Or you can practise receiving, by asking a friend to punch it out for you. Either way, it’s a great way to hone your skills and prepare for your radio operators license exam.

The project is a follow up to his earlier one where he hooked up the Morse key via a RS-232 — USB converter directly to a computer and let the code do all the work. That turned out to be a very resource hungry, impractical project and made him do it right the next time around. The hardware is dead simple. An ATtiny85, a piezo buzzer, some decoupling capacitors, and a few resistors and zeners to allow a safe USB interface. The design accommodates a straight key, but there is one spare pin left over in the ATtiny to allow for iambic or sideswiper keys too. There is no speed adjustment, which is hardcoded at the moment. That isn’t very user friendly, and [mitxela] suggests adding a speed potentiometer to that last remaining pin on the ATtiny. This would prevent use of iambic/sideswiper keys. Or, you could use the RST pin on the ATtiny as a (weak) IO. The RST pin can read analog values between 5V and 2.5V, and will reset when voltage falls below 2.2V. Or just use another microcontroller as a last resort.

For the USB interface, [mitxela] is using the V-USB library after wasting some time trying to reinvent the wheel. And since this is designed to work as a HID, there are no drivers required – plug it in, and the OS detects it as a keyboard. He’s borrowed code from the EasyLogger project to use the internal oscillator and help free up the IO pins. And to detect the characters being typed, his code uses a long string of compare statements instead of a dictionary lookup. Writing that code was tedious, but it makes the identification quicker, since most characters can be identified in less that five comparisons (one dit = E, two dits = I, three dits = S and so on). This “tree” makes it easier to figure it out.

If you’d like to look up some of his other “tiny” projects, check out The smallest MIDI synthesizer, Smallest MIDI synth, again! and the ATtiny MIDI plug synth.

Continue reading “Tiny Morse Code USB Keyboard”

Milliohm Meter Version 1.5

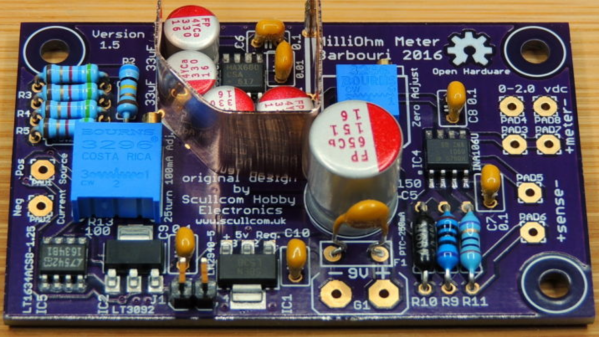
A milliohm meter is a very handy piece of test equipment. Most hand-held multimeters cannot measure low resistances and bench meters that can, are usually quite expensive. [barbouri] has shared details of his milliohm meter build on his blog post, and it looks pretty nice.

When using a single pair of leads to measure very low ohms, the resistance of the measuring wires and voltage drops across the various joints become substantial enough to invalidate your measurement. The solution is to use the “Kelvin method” or 4-wire measurement. This involves passing a highly stable current derived from a temperature compensated constant-current source through the unknown resistance, and then using another pair of leads to measure the voltage drop across the resistor, which then gets displayed as a resistance on a voltmeter.

The finished project not only looks good, but is able to measure up to 2Ω with a resolution of 0.0001Ω (that’s 0.1mΩ). The project is originally designed by [Louis] from [Scullcom Hobby Electronics] and [barbouri]’s second iteration adds an improved board layout to the original project.

Continue reading “Milliohm Meter Version 1.5”